
Disclaimer: This post contains affiliate links. This means if you purchase something after clicking one of the links, I may receive a small commission at no cost to you. Thank you for your support!

The Essential Wristlet PDF Pattern
I received an email yesterday asking about my camera, because the reader liked my bright white backgrounds. The trick isn’t the camera, although my (current 2019) Canon SX730HS (aff link) is a pretty fantastic point and shoot!), it’s the lights. So, while reassembling my tabletop “studio” today (something I do periodically, usually when prepping for a new pattern and the 1000+ photos I will end up taking, because the paper gets scuffed and dirty) I took some process photos. I’ll share where you can buy my basic equipment, and how I slap it all together with binder clips and painter’s tape. This much gets me about 75% of the way, and then I tweak them in Aperture or Photoshop Elements on my Mac.
Yes, this really cost me about $150. The best part is that the lights make whatever camera you already own take better pics, so you don’t need to run out and buy an expensive DSLR.
Cowboy Studio 1200W Lights & Stands (Four lights on two stands) – $106 @ Amazon (aff link) This set has been very good to me!
Super White 53″ wide background paper – $34 @ Amazon (aff link)
Painter’s Tape ~ $5 @ Amazon (aff link)
Command hook ~ $6 @ Amazon (aff link)
Foam board, 2 pieces, don’t need to be new as you will cover them ~ $8 (available at any craft or office supply store)
Binder clips ~ $3 (available at any office supply store)
Total $162. Use 50% off big box craft store coupons and you’ll get it under $150!
You need a table or desk of some sort. Anything wide and deep, like an old coffee table or desk. I needed to stand on a step-stool to take my overhead process pics, so I swapped this desk out for a lower TV stand.
 I use two pieces of foam core board. The first one is flat on the desk, pulled forward just a tiny bit from the back edge of the table and taped down with blue painter’s tape. The second one is placed vertically on the desk, leaning against the wall while the piece taped to the desk prevents it from moving forward. I used clear tape to tape these together to make sure it doesn’t show through the paper.
Measure from the top of the foam board to the front of the desk and cut a piece of background paper off the roll that length plus about 6″.
 Then wrestle the giant piece of paper that wants to roll in on itself to the top of the foam board and center it the best you can. I secure it to the top of the foam board with binder clips.
 Medium sized binder clips are best, but the small ones work OK too. Clip as far to the edge as you can.
 Now, unroll the paper and make sure it’s lined up OK at the bottom, adjusting the clips or cut the edge straighter if necessary. If it’s OK, tape the top edges down. Then keep it unrolled and kind of shove it into the bottom corner as much as possible WITHOUT making it crease or buckle. You want the vertical and horizontal surfaces to be as flat as possible without a huge curve in the middle, but without a crease for a seamless look. You’ll find the sweet spot.
 Then tape down the front corners. I like to use the extra 6″ to wrap it around the front of my desk and tape it underneath. You have to really fight to crease this paper, but it’s worth it to not have to crop blue tape out of of the bottom edge of every photo. If you can’t do this, then just tape it down to the front edge however you can.


 Then, you can either hang your bag from the hook, or place it in the middle of the table (away from the wall) for the least amount of shadow and the brightest white background potential. I place the lights as close to the outside corners of the table as their stands will allow.

 Now, that with a +1 exposure compensation gets me this:
 Which I can easily process into this:
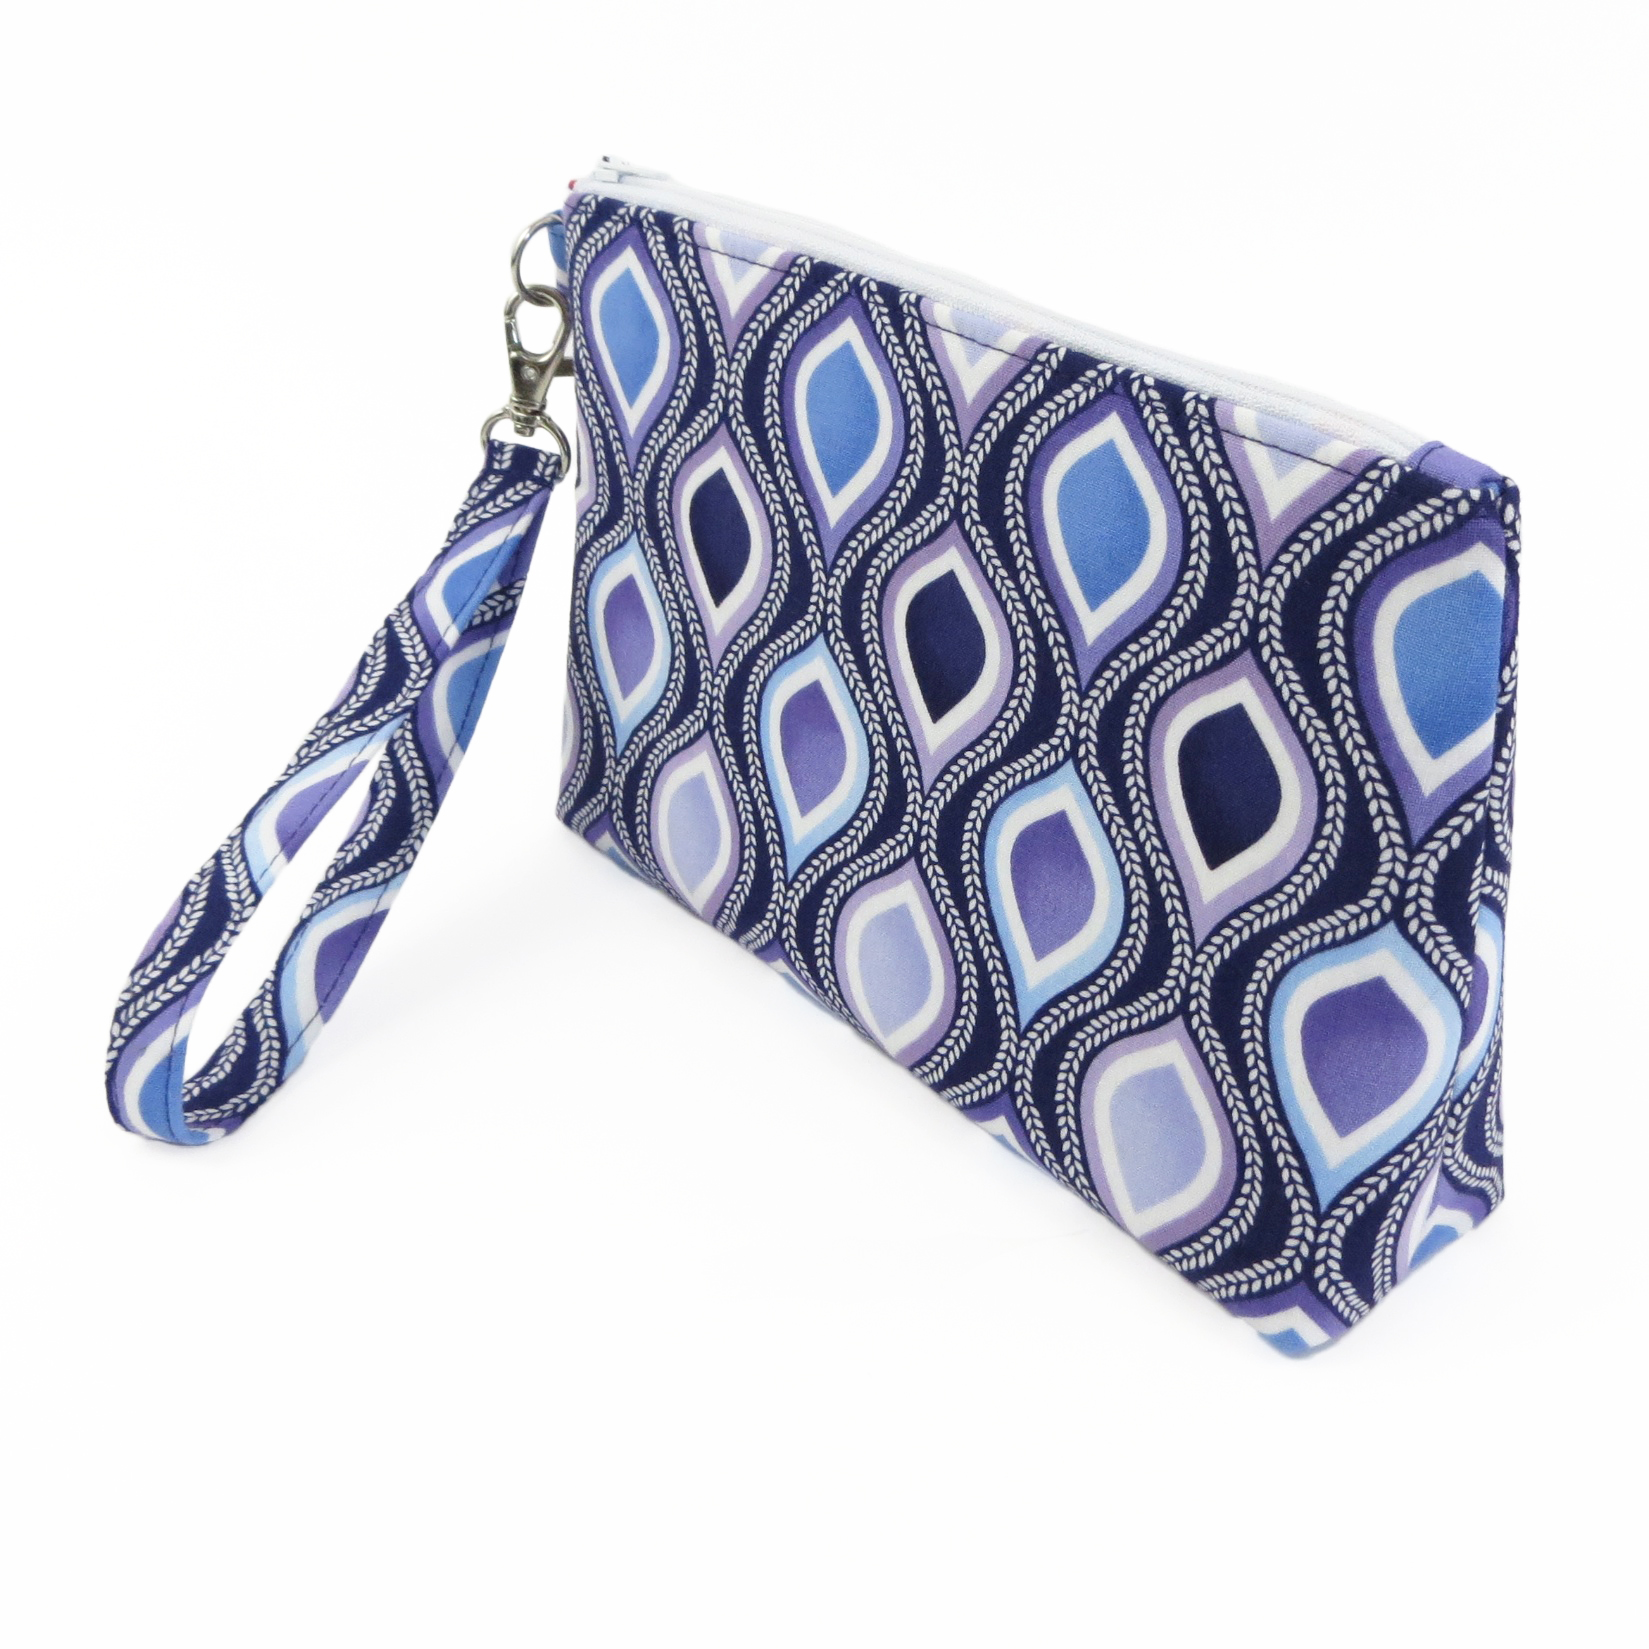
Not perfect, but not bad. What do you think?
Wonderful! Thanks for compiling and posting!
This is really, really helpful for a newbie. Thank you so much for taking the time to post this!
I’ve always thought your photos were sensational…aren’t you the sweetest…sharing your secrets…thanks so very much!
Thank you so much for sharing your secrets with us. I have a Mac,so would love to hear how you edit the photos using that program.
Thanks everyone! I will do a quick tutorial on the pics after the makeup bag pattern is ready!
On behalf of everyone, including me!!), thanks ever so much for taking the time
to do this post! It’s fascinating! And I will save my pennies to do exactly what
you’ve done! One step at a time :)
Thank you SO much for posting! I can do this! I am not a “photographer”, either, but the world wide web doesn’t have to know! ;)
This is fabulous!! Years ago I bought a “photo cube” and it is too small!! This is awesome. I might have to make some adjustments–I have the lights but they are table-top,not floor, and I need the umbrellas. I’ll have to check out B&H (I have ordered quite a bit from them and they are great, aren’t they?) and see if I can buy “parts”.
Oh, great pic!
This is great!!! I have a small light-box which was ok taking cards and jewellery photos but is not big enough now I’m making bags si this has given me some great ideas on how to get better results rather than waiting for my son to come take pics for me!!
Love it!! Thanks for taking the time to do this for us!
Thank you for this info! I would love to know how you edited the photos. Also, (I know this is an older blog post) but which lighting kit did you use? The link above shows several different kits with different umbrellas to choose from and different kinds of bulbs.
Thank you for any information :)