Image
  • Blog
  • Sewing Patterns
  • Tutorials
  • About
  • Contact
  • Masks

Introducing the long awaited Zip Around Town Wallet!

Posted on September 15, 2018 by Erin Erickson | 0 Comments

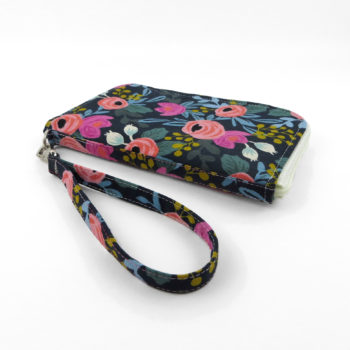
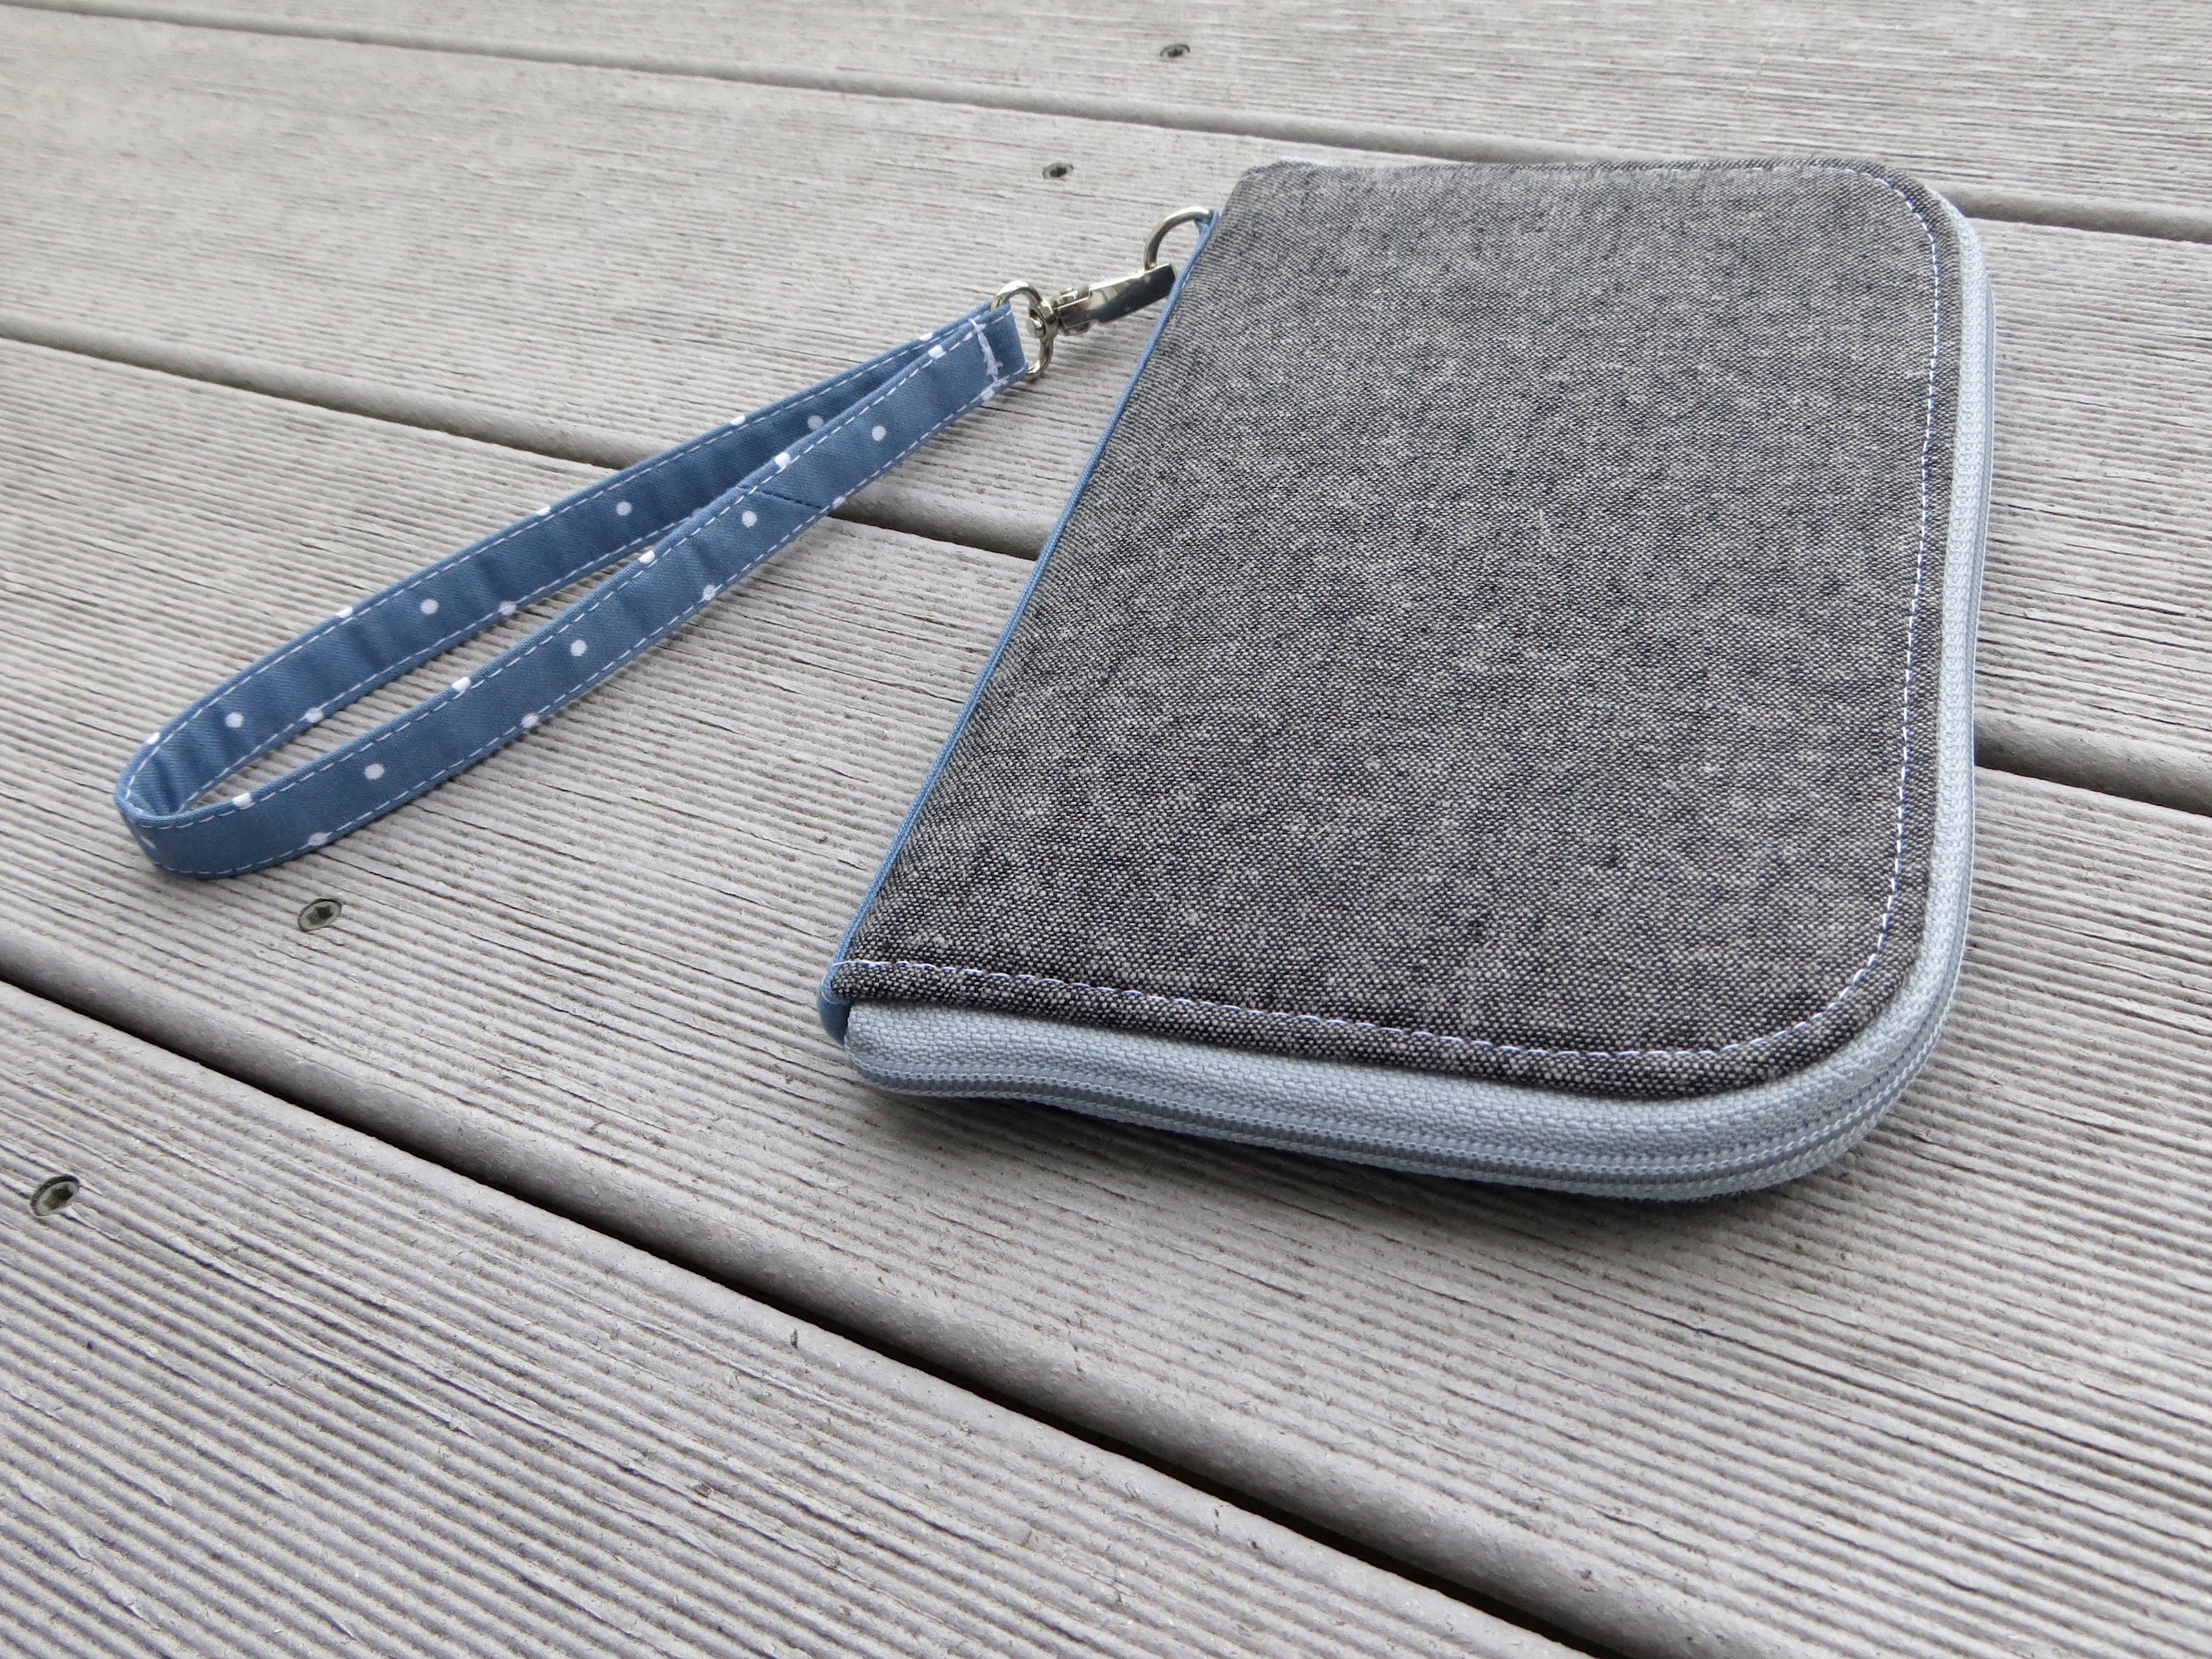
It’s here!!! I am so excited to introduce the Zip Around Town Wallet! 

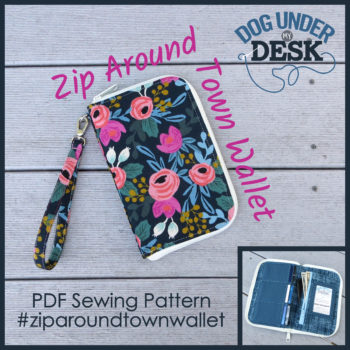
This long awaited Zip Around Town Wallet is FINALLY here! And I mean FINALLY.

Over the years, I’ve been repeatedly asked to create a zip around wallet. And occasionally, I would have an idea, and try it out, and fail. And eventually I became an expert in how NOT to sew a zip around wallet. (Seriously, I have a tote bag full of the fails!) Earlier this year I was nearly there, and I decided it was time to become an expert in how TO sew a zip around wallet. My goal was to end up commercial looking zipper ends AND a fully topstitched exterior – two things that seemed to be incompatible with a domestic sewing machine.

Two common industrial machines are called a post bed and cylinder bed, and sometimes when considering designing a bag that looks like a commercially made bag, there are limitations to construction due to the fact that most people do not have these machines in their own homes. Designing for home sewing means taking these limitations into consideration and working around them. In taking apart some commercially made wallets, I discovered that most of the exteriors and interiors are assembled separately and then glued together and topstitched. That is just not practical for most of us, making the “homemade” zip around wallet an even bigger challenge.

Basically, I needed to emulate the way these are glued and stitched on specialty industrial machines with a domestic machine and only a bit of basting tape and fray block! By eliminating as much bulk as possible from all layers and adding some trickery with the pattern pieces, I’ve made it possible to turn and topstitch this wallet (which keeps the layers aligned!) without sacrificing structure or breaking a whole pack of needles!

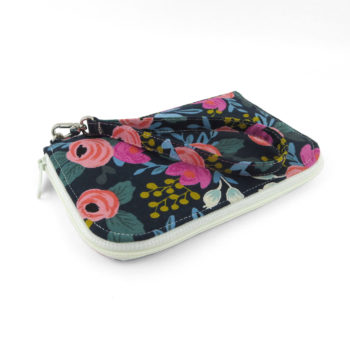
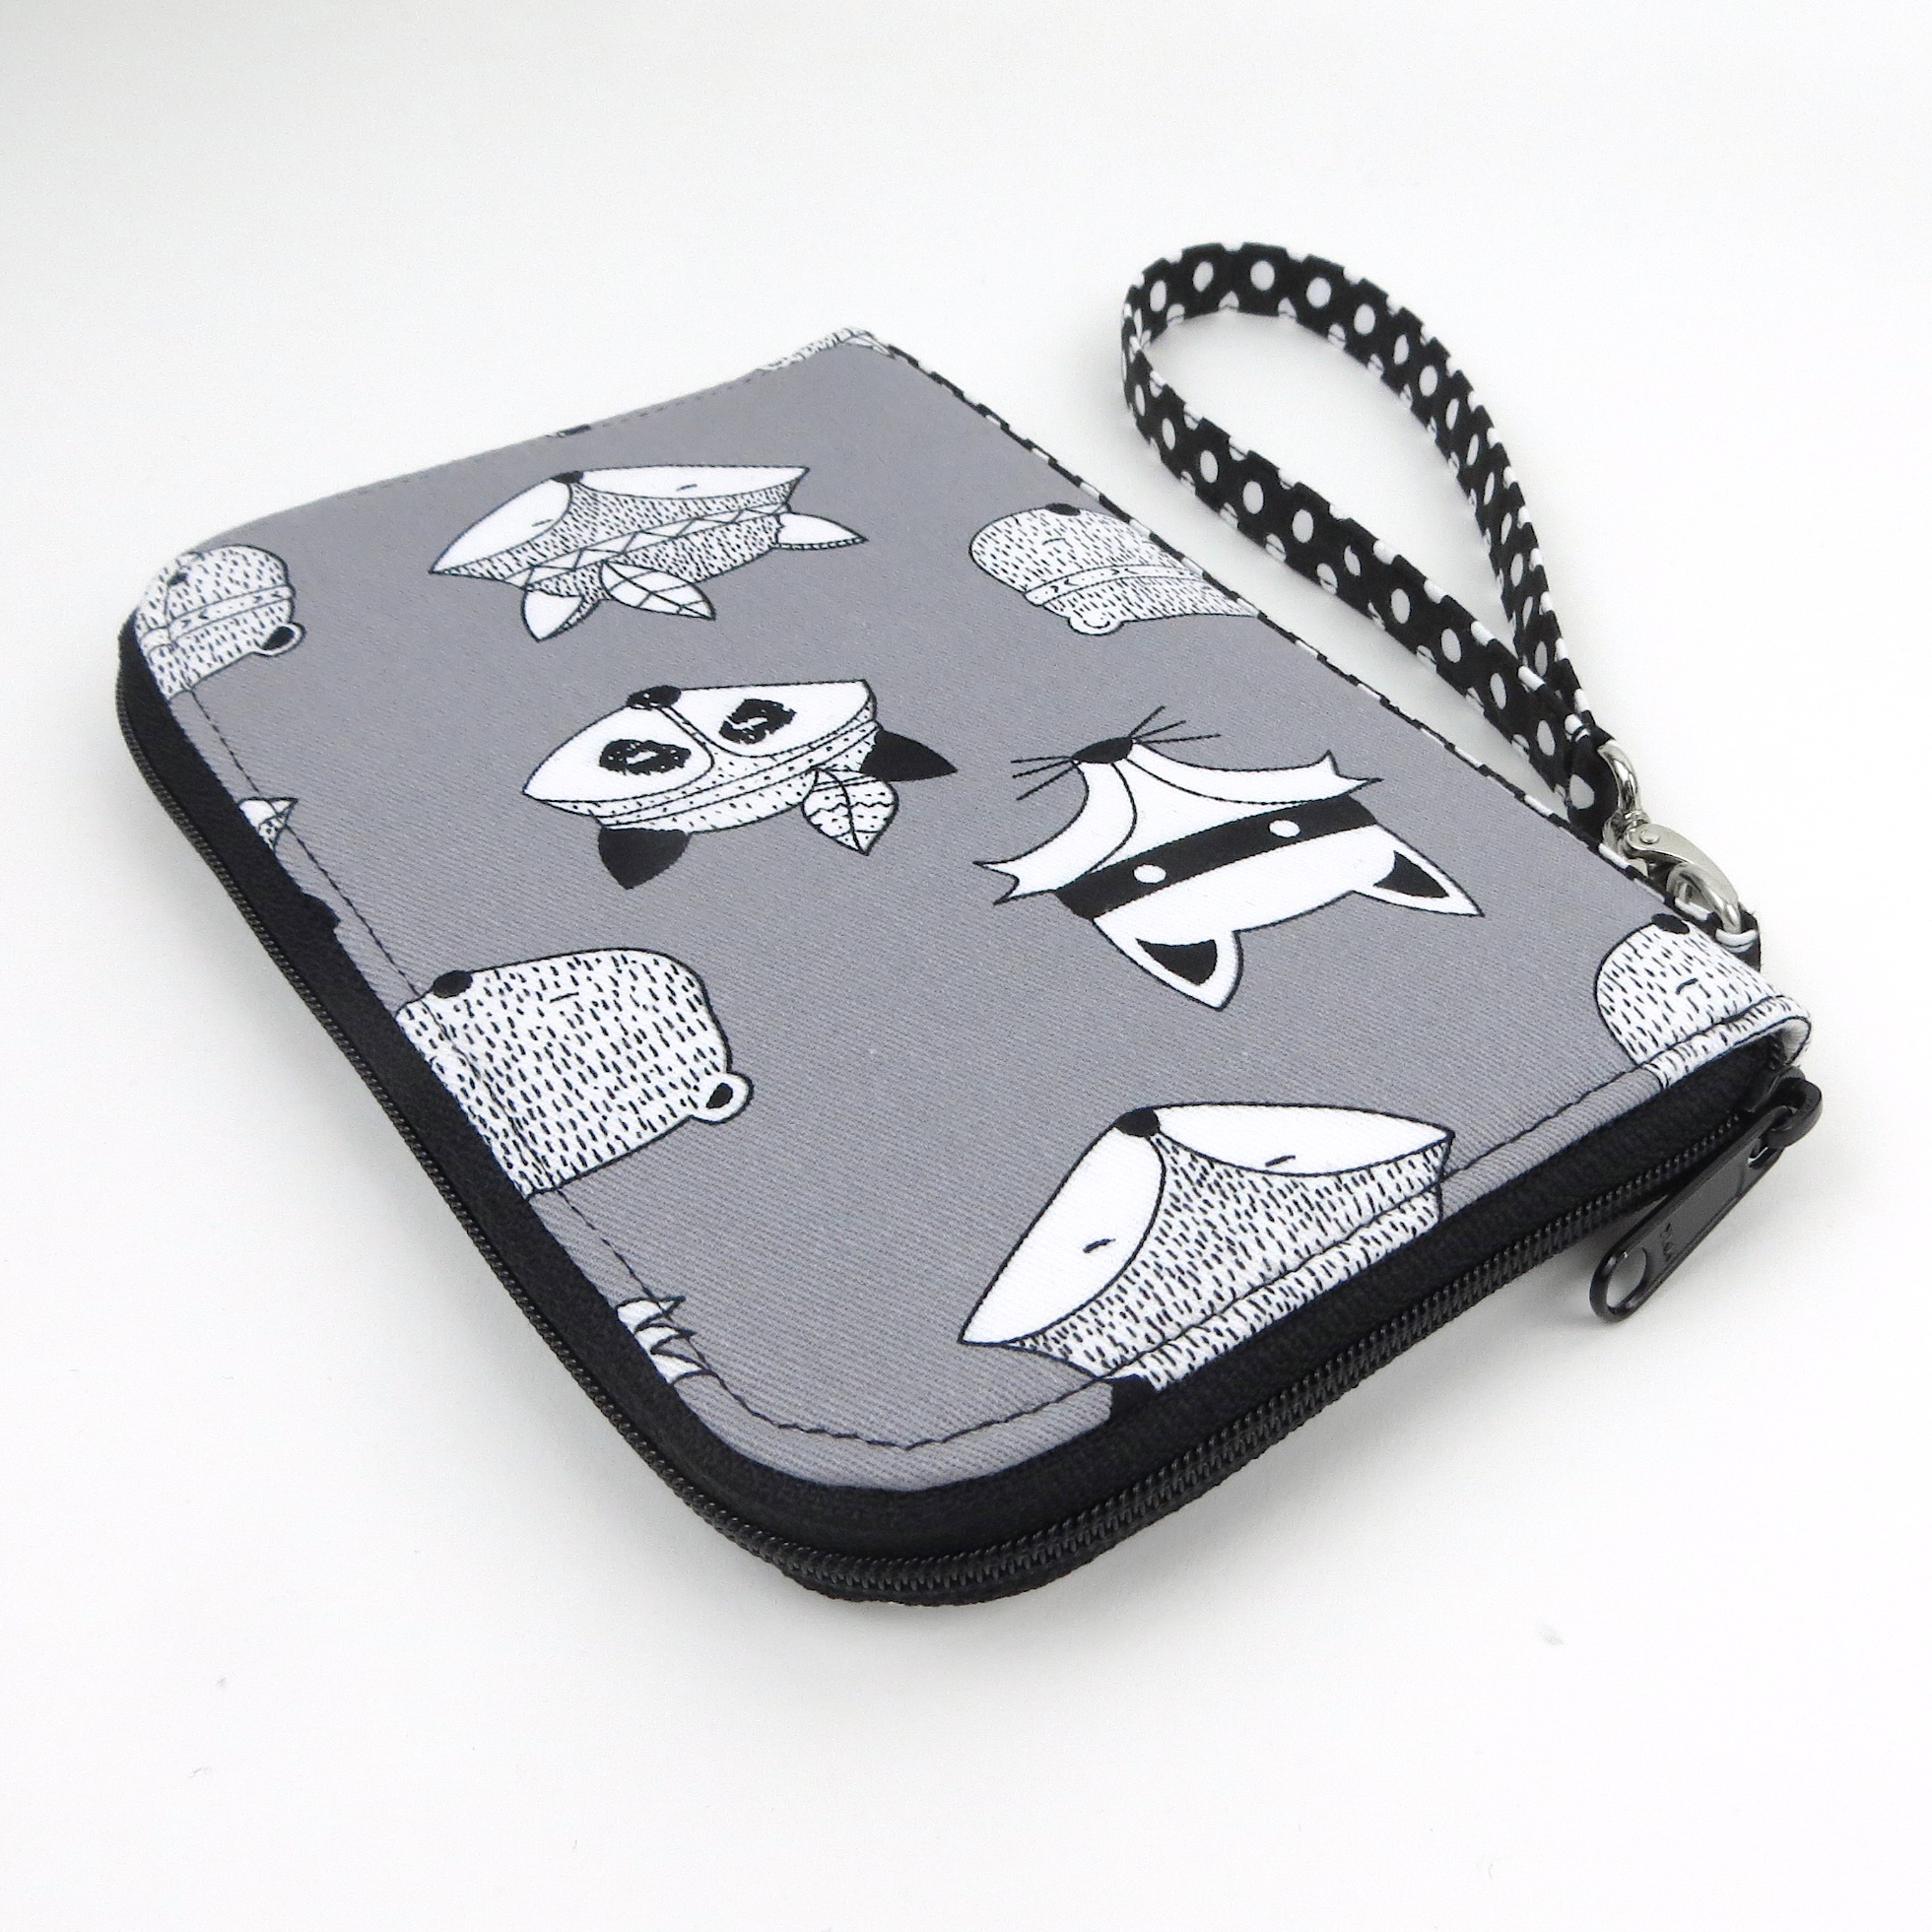
After at least 20 revisions and two pattern releases that jumped ahead in the mean time (since I was not willing to rush this design process), I am seriously thrilled with the result, and I hope you will be too!

We ended up with six card slots + an optional ID pocket (a technique you can transfer to any bag!), and a zippered pocket for cash+coins on top of a slip pocket that can hold cash, a large phone, or even a passport. The spine with the D-ring for the wristlet strap is integrated, although you could leave it off. I love the locking feature if you do choose to carry the wallet as a wristlet, without placing it inside a larger bag.


This wallet is not a super time consuming sew and it isn’t a fabric hog either. I hope that makes up for the complexity of the zipper installation! The way the card slots are constructed only takes a few minutes to sew and the zippered cash pocket shares pieces with the phone pocket, combining those steps for a quick finish. Don’t be too intimidated, or if you are please pop into the Facebook Group and ask some questions! This isn’t a beginner bag pattern due to the level of accuracy required (you must sew a 1/4″ seam around the curves and then sew directly over that seam a second time), but the steps are broken out in detail just like all of my other patterns so there shouldn’t be any confusion. That said, a “narrow zipper foot” is your friend for this one! Berninas come with one, but you can purchase them for almost all models.

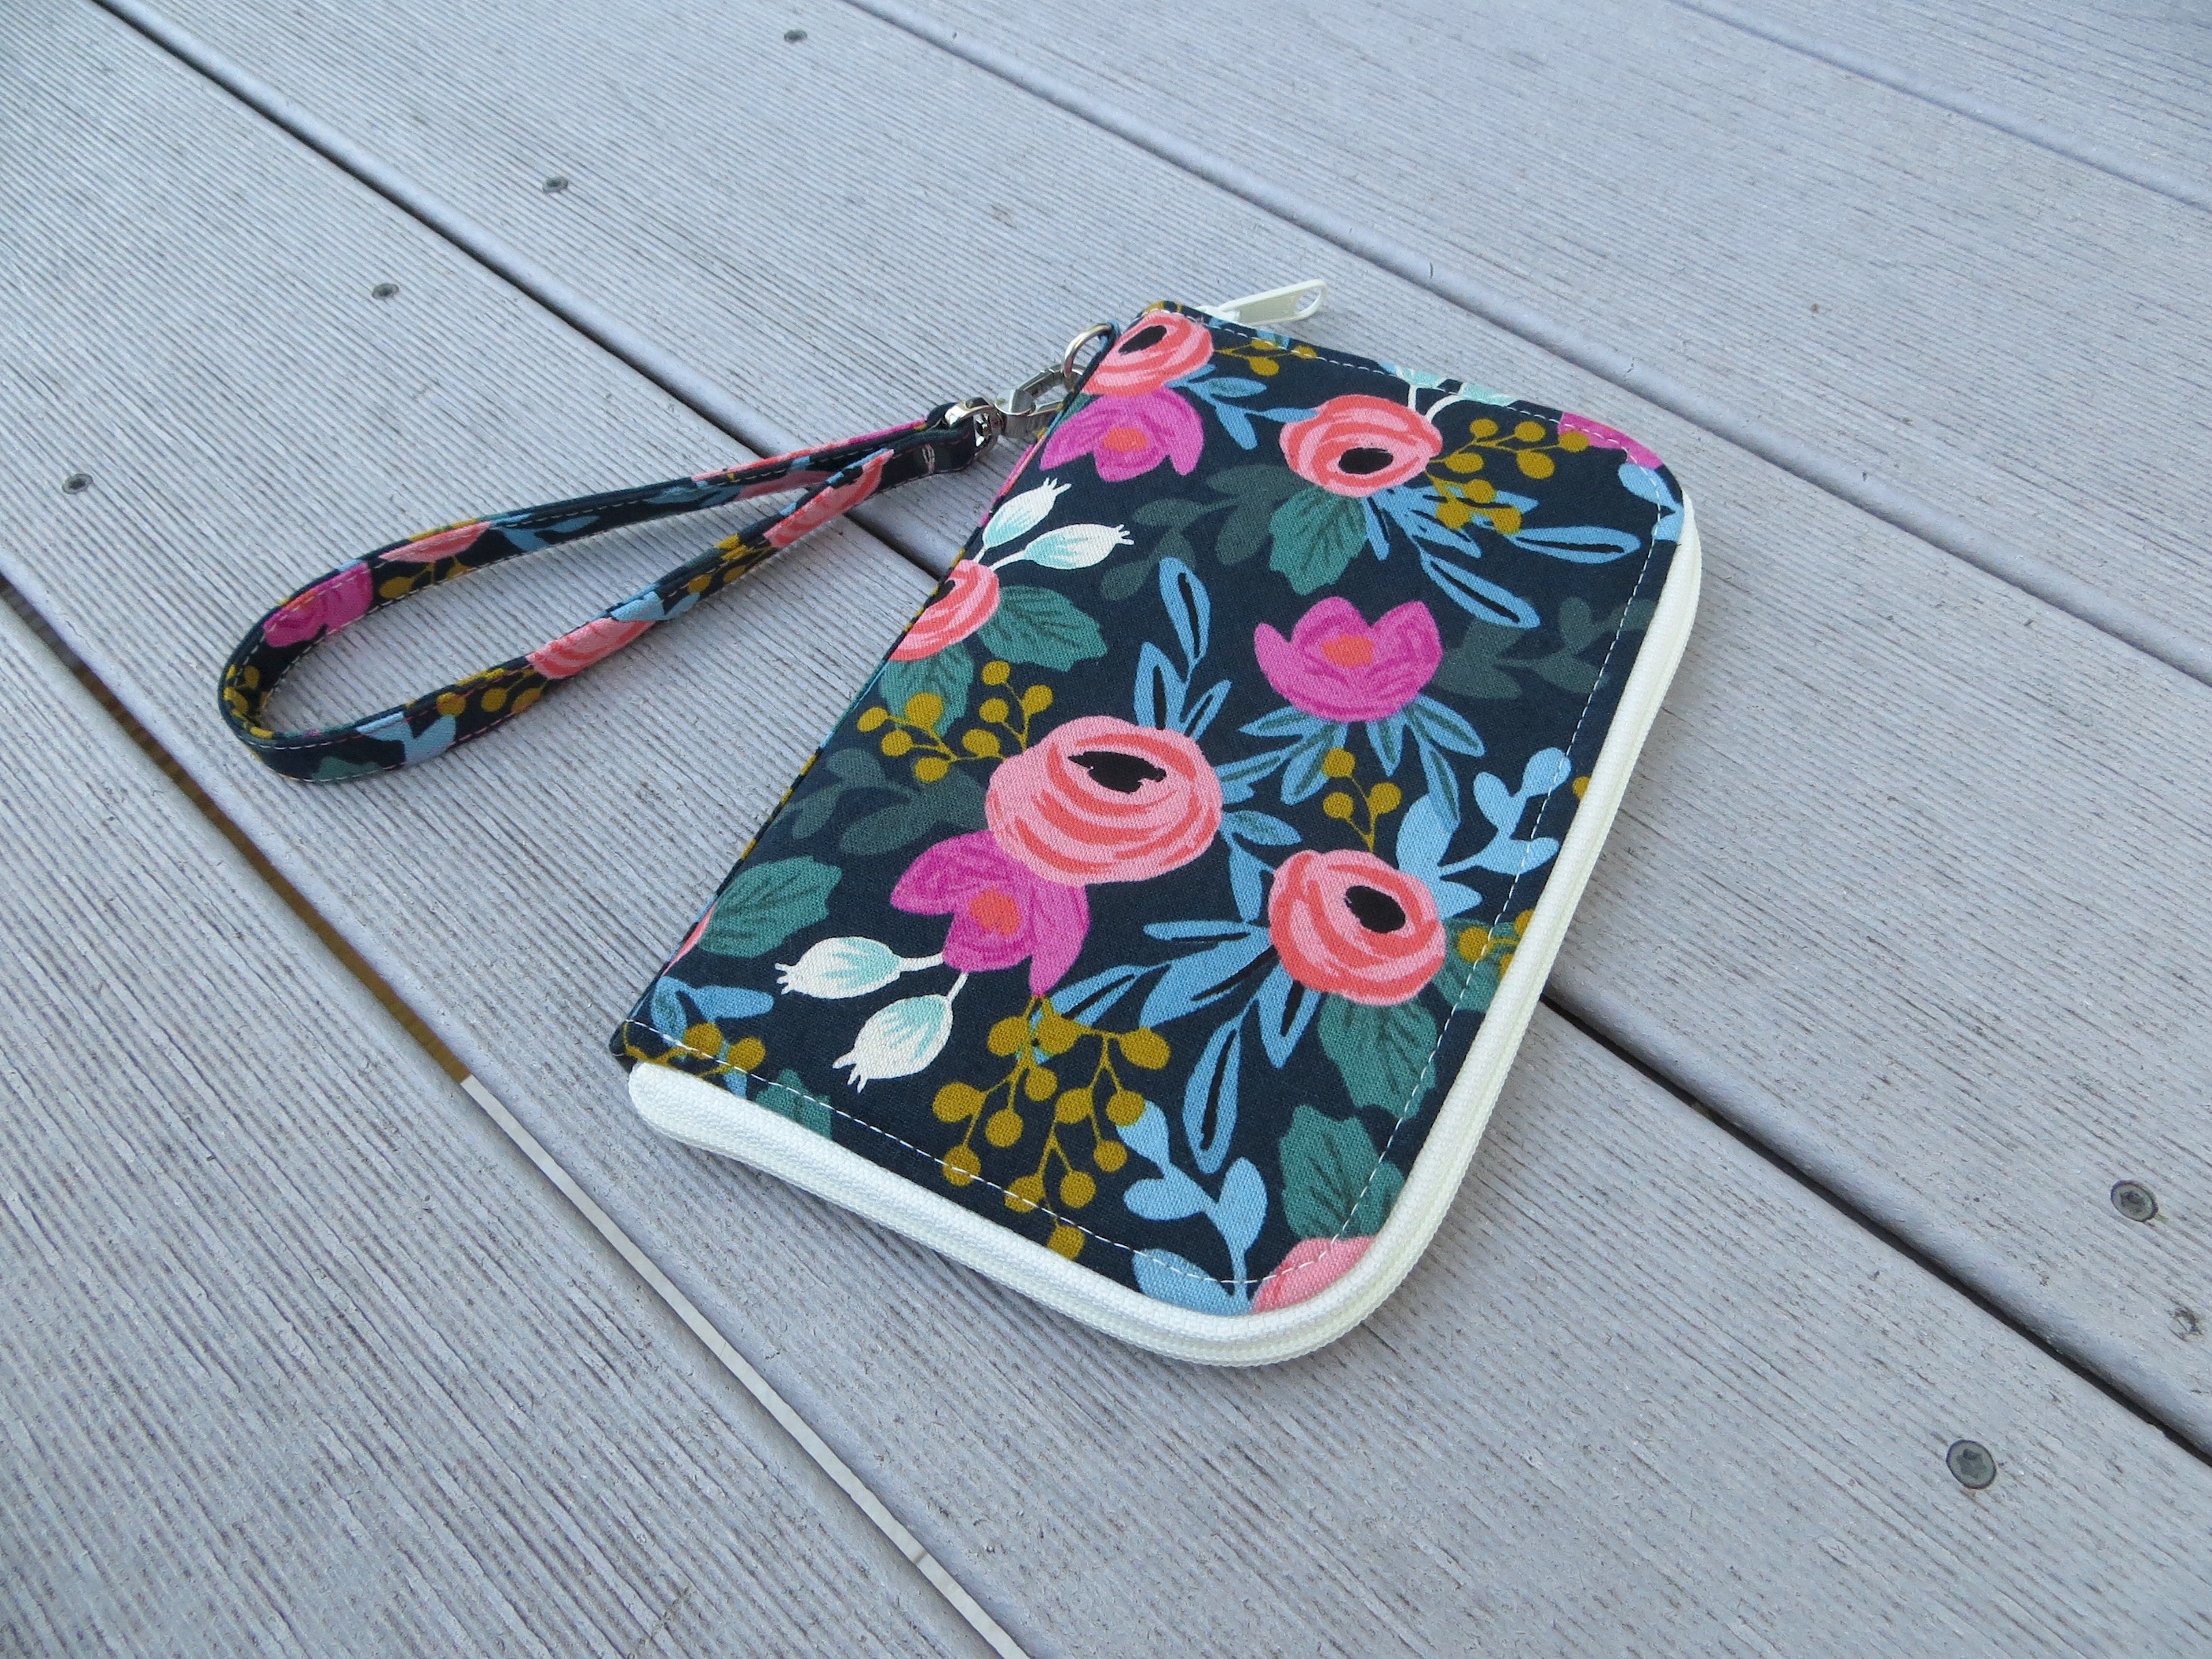
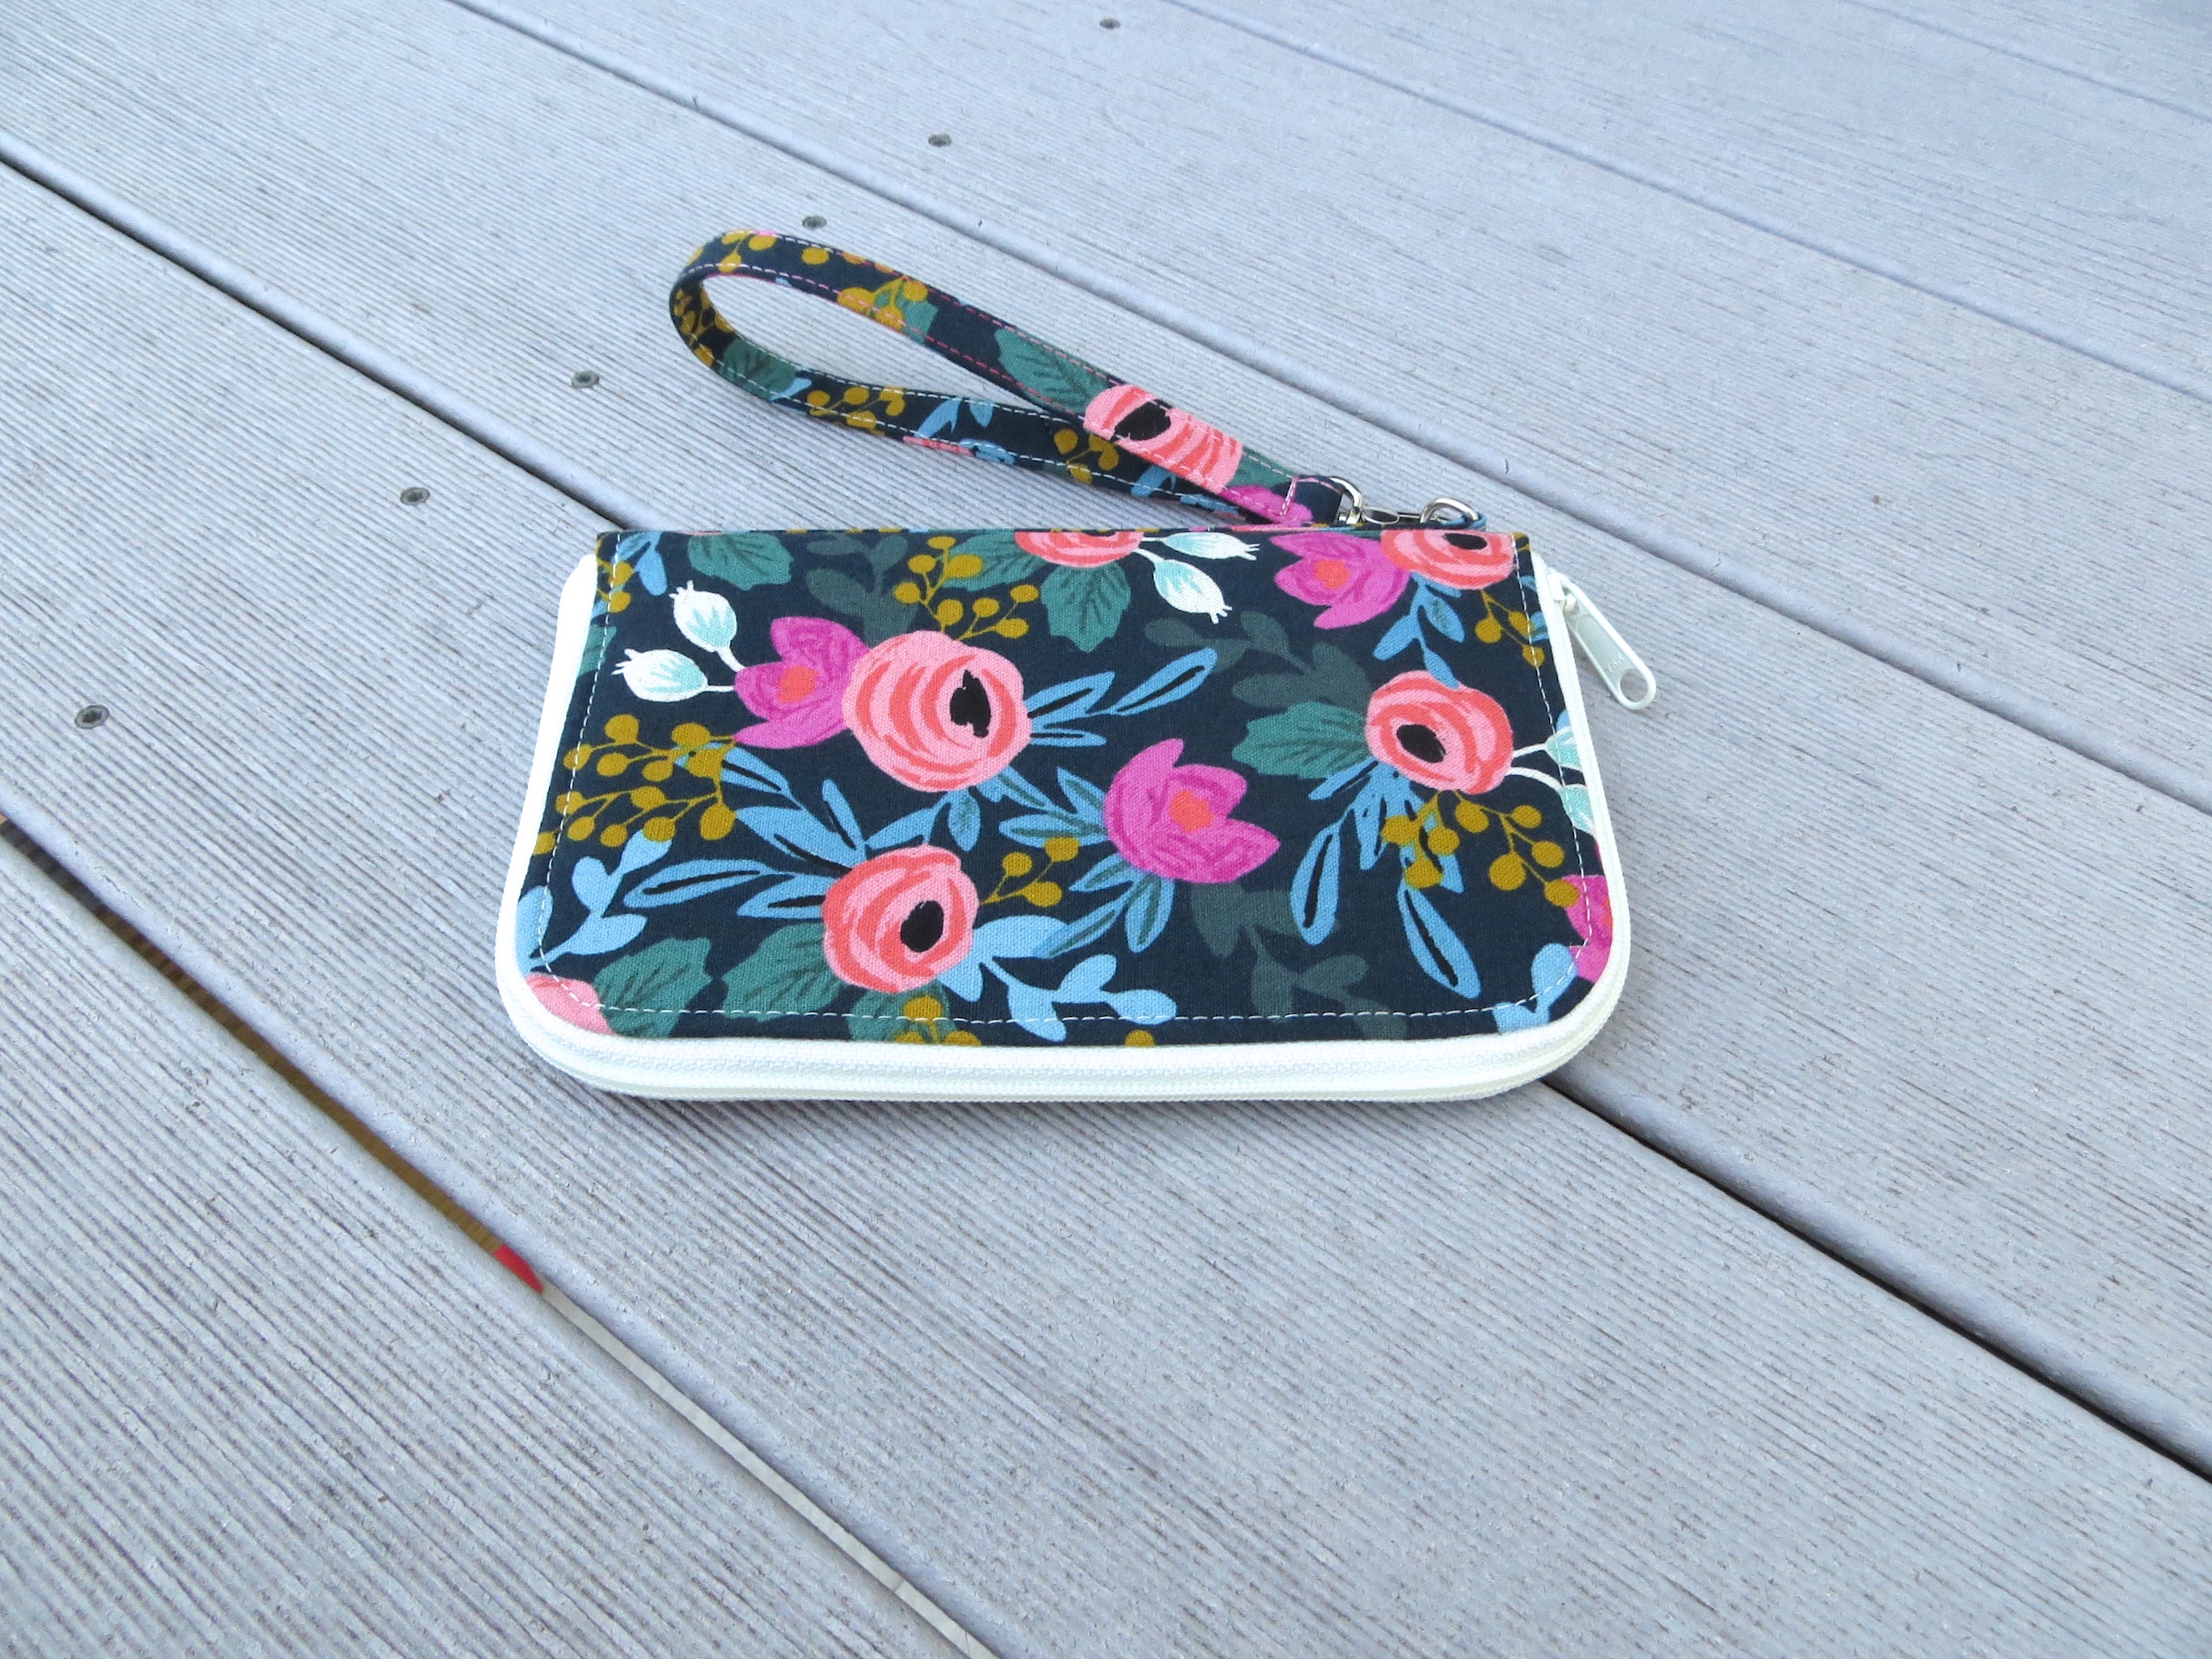
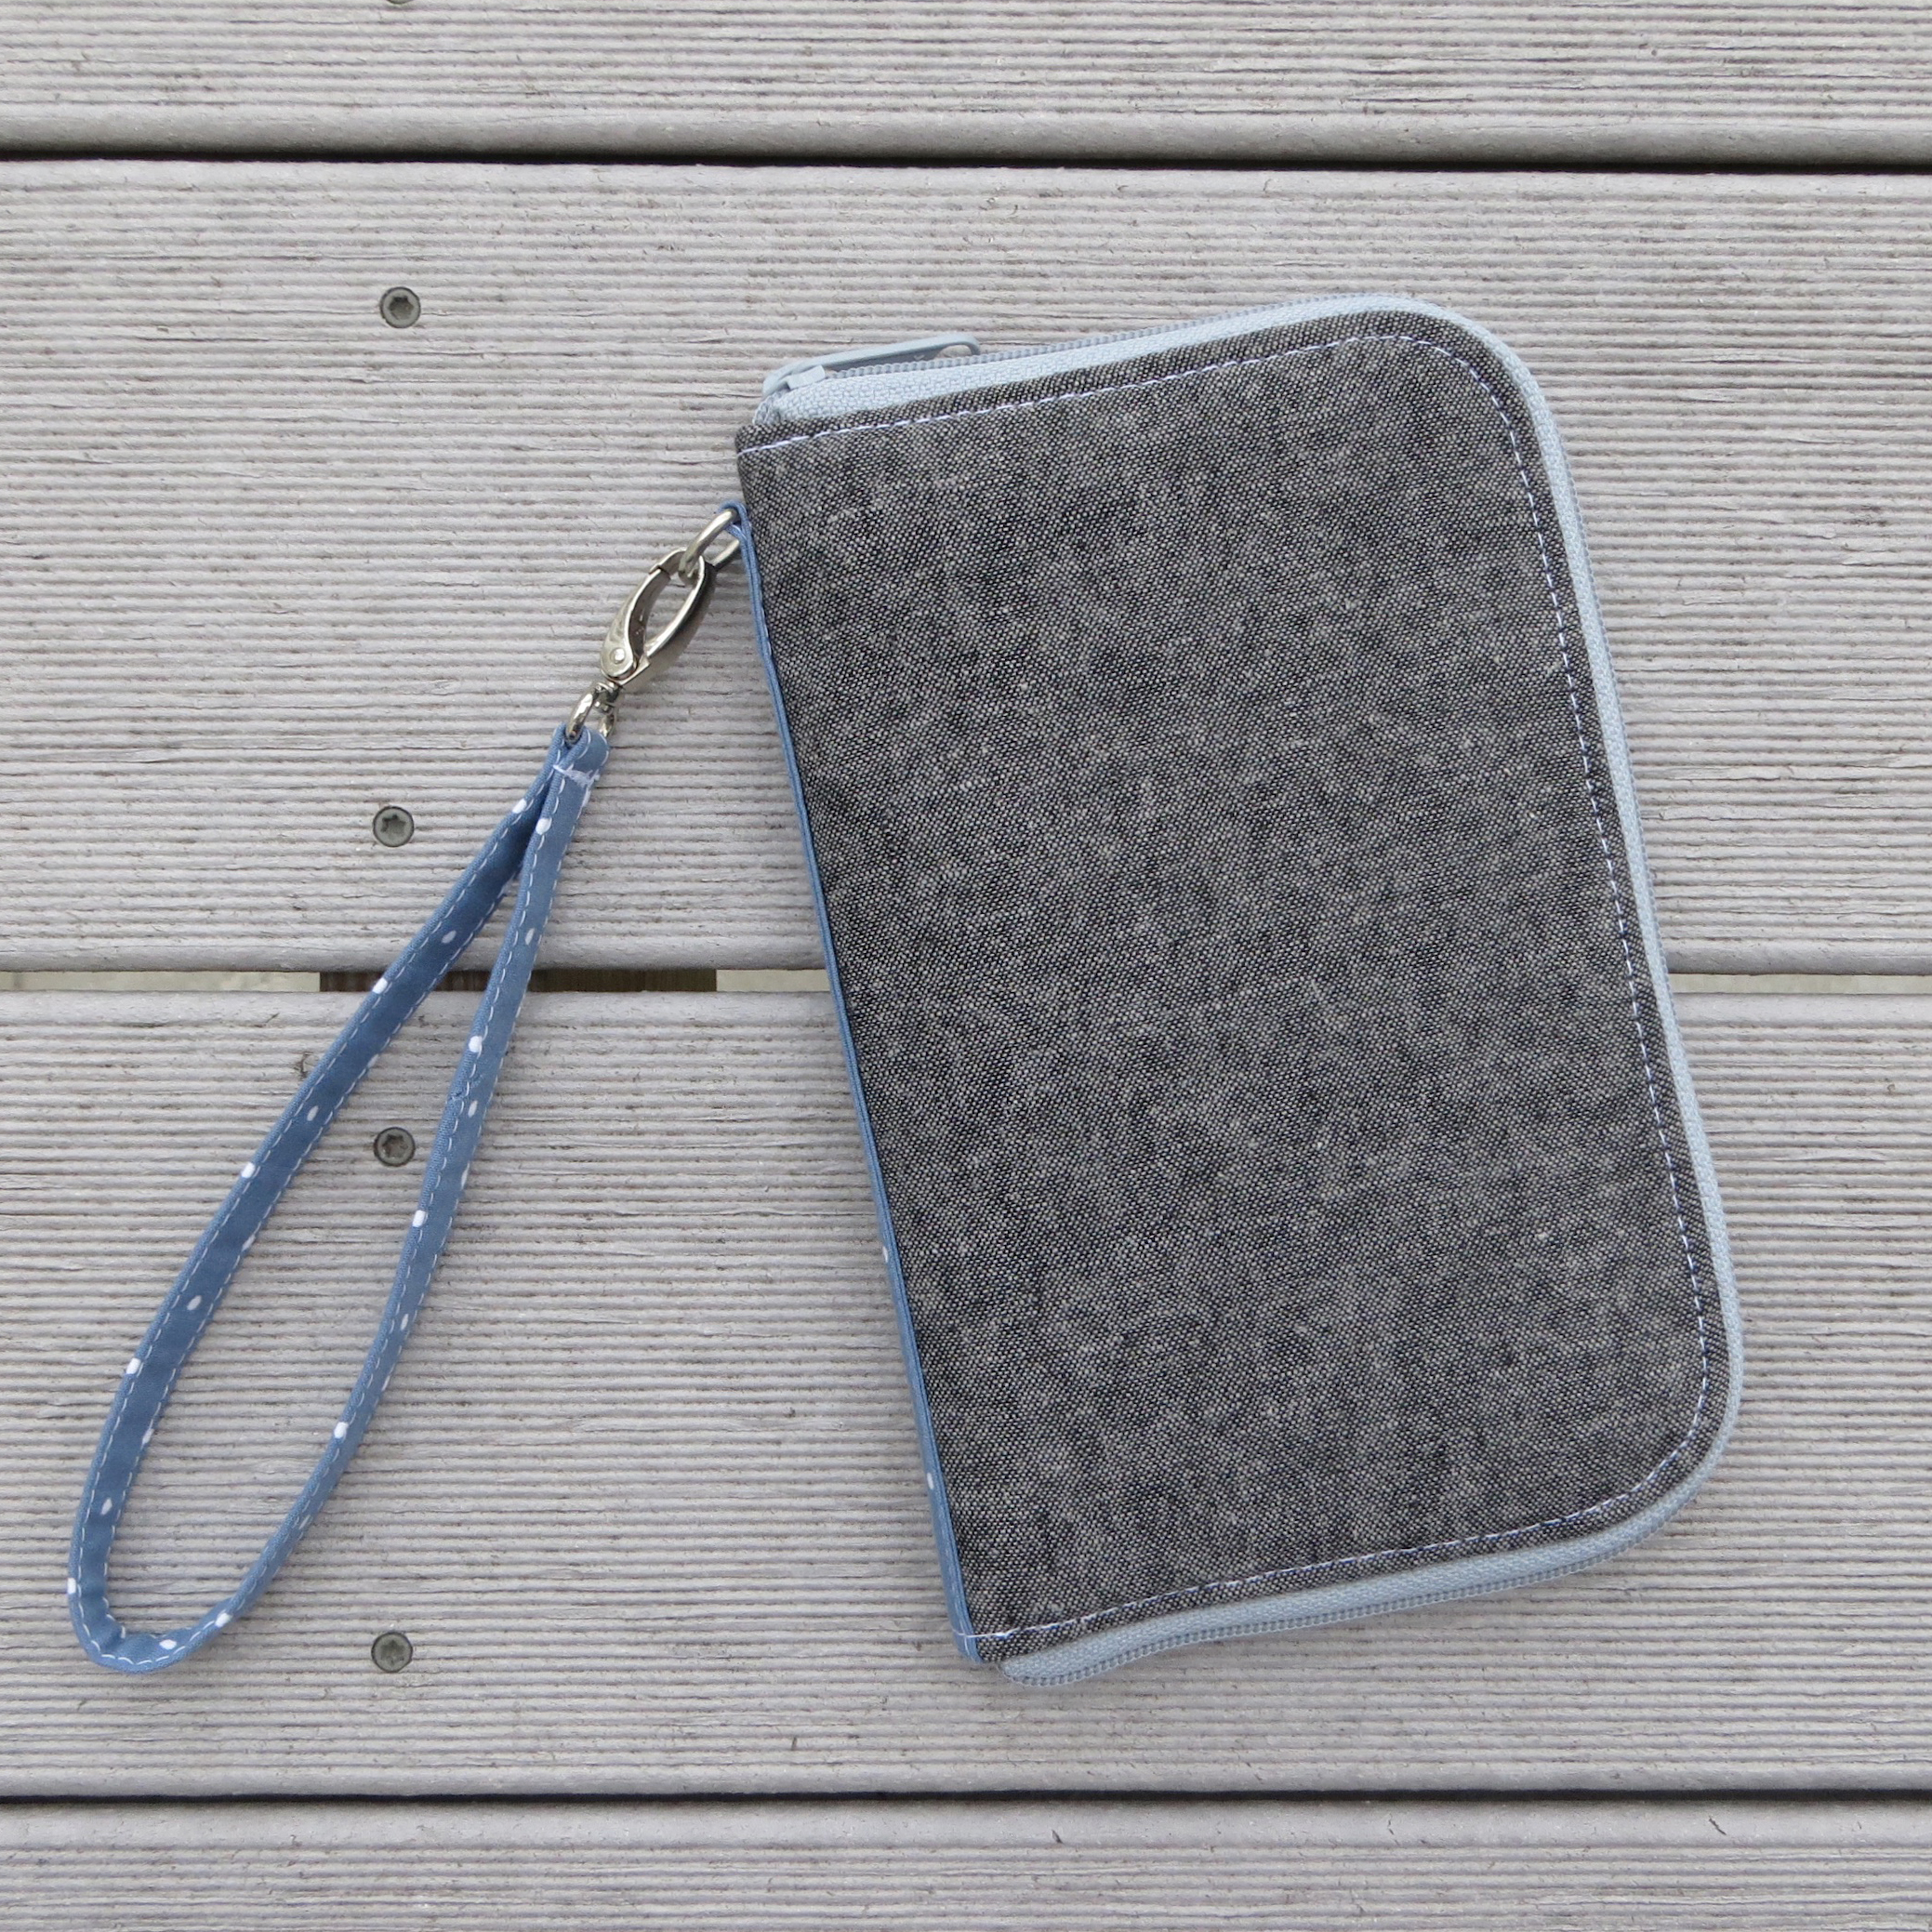
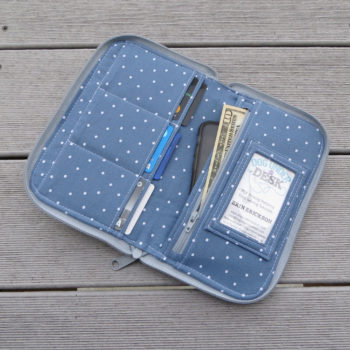
The pattern has my usual level of detail, with 170+ photographs. (Yes, those took FOREVER!) My testers were jumping up and down excited to show theirs off, which we will get to next! :)

……………………………………………………………………………………………………………………….

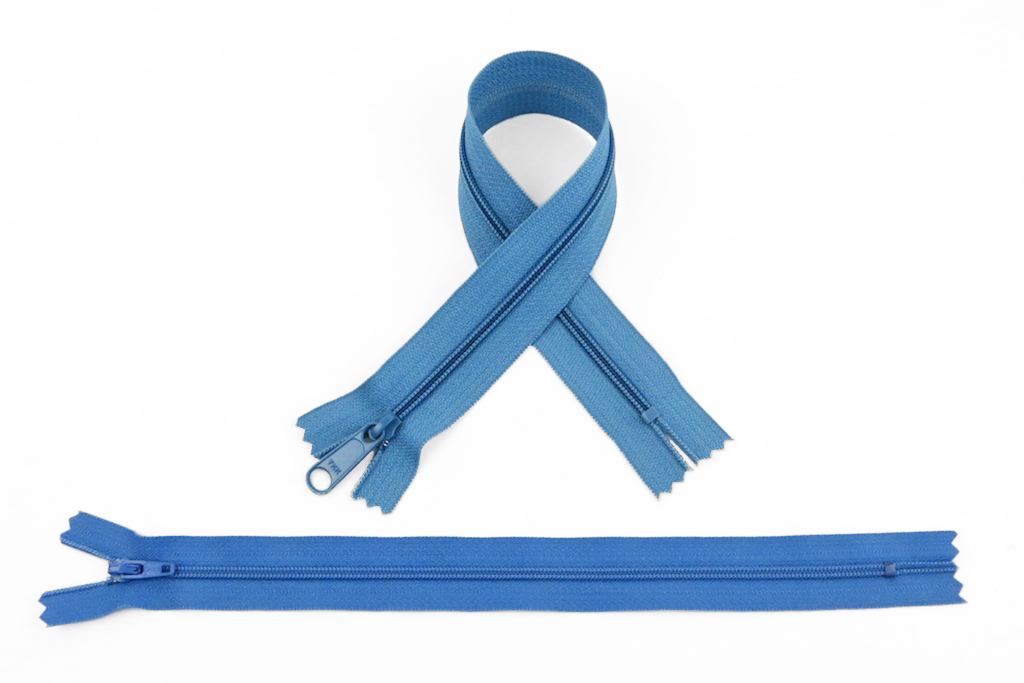
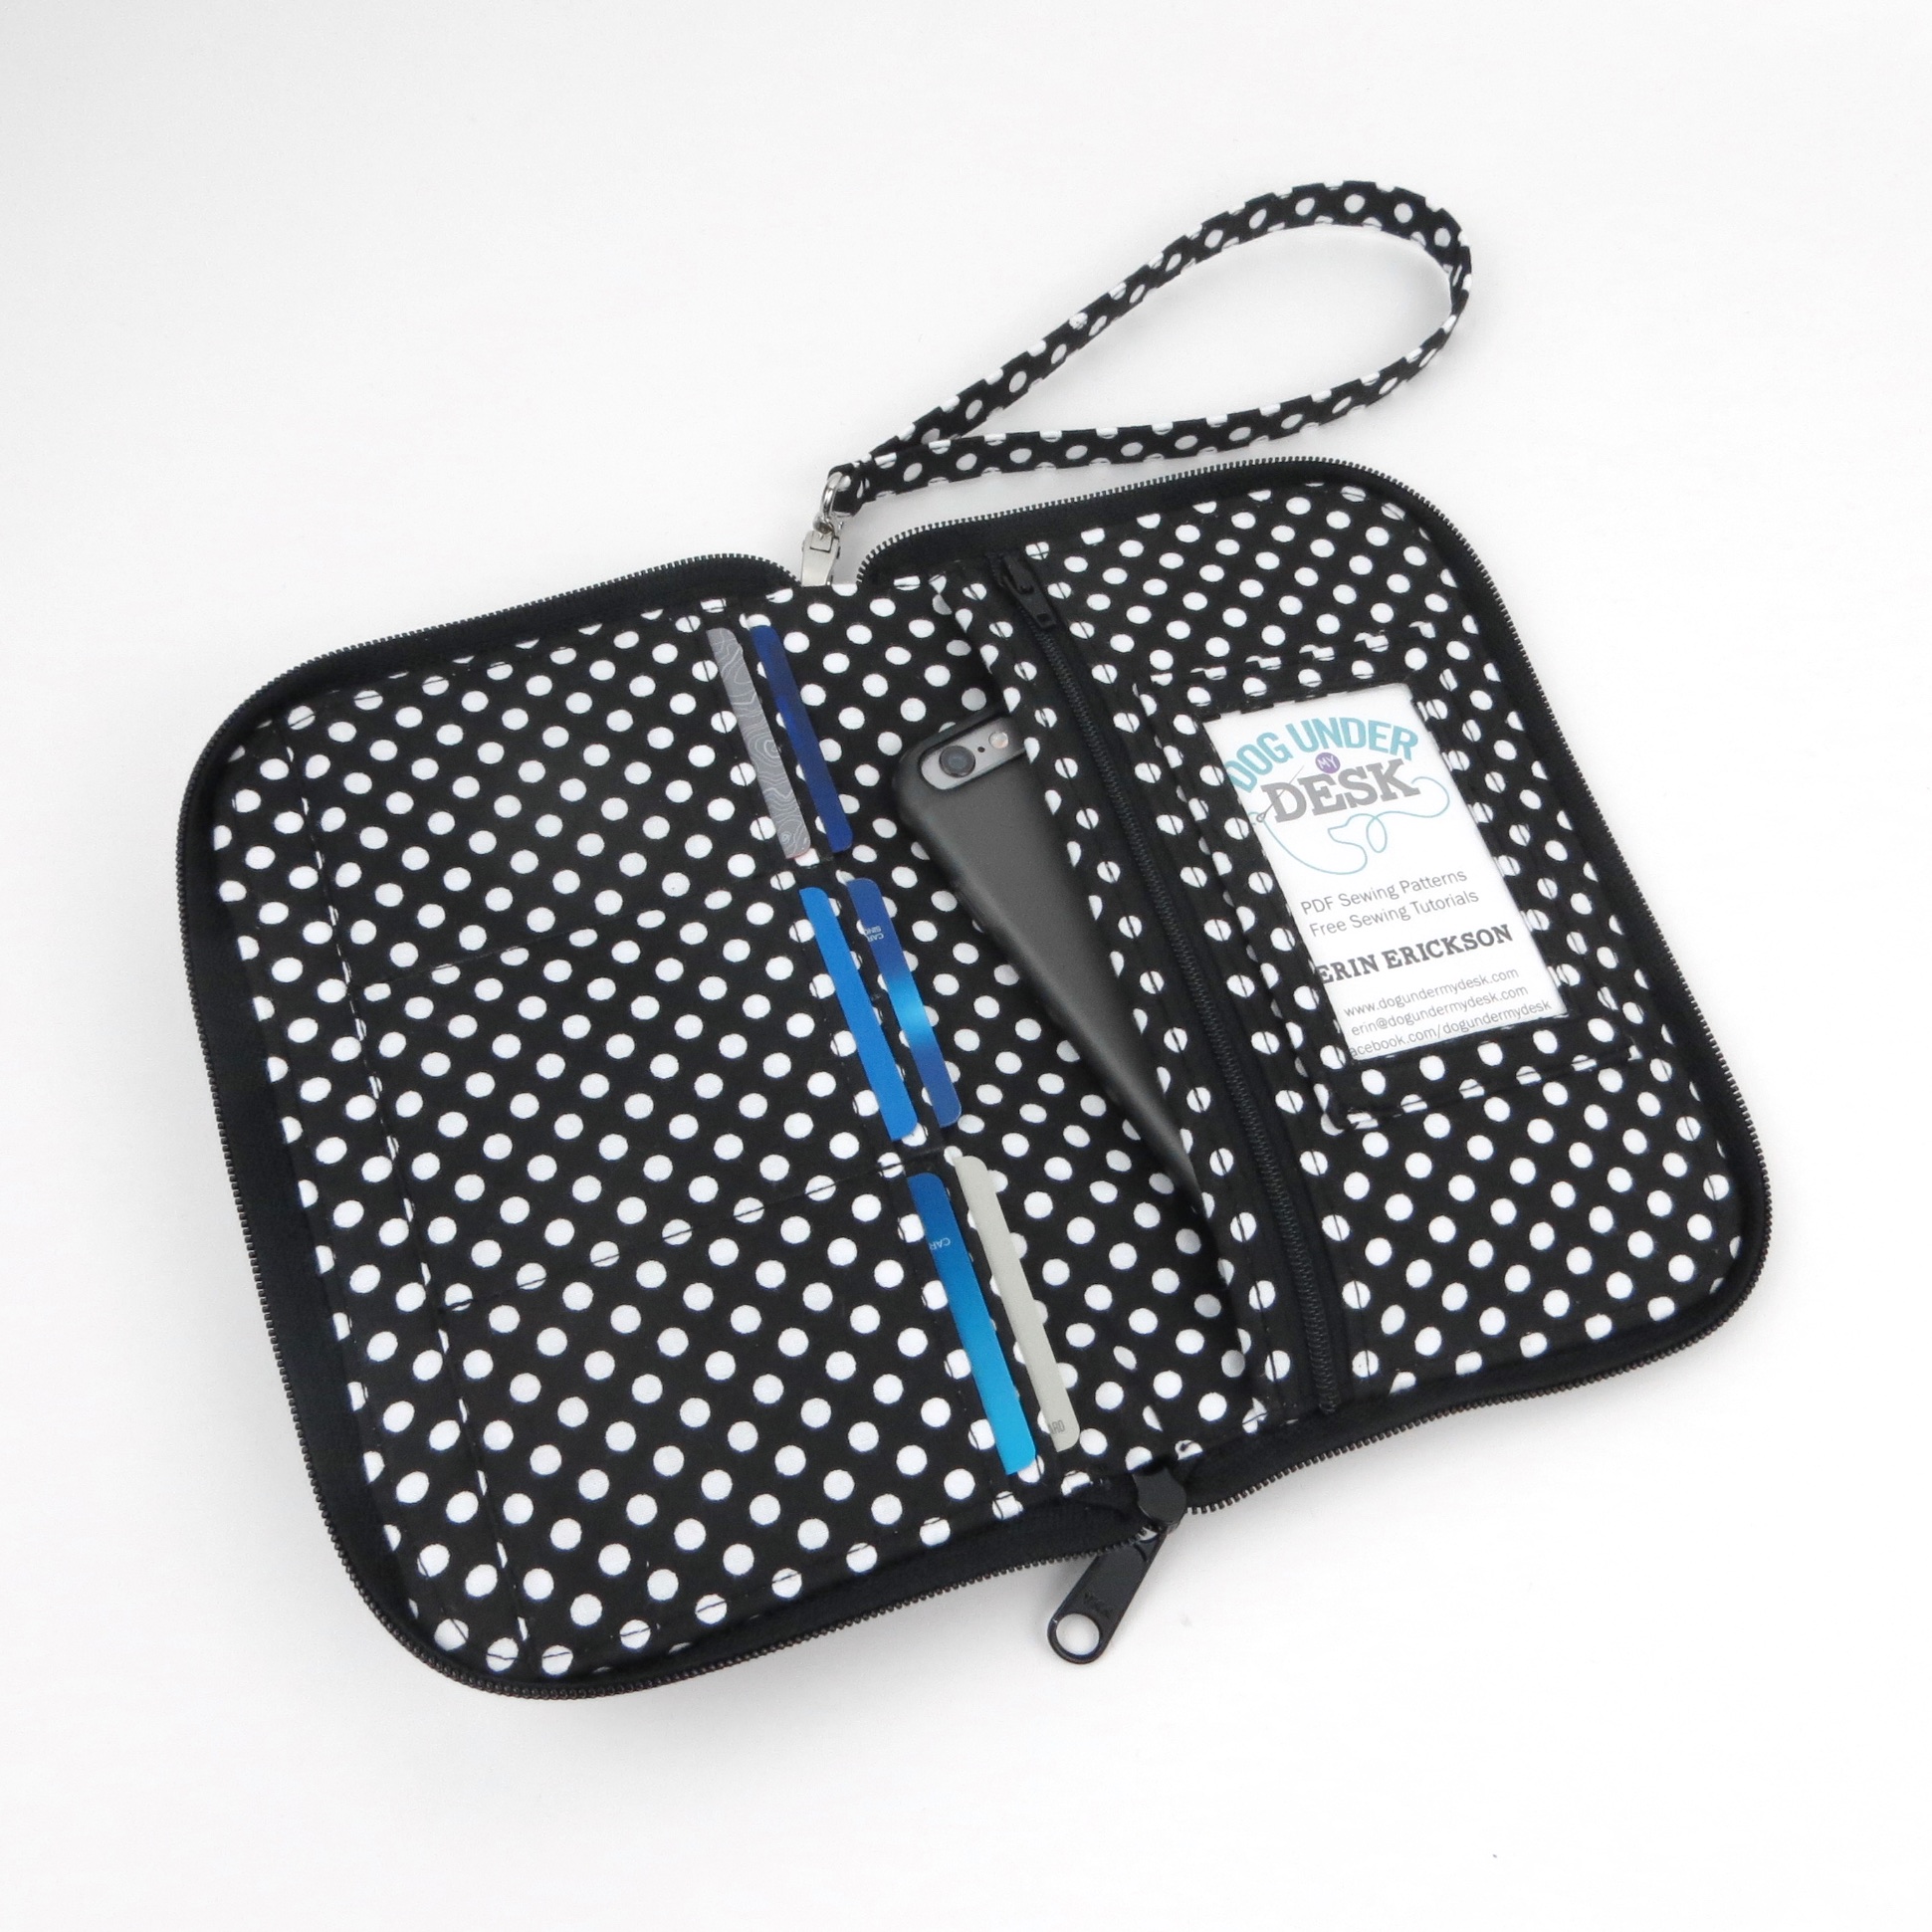
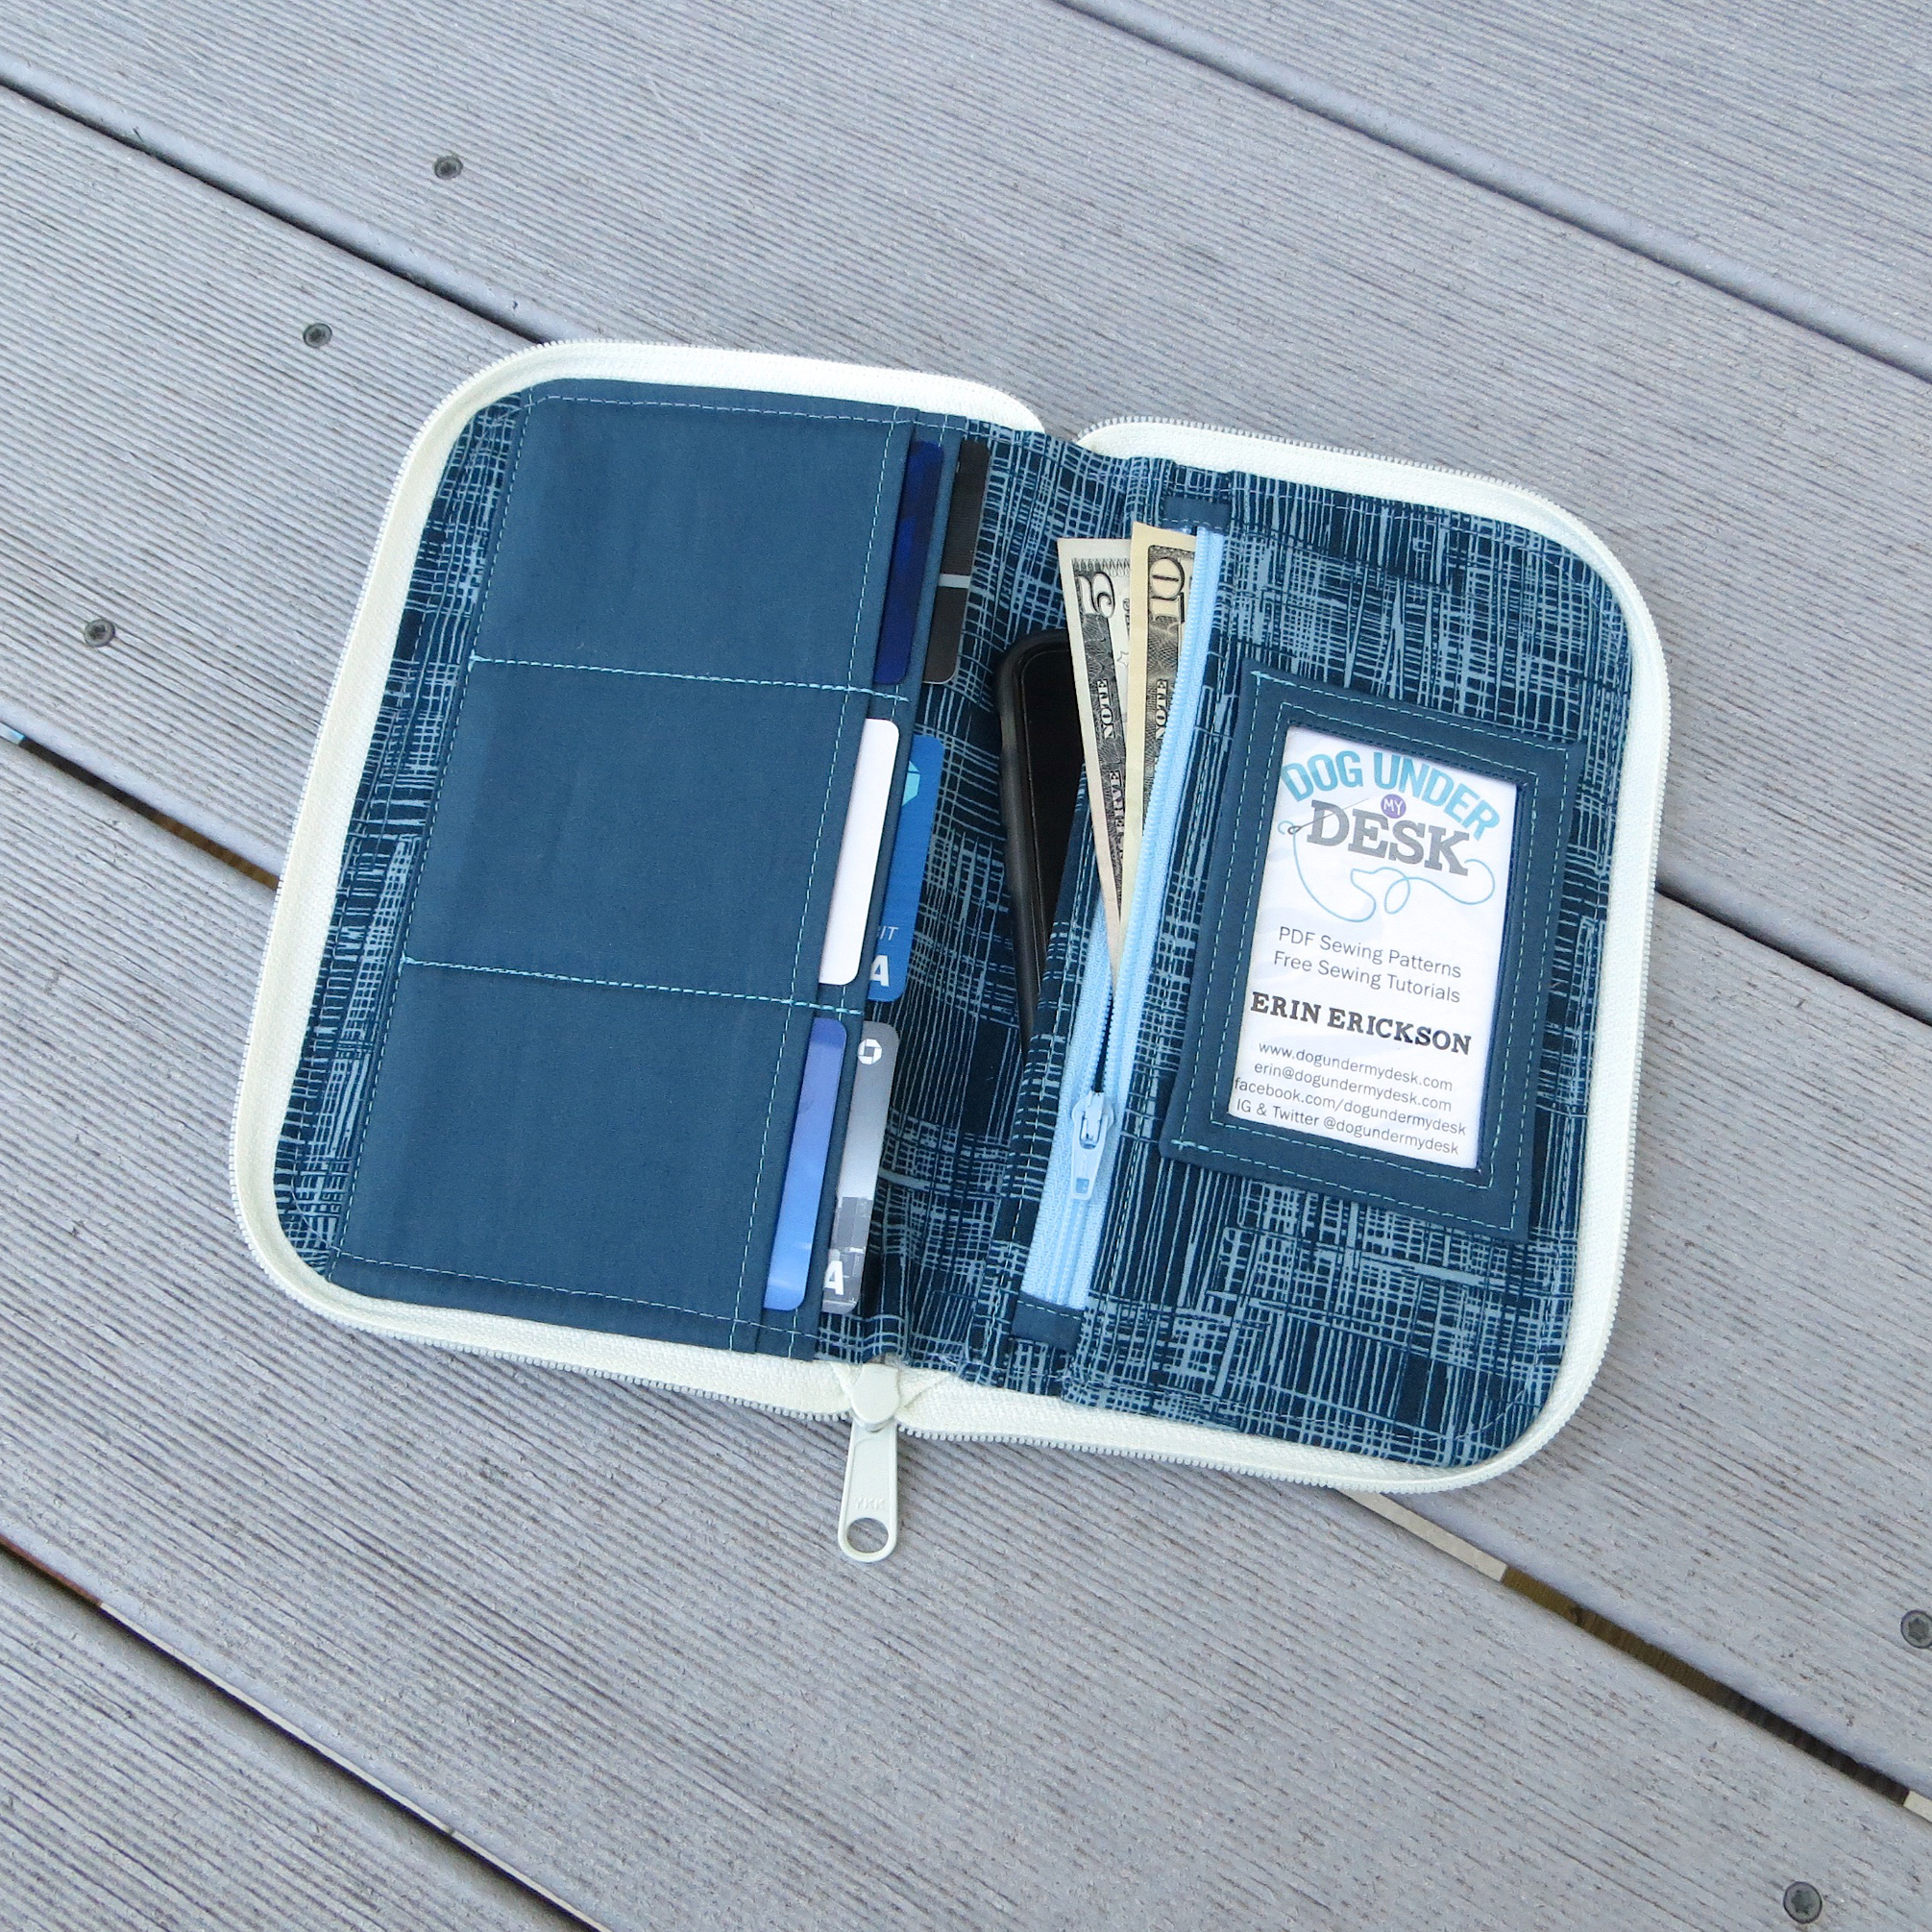
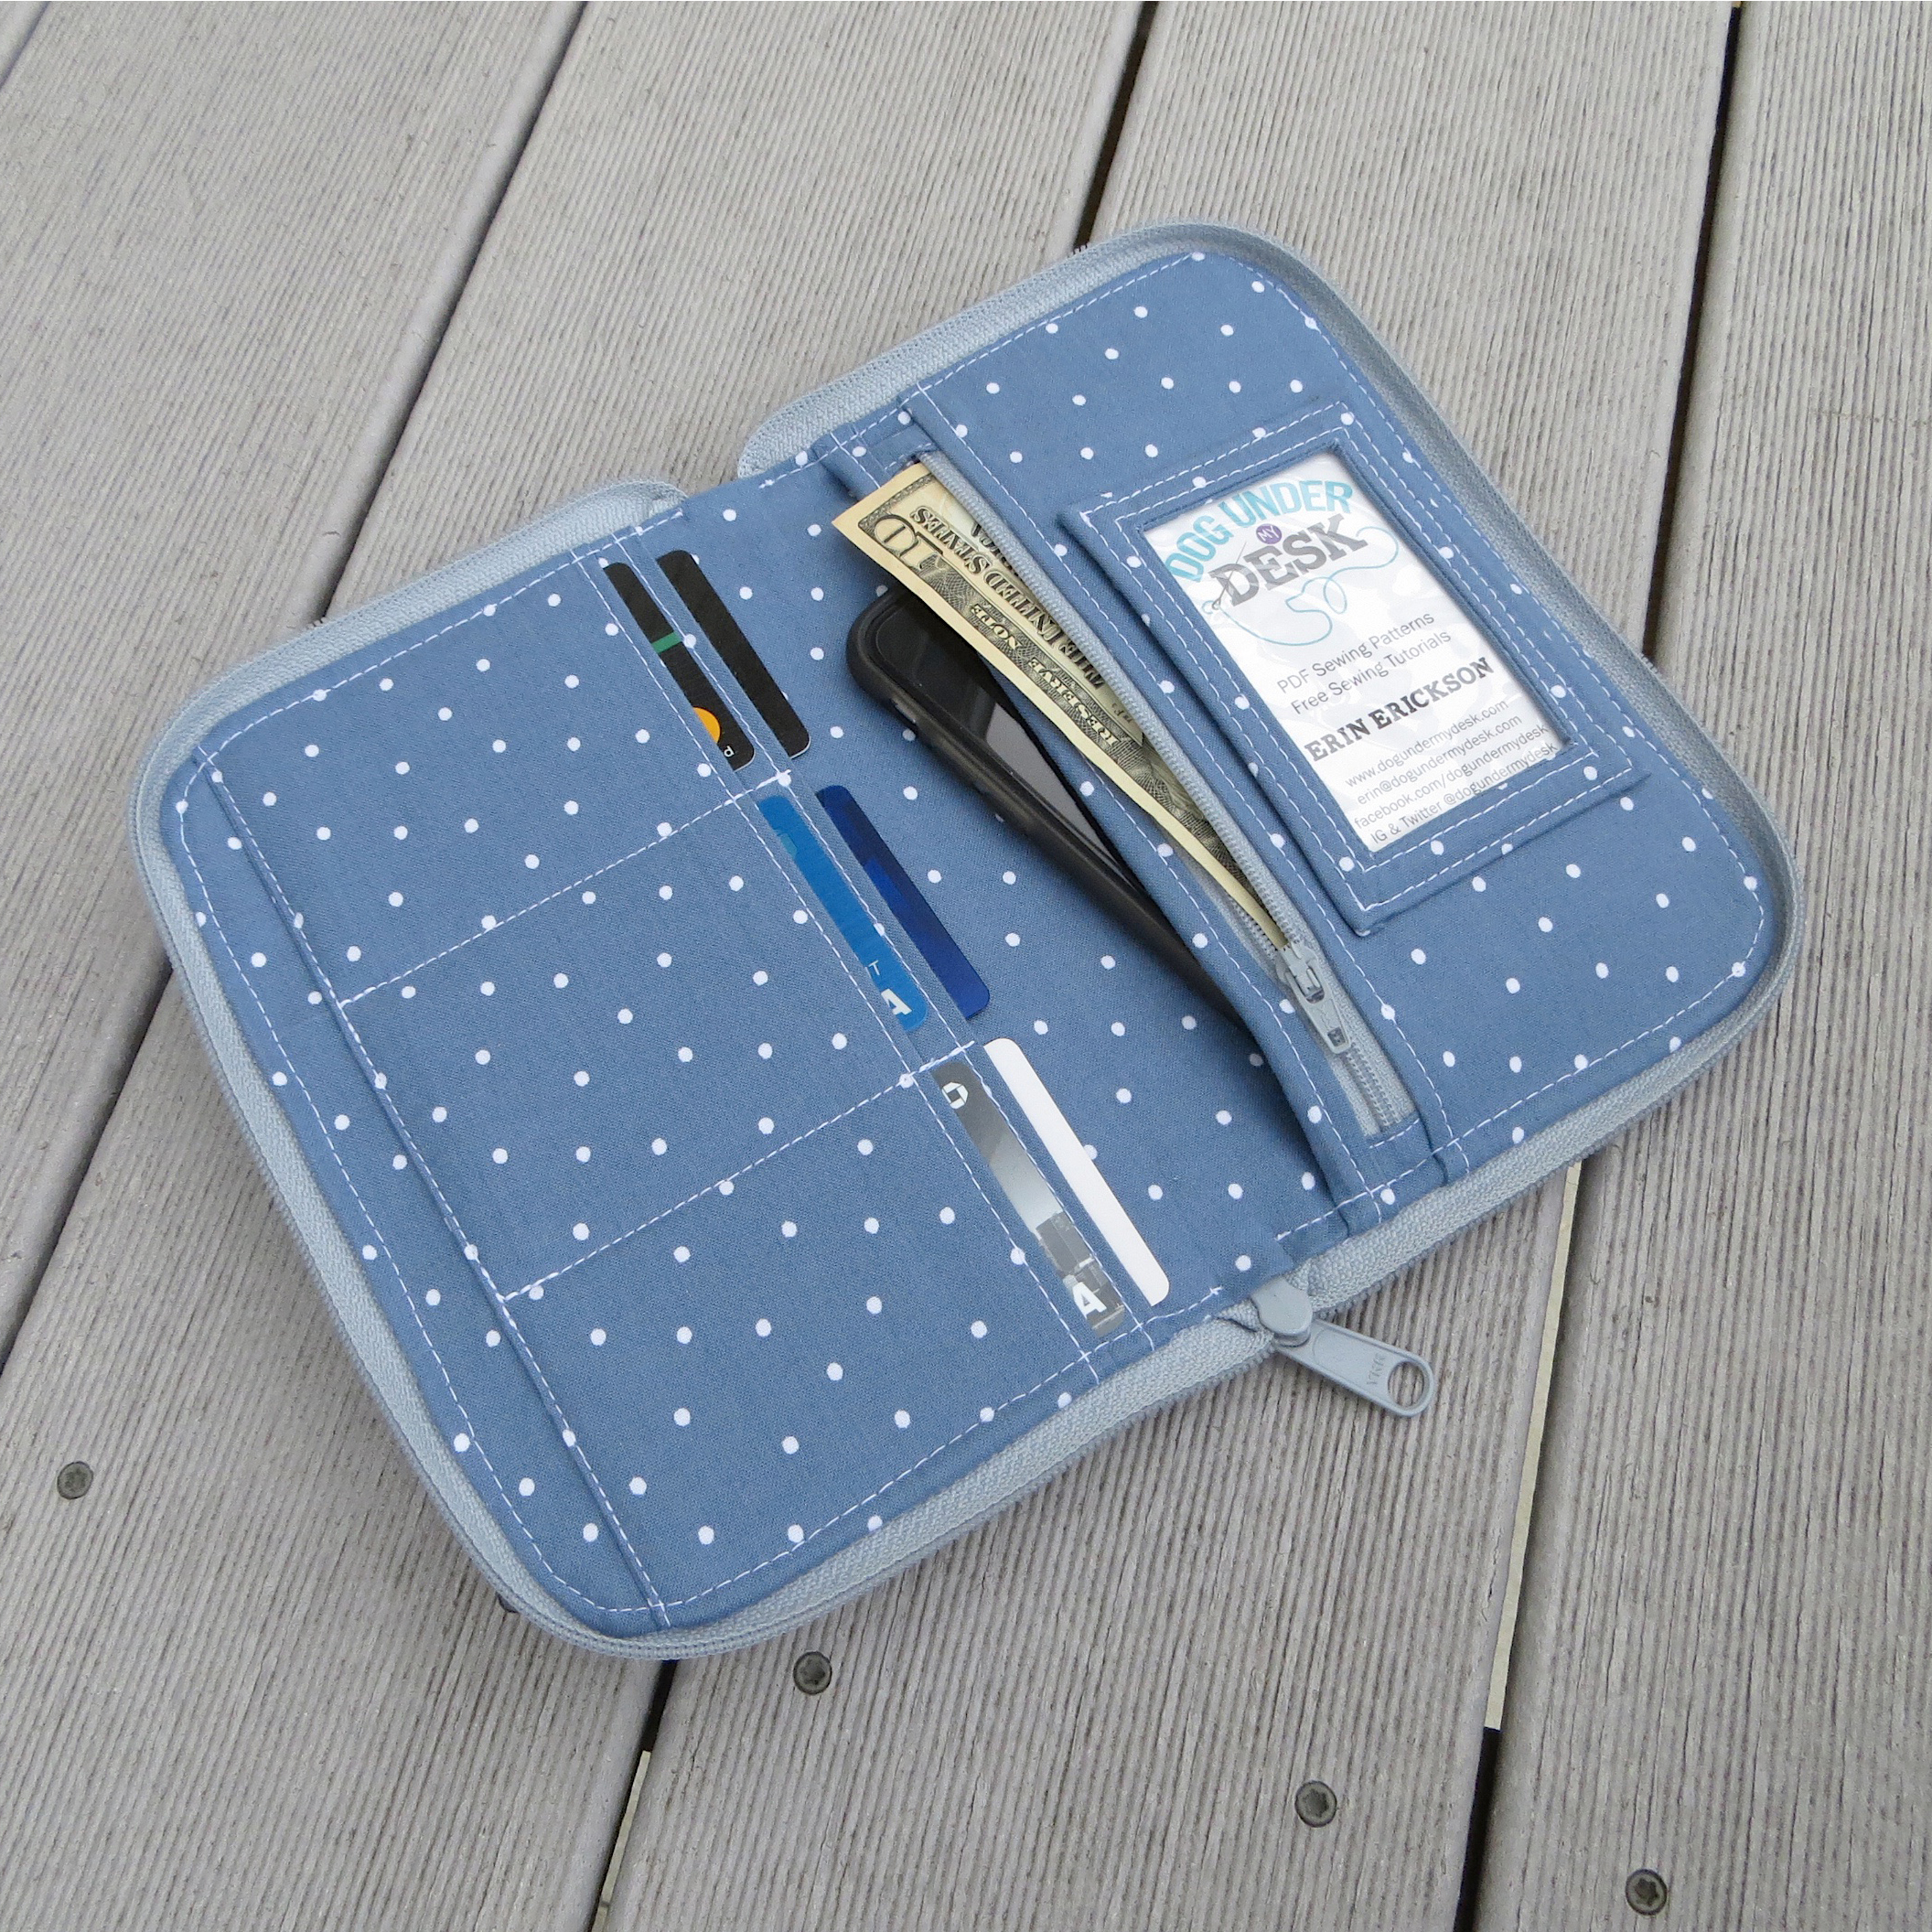
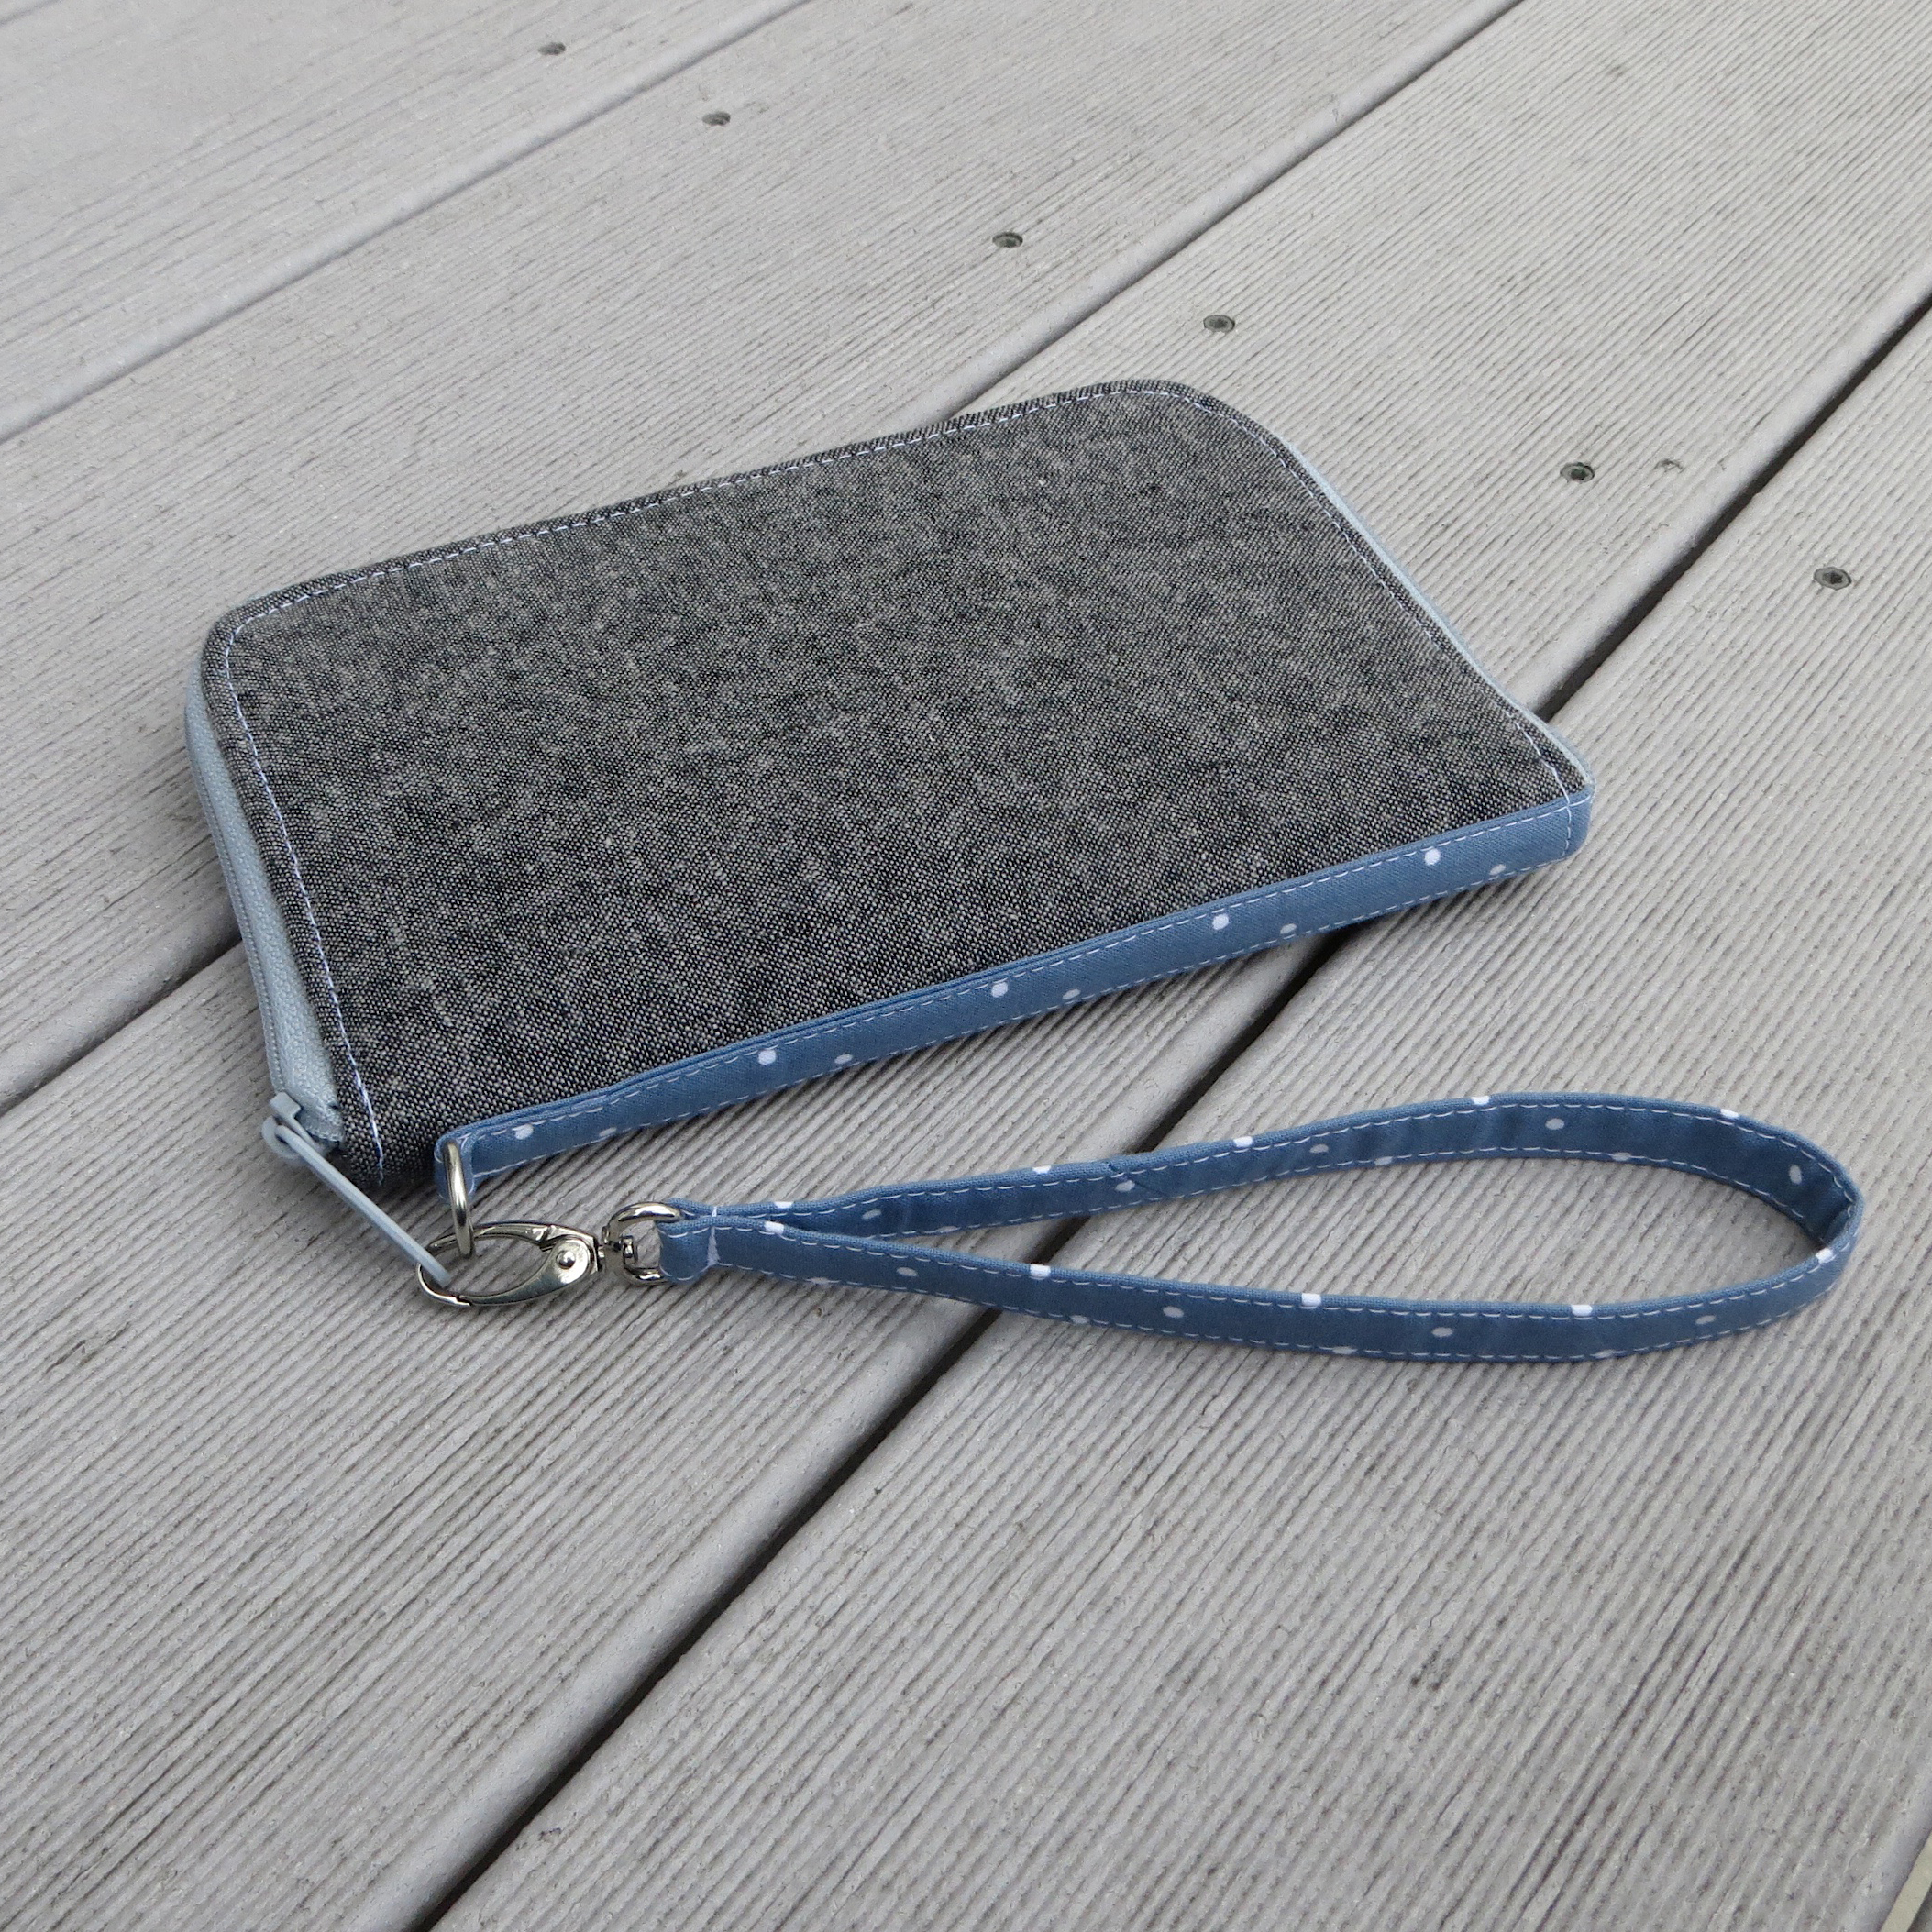
#4.5 1.25″ wide Long Pull Purse Zipper on top Standard #3 1″ wide dress zipper on bottom

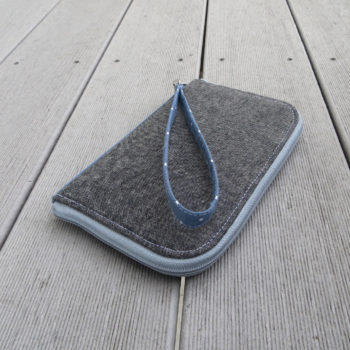
Let’s talk zippers: You can and should use a standard zipper for the inside pocket, but you MUST use a 1.25″ wide, #4.5 YKK Long Pull Purse Zipper for the exterior. These are designed for handbags. You can purchase them at a very reasonable price from Zip It Zippers (jump into the Facebook Group for a 15% off code for Zip It) and she ships worldwide. You can also find these zippers locally at quilt shops, although they cost significantly more (Five 24″ zippers are $7.25 from Zip It, and one at your LQS will be in the $5 range). A standard 1″ wide dress zip will not work for the outside of the wallet. Since it needs a 1/4″ SA, the wallet itself would simply be too thin to fit anything inside, and offsetting it by 1/8″ (which sometimes works in flat installations) would definitely not work here. A couple of testers tried a #5 zipper, which is wide like the handbag zippers but has thicker coils, which can be difficult to bend around the curve. I would leave those to the professional bag makers and splurge on the handbag zips. I try to ask so little hardware-wise, which is why my patterns do not typically require a lot of bling! But this is a basic necessity to sew this wallet successfully.

And now fabric: You may use a thicker fabric on the exterior. I have designed it with two layers of interfacing and one layer of stabilizer (Peltex) on the exterior, and it is easy to eliminate one or both layers of interfacing if necessary. Canvas (Premier Prints or Cotton+Steel, for example) and Essex Linen work fine with all layers as designed. I really love the Essex Linen for this wallet – it makes it look extra sophisticated without increasing the difficulty level at all!

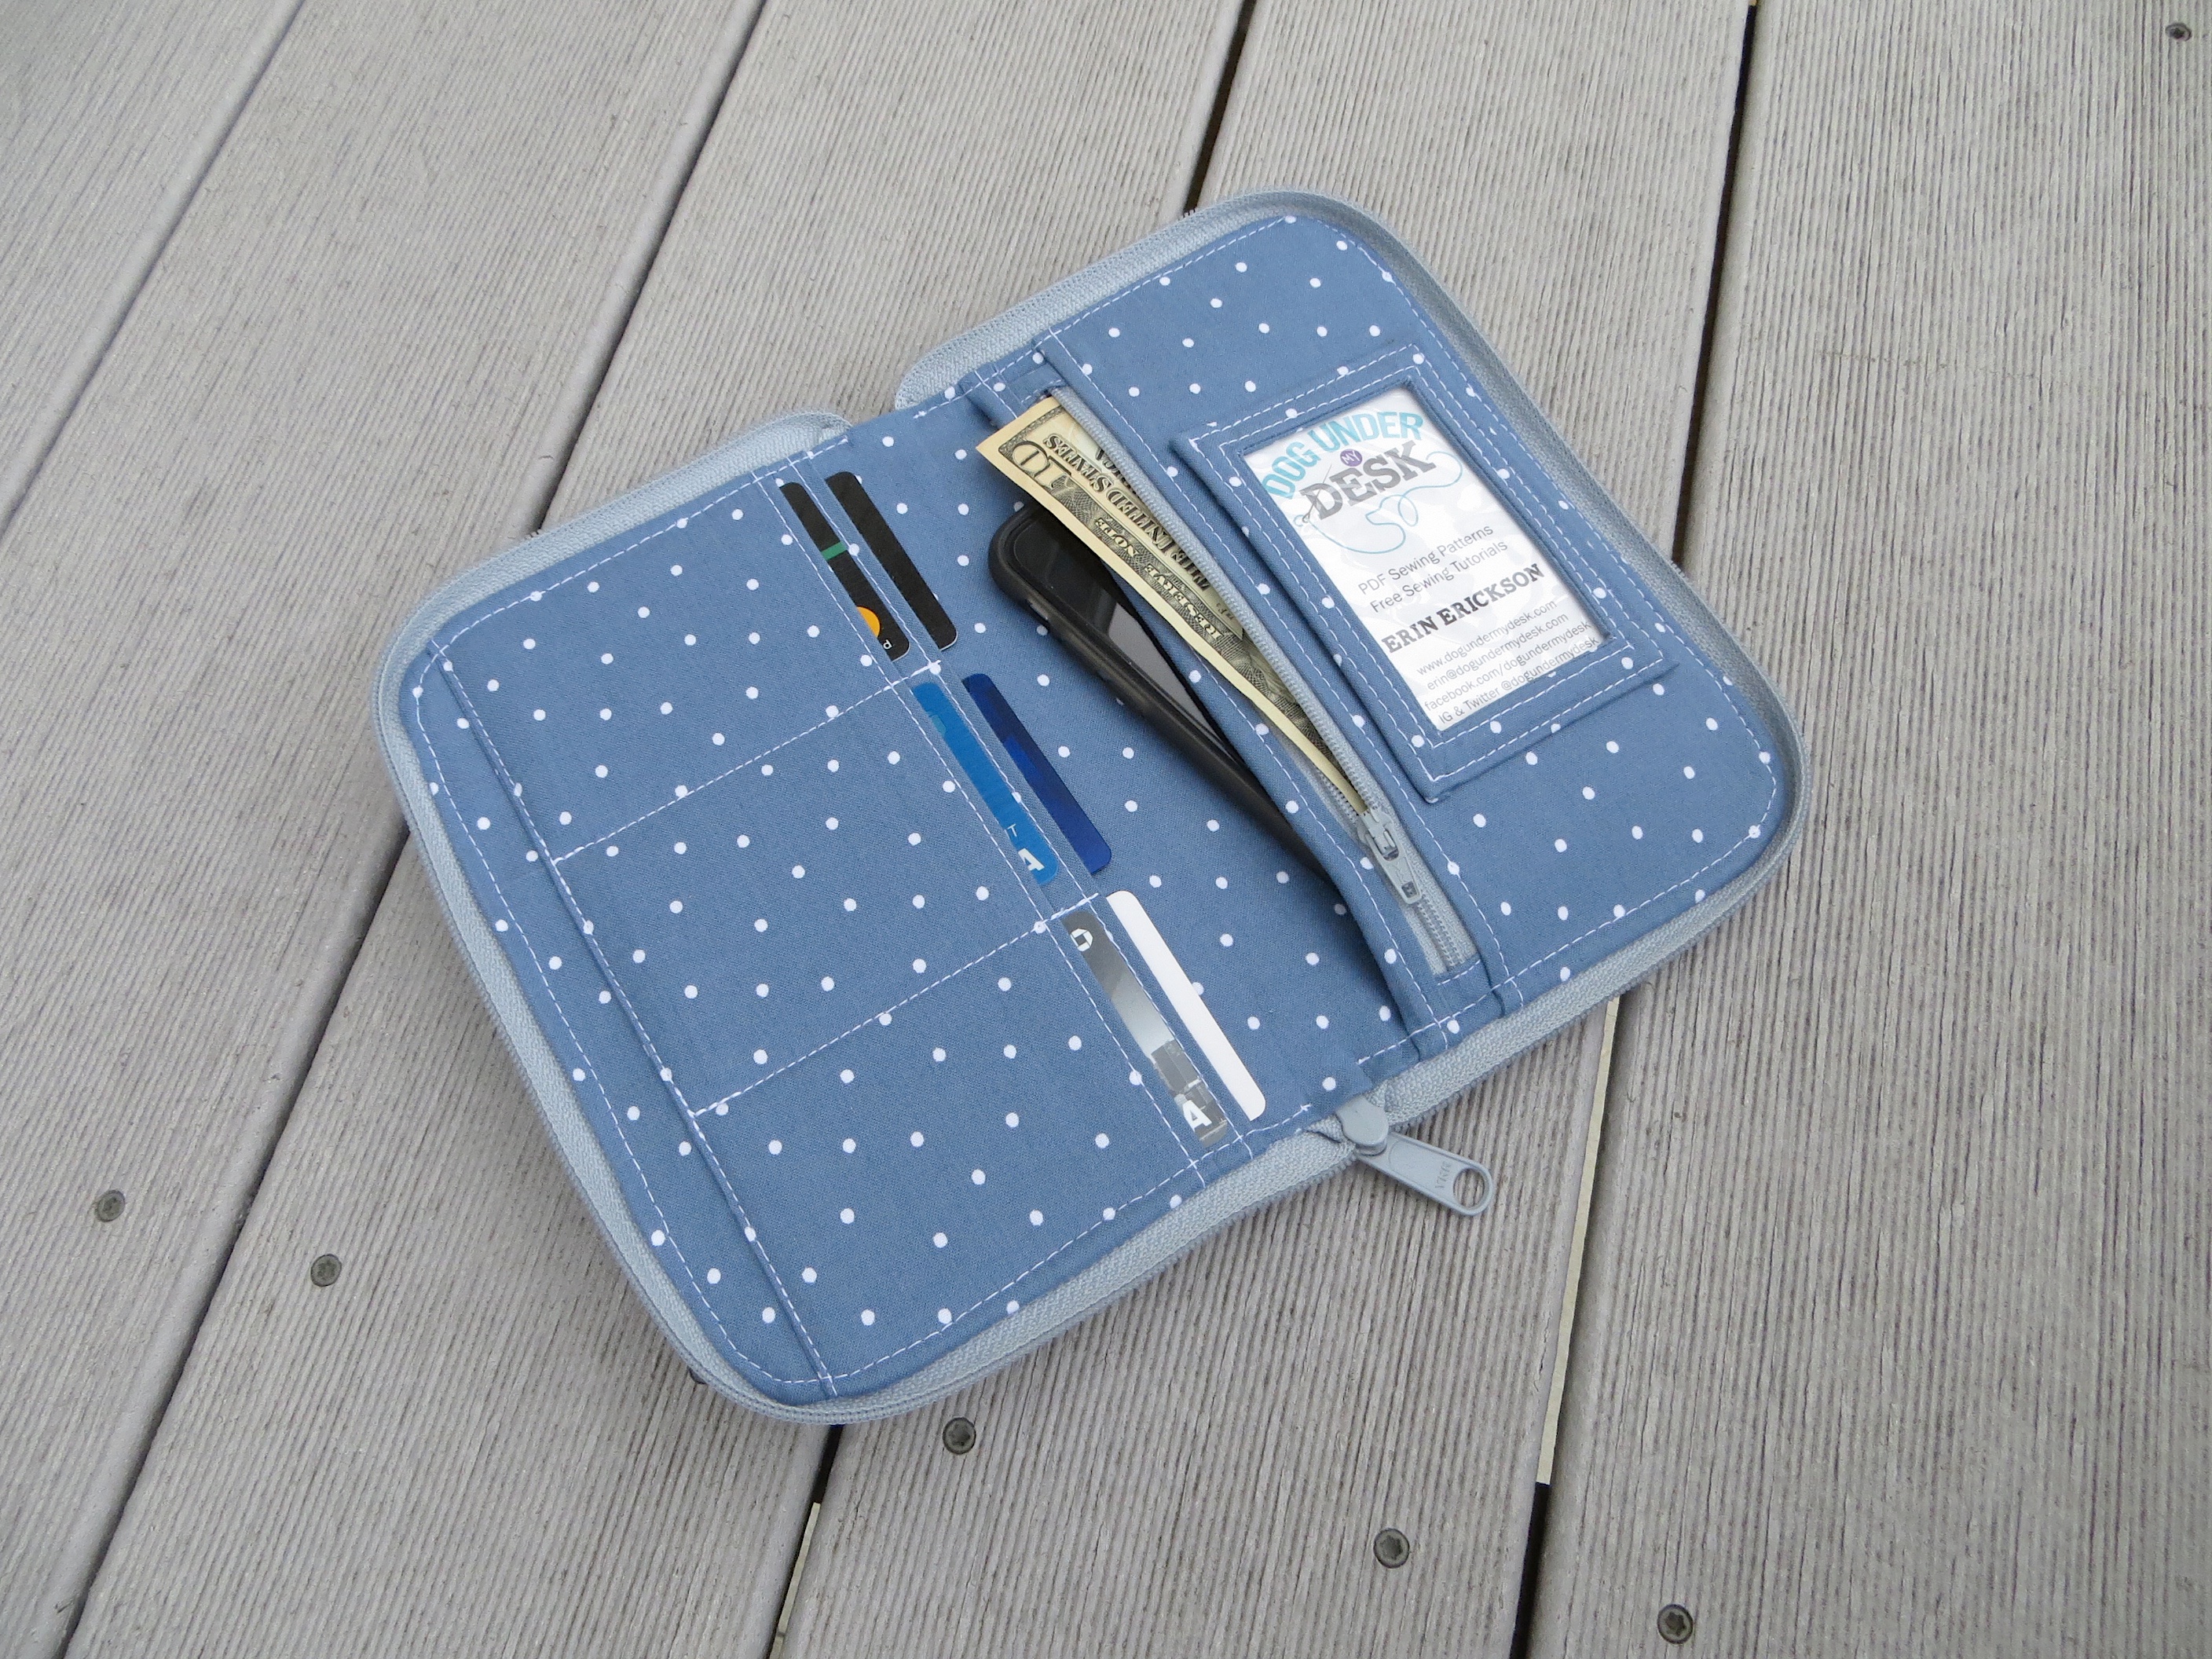
For the lining, choose thinner quilting cotton or batiks. These thinner fabrics have less bulk so that you can put some STUFF in your wallet, instead of just zipping up your pretty fabric. :P

As far as interfacing goes – it doesn’t use very much so it’s worth getting the good stuff (SF-101, or a similar woven fusible), but on thicker home dec fabrics you can sometimes get away with a super thin non-woven fusible. I would definitely splurge on the Pellon Peltex 70, or something similar. It gives the right weight while still allowing you to turn the wallet. It’s available in many countries – it was one of the few things I could easily purchase in Australia (sometimes called Legacy) and I know our UK customers can get it as well. I think it makes a huge difference in the end result.

If you have any questions please email me, find me Instagram, the Facebook Page, and the Facebook Group. Please come and share yours because I want to make these in every fabric but I have to move on to designing a new bag, so I would love to see what you make!

Categories : PDF Patterns, Zip Around Town Wallet
Comments (0)

Leave a Reply

Click here to cancel reply.

Dog Under My Desk
Copyright © 2025 All Rights Reserved
iThemes Builder by iThemes
Powered by WordPress