
Wow! OK so this is the last tutorial for Time for a Change! You all are making AWESOME bags with the pattern and I love seeing the fabric combinations you are choosing! If you have any additional requests, pop into the Facebook Group and I can give you tips and advice much more quickly than writing one of these. I have an after school babysitter now (YAY!) but I need to use those afternoons wisely!
The reason I struggled with elastic pockets on this bag is that normally with elastic pockets, you just make a casing and add elastic to the top of the pocket like you would a waist band, and then sew the raw edges into the side and/or bottom seams. You can’t do that on Time for a Change due to the angle of the bag. But, the bonus is that you can use this elastic patch pocket on ANY bag!
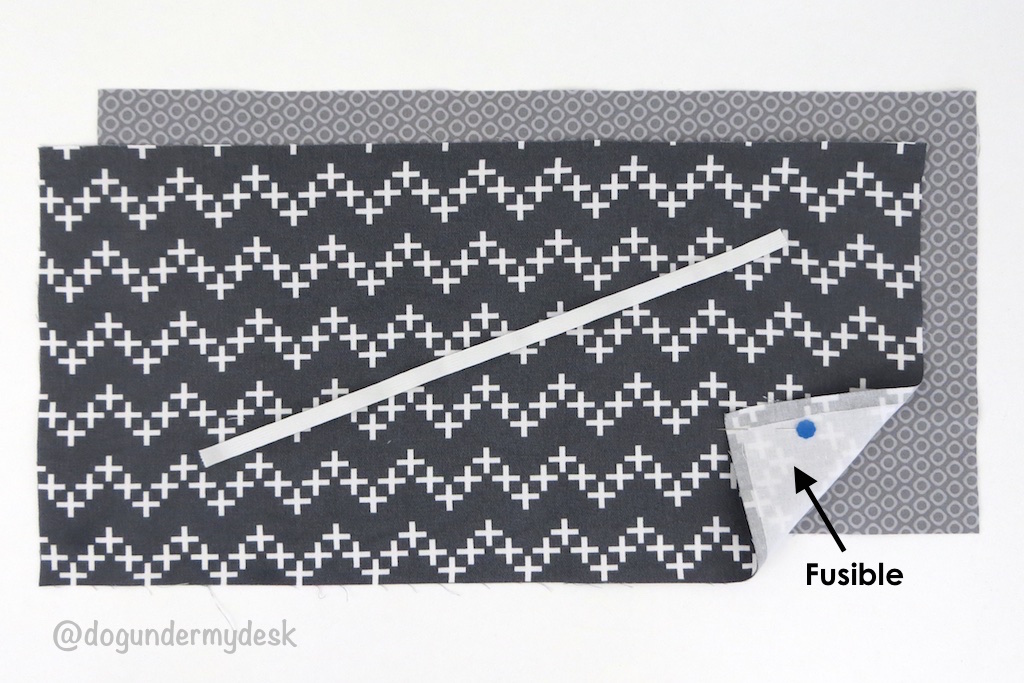
Cut 1 main fabric & 1 lining: 18″ wide x 9″ tall
1 fusible interfacing (SF101 or similar): 17.5″ tall x 8.5″ tall
You don’t want this to be too thick or the elastic won’t have the power to gather it, so if you’re using thick fabric or home dec for the exterior, stick with a cotton lining fabric or skip the fusible.
3/8″ wide elastic: 13″
Fuse the interfacing to the main fabric
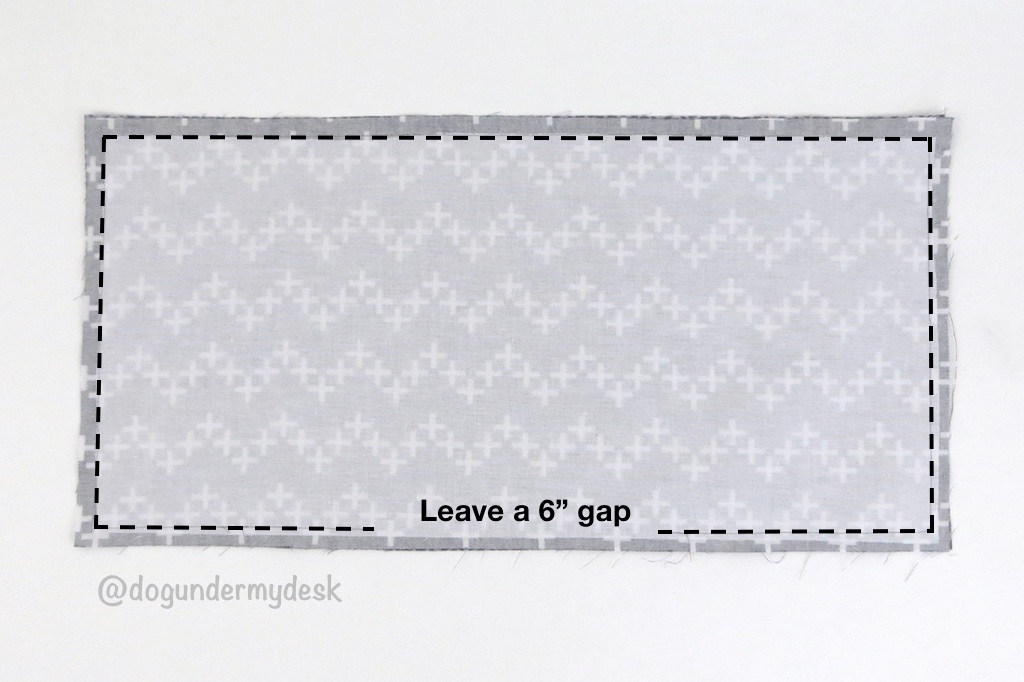
Place the pieces RST and sew around with a 3/8″ SA. Leave a 6″ gap in the bottom for turning.
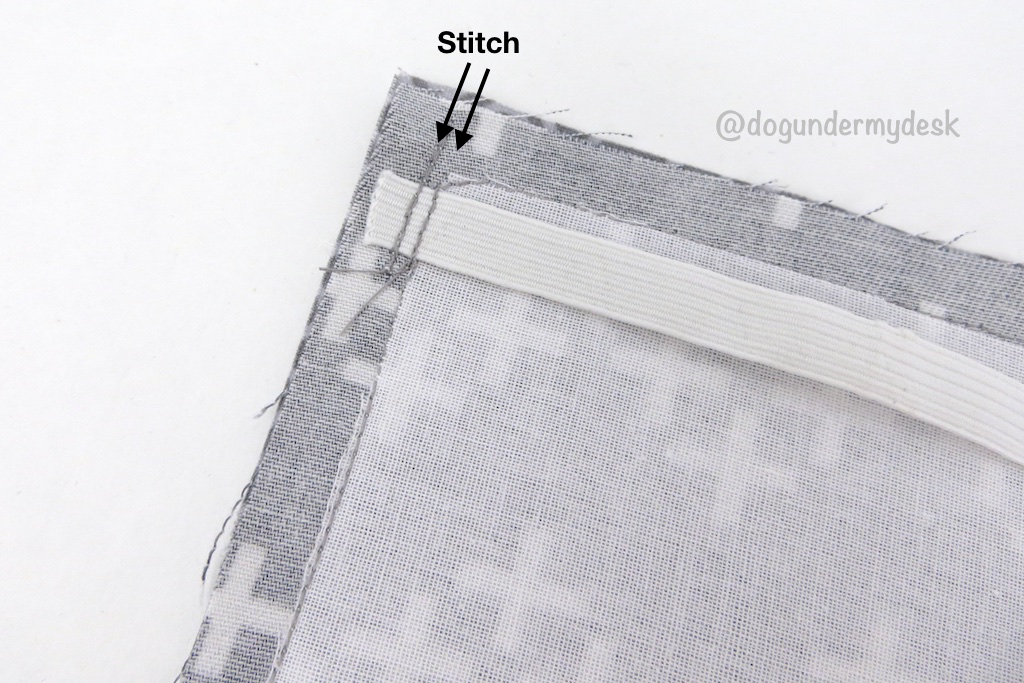
Now stitch one end of the elastic right over the original stitch line on the side seam, just below the stitches across the top.

Stitch again within the seam allowance to secure. You don’t want the elastic coming undone or you’ll have a saggy pocket!
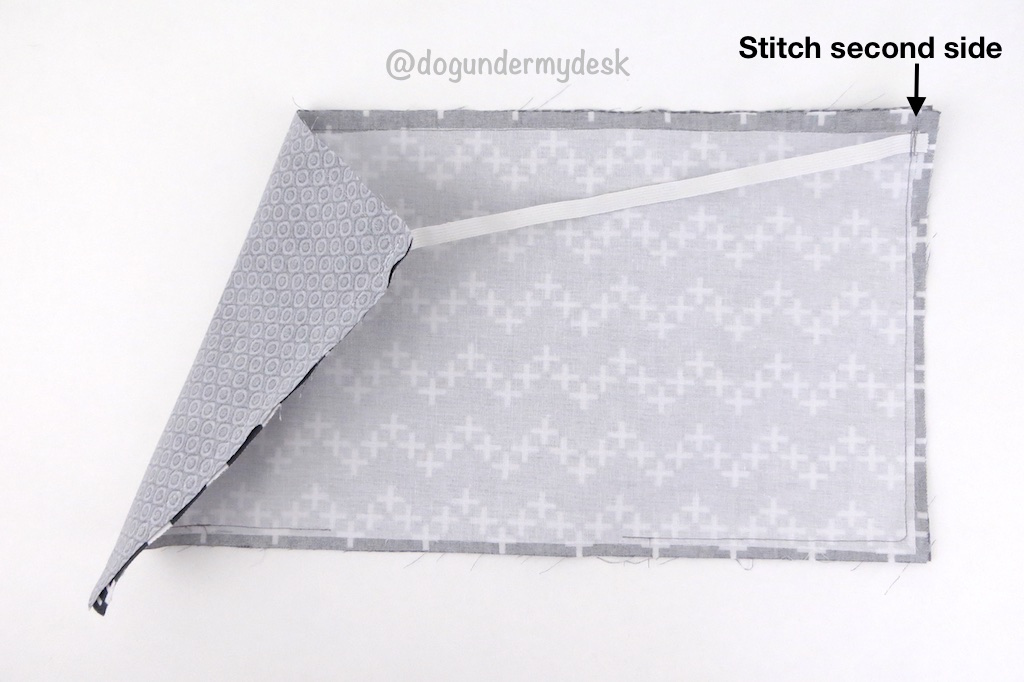
Repeat with the other side.

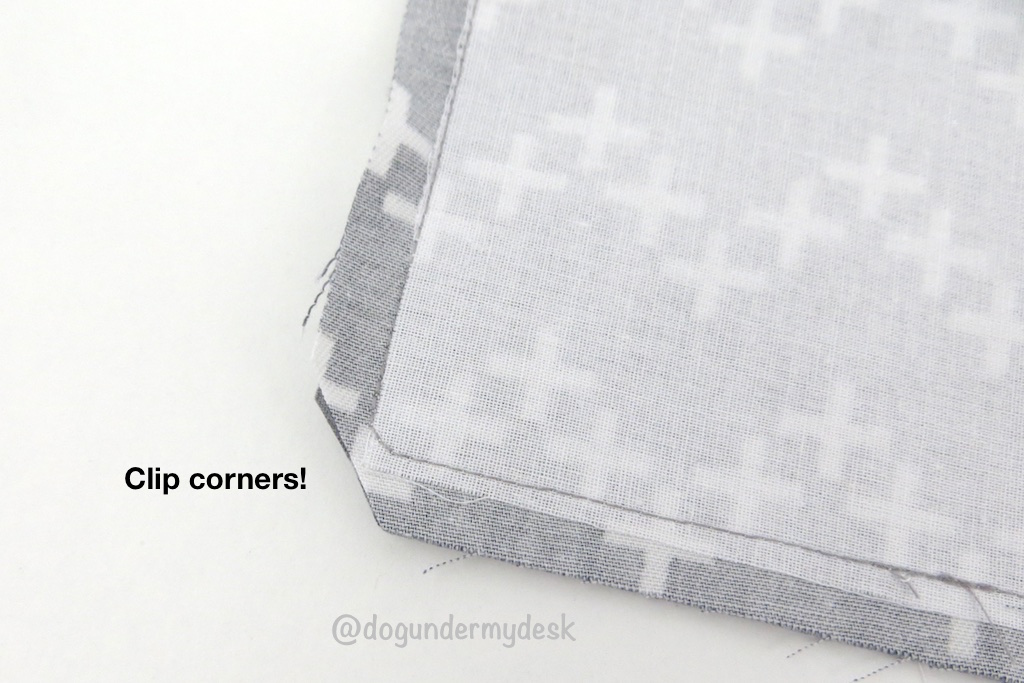
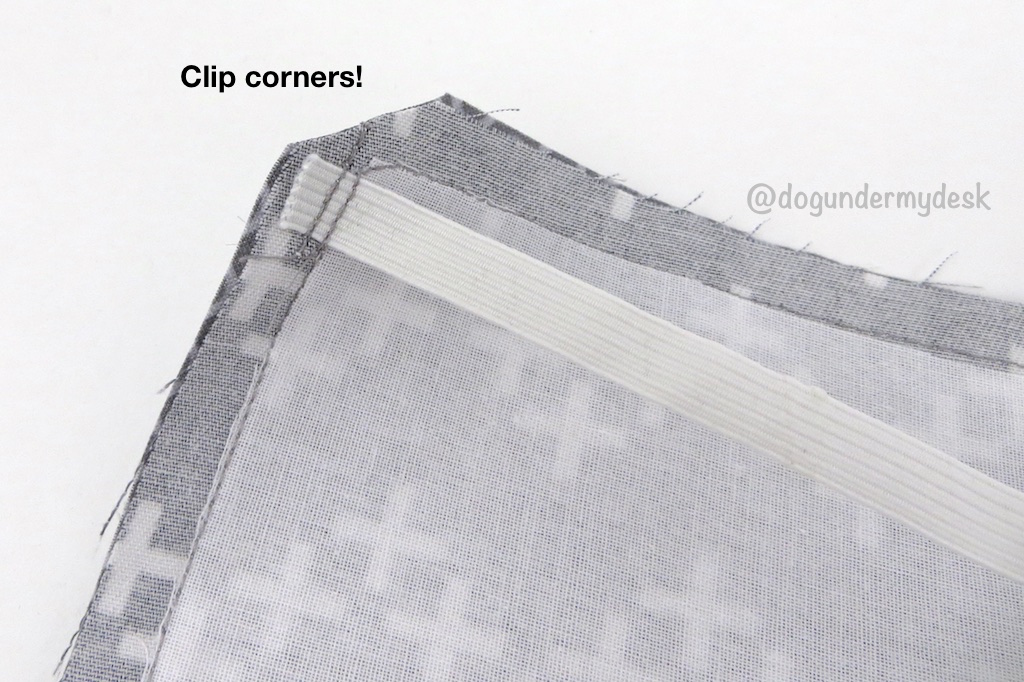
Clip corners.
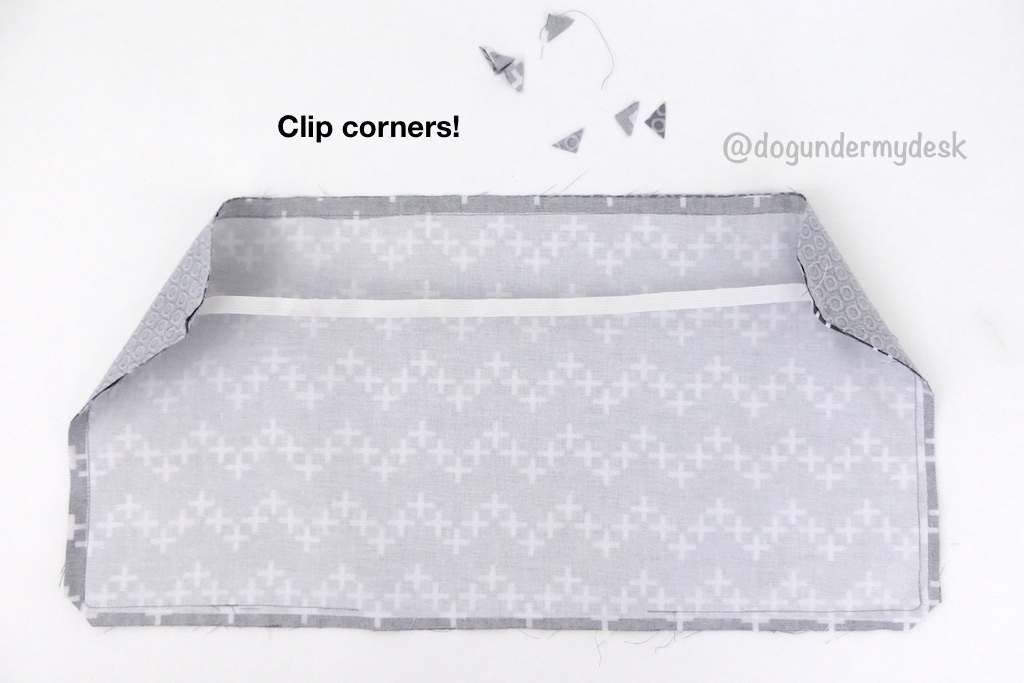
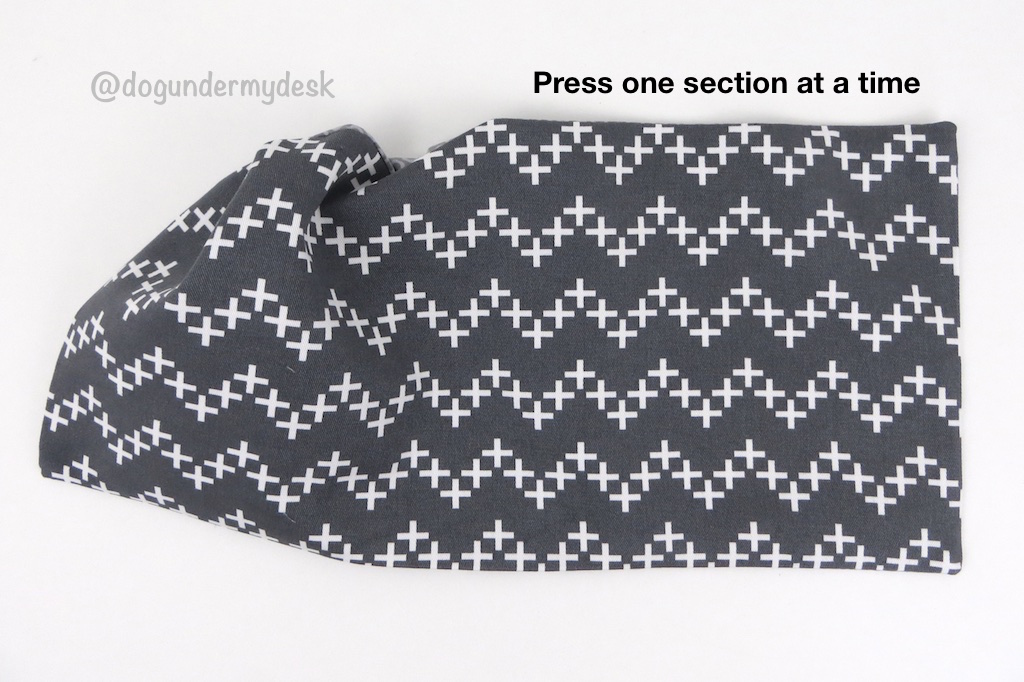
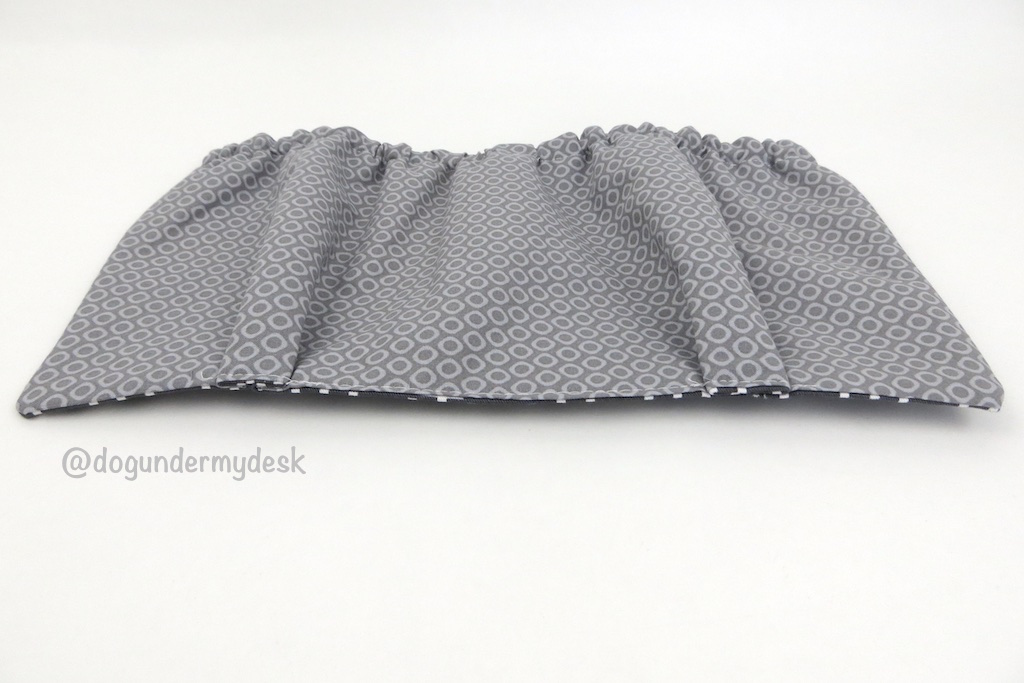
Turn right sides out and press. Press one section at a time on top. Make sure you fold the opening under and press that too.
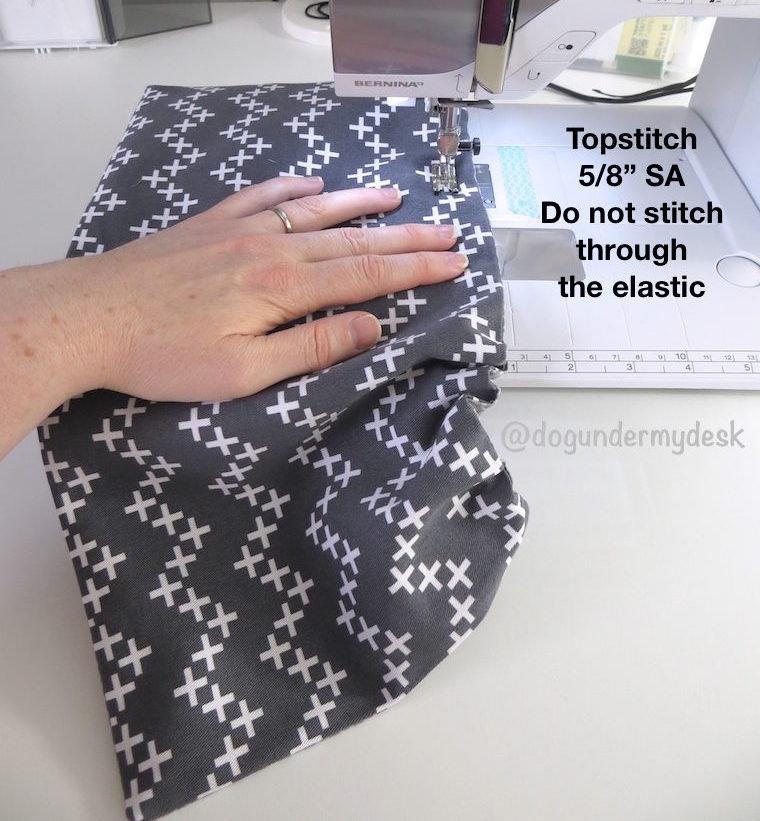
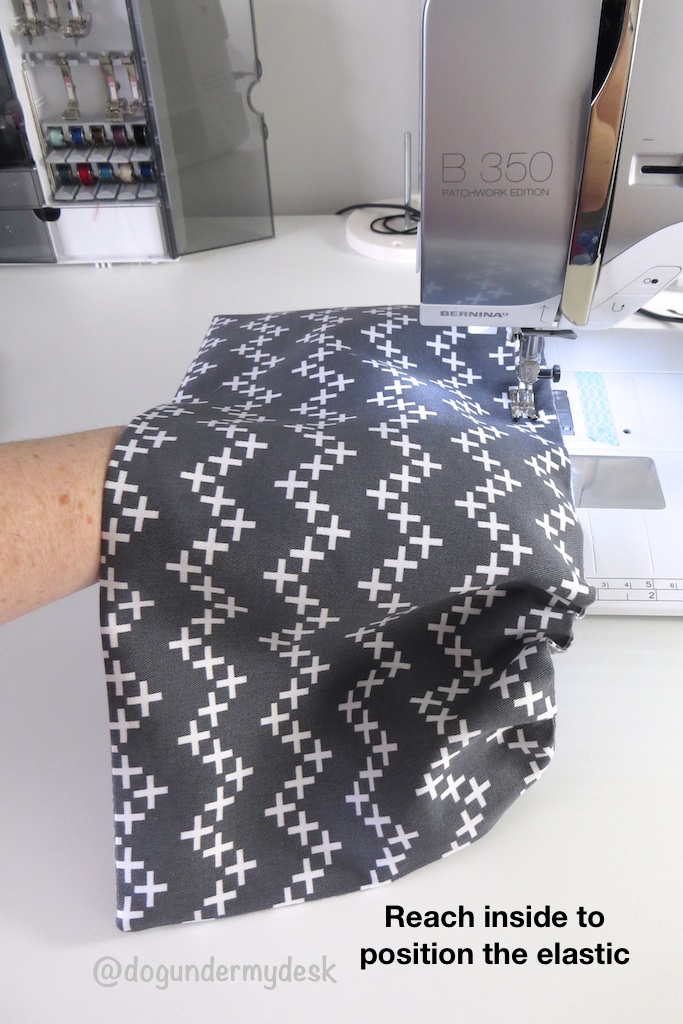
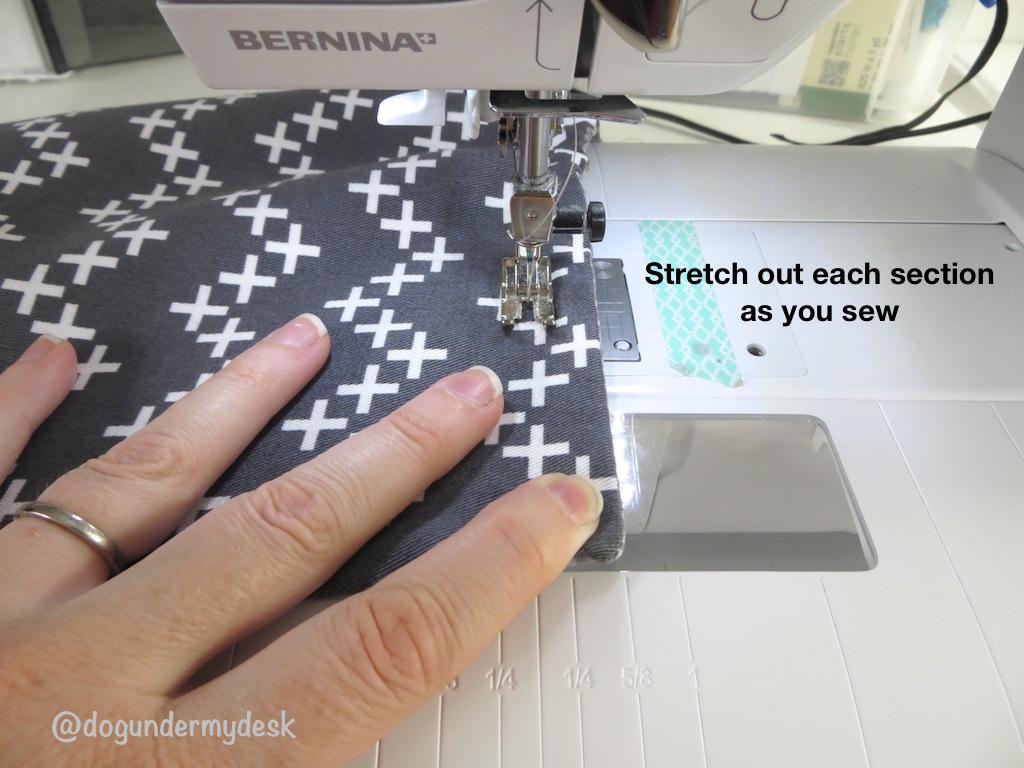
 Topstitch with a 5/8″ SA. Reach inside to position the elastic and then hold it firmly against the top of the seam as you sew. You are basically creating a casing for it now, and you don’t want to stitch over the elastic or the pocket will stretch and not gather evenly, or at all! Stretch out just the section that you are sewing. Go very slowly.
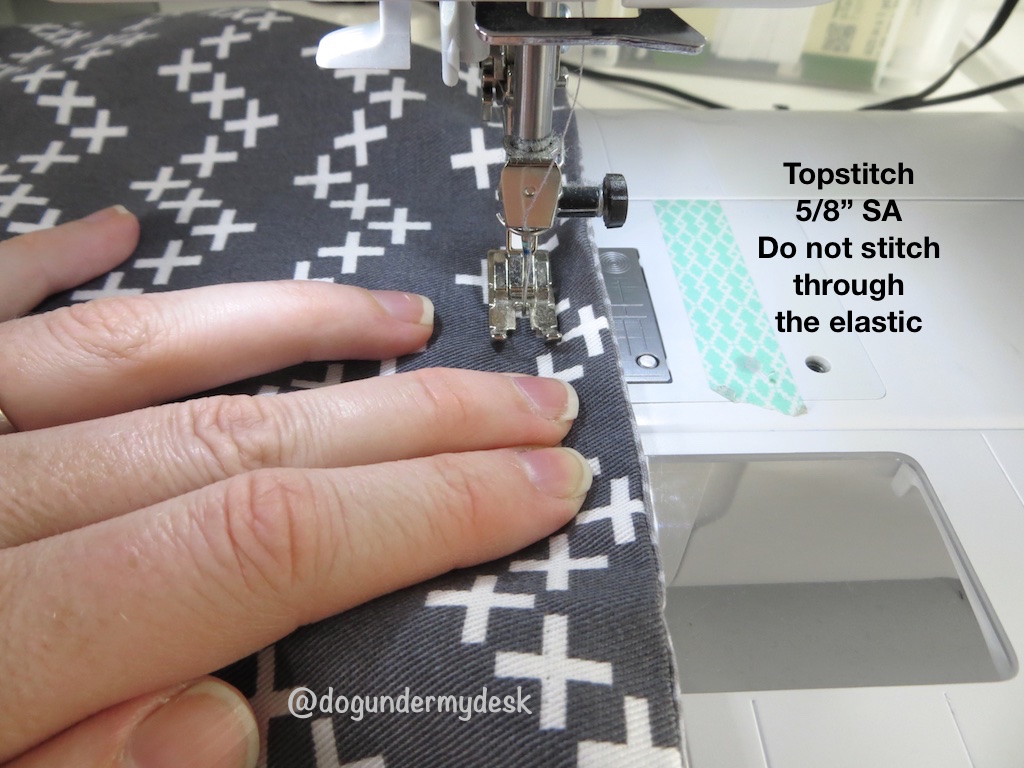
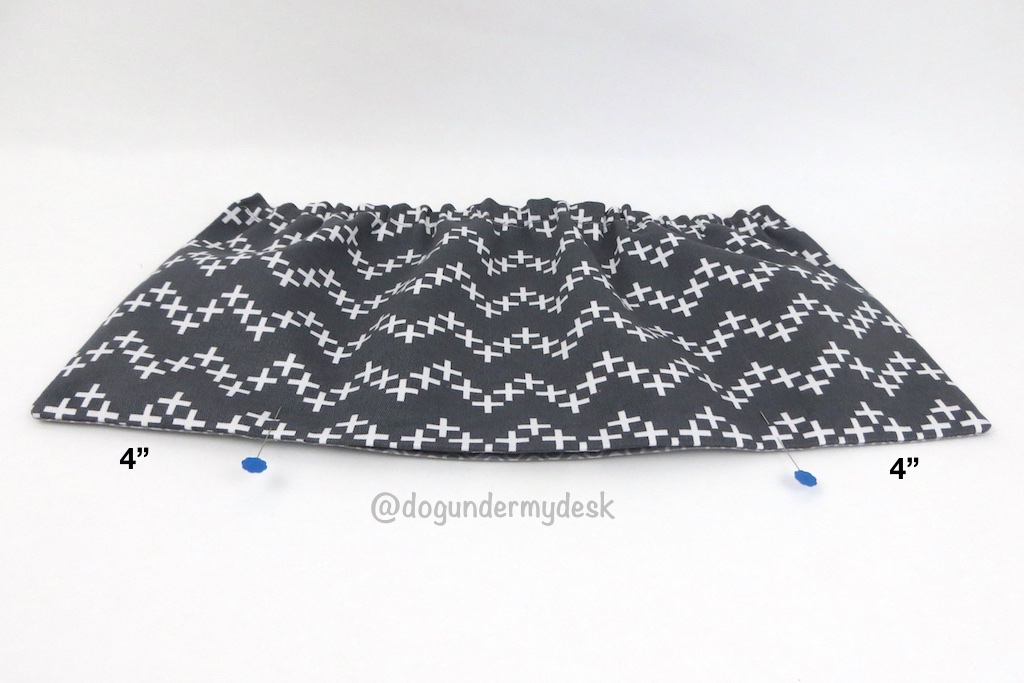
Now that the top is gathered, it should be narrower than the bottom. The bottom edge needs to be pleated to make the pocket a rectangle, as well as allow for larger objects like wipes containers to fit.
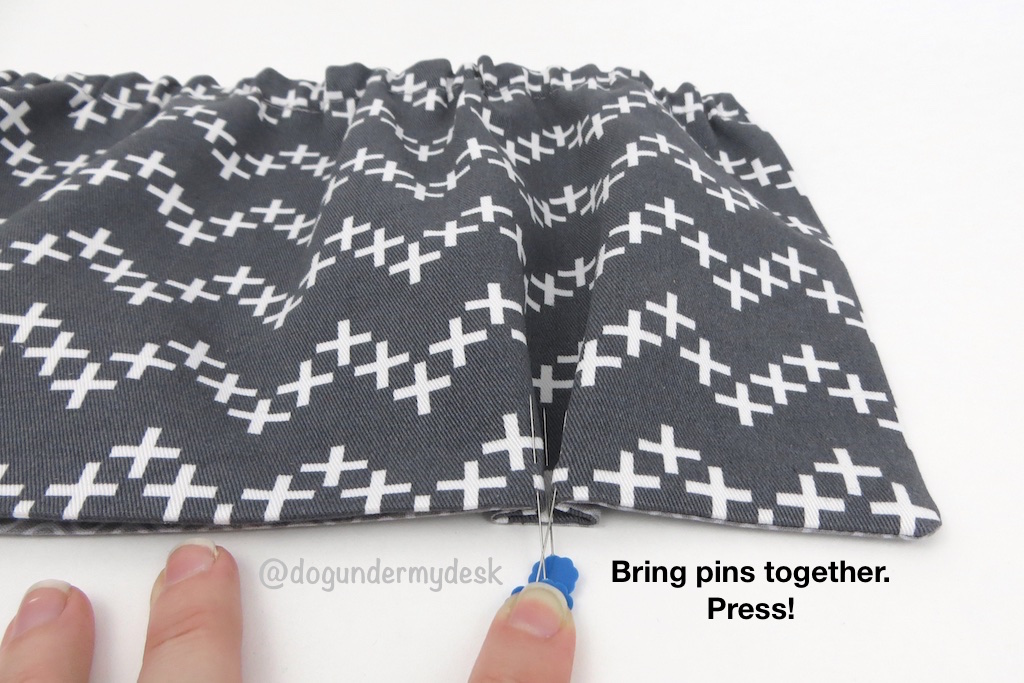
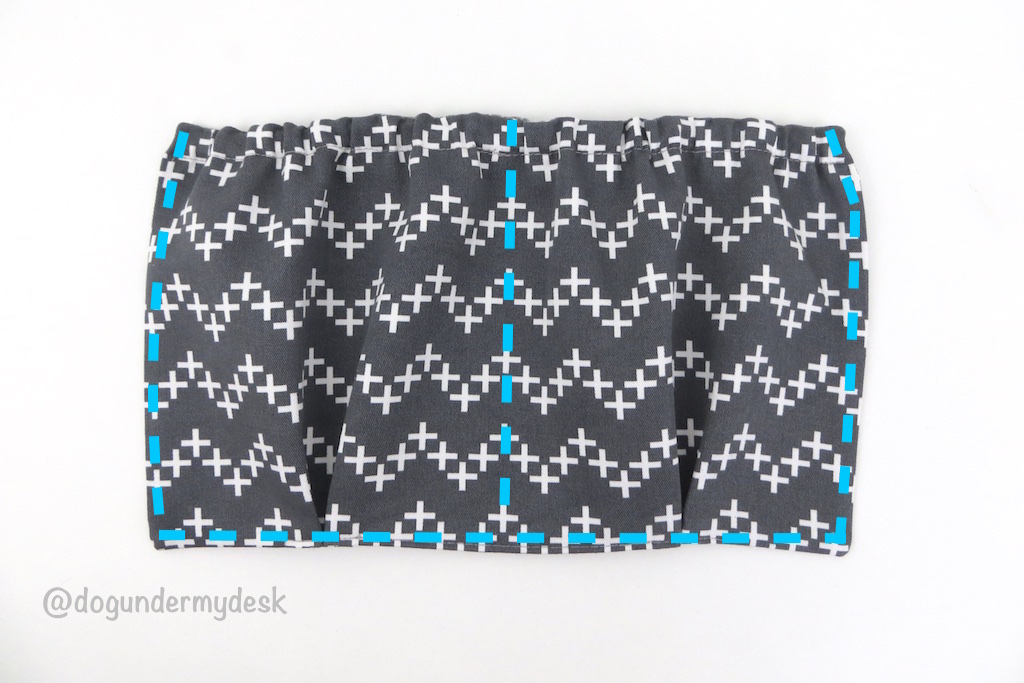
Mark or pin 4″ from each bottom edge.
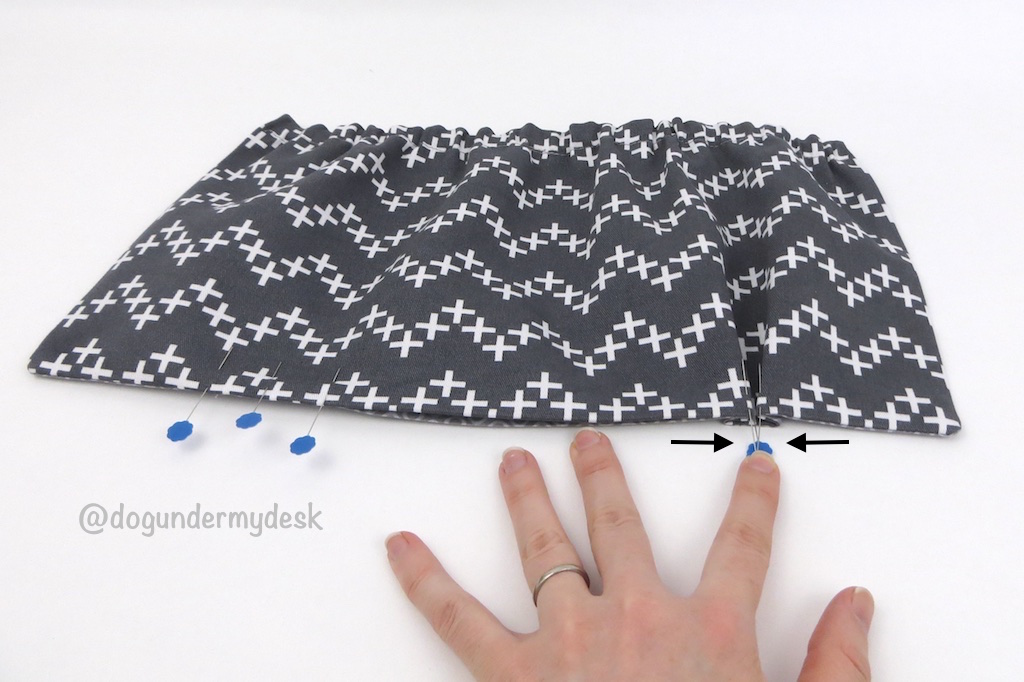
 Then mark/pin 1″ on either side of the first mark/pin.

Bring the pins/marks together to the center one and press!
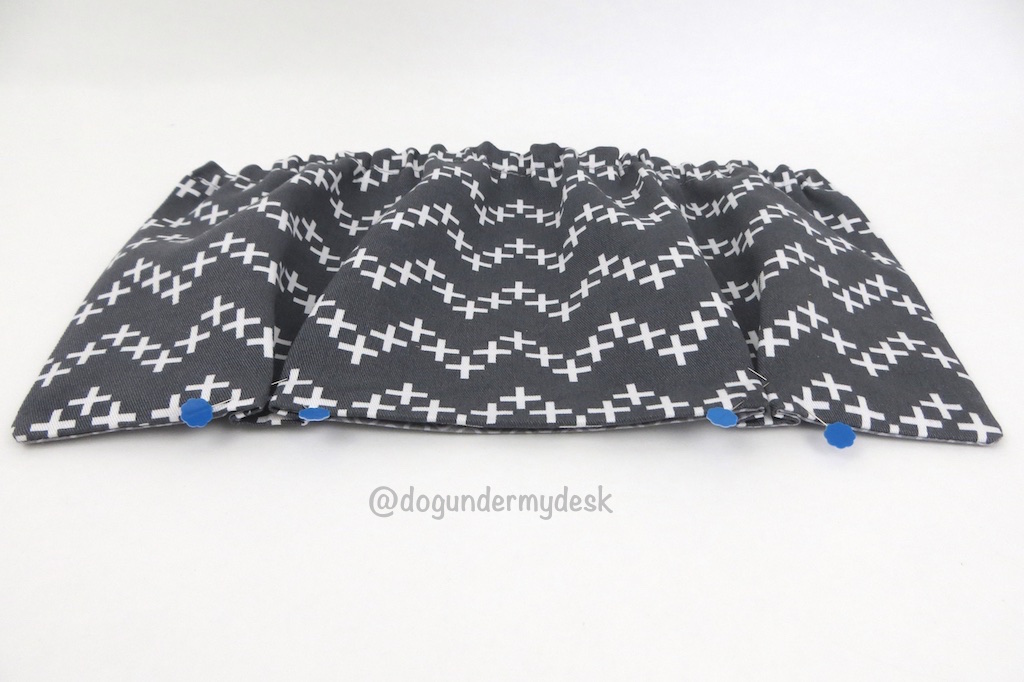
 Pin into place.
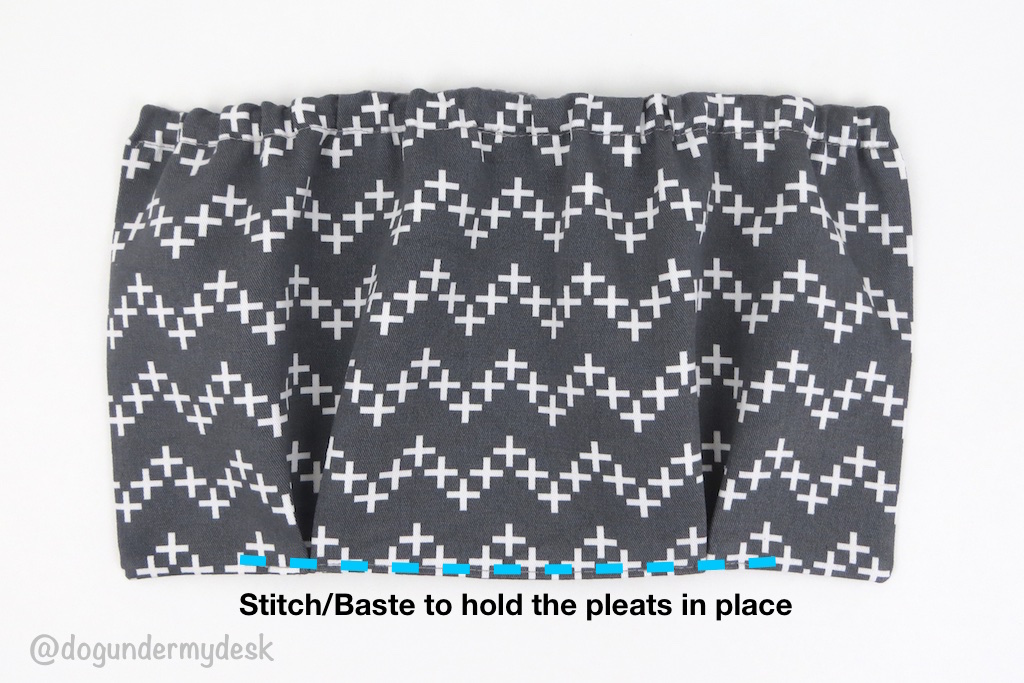
Baste along the bottom edge to hold the pleats in place. This will also close the opening.
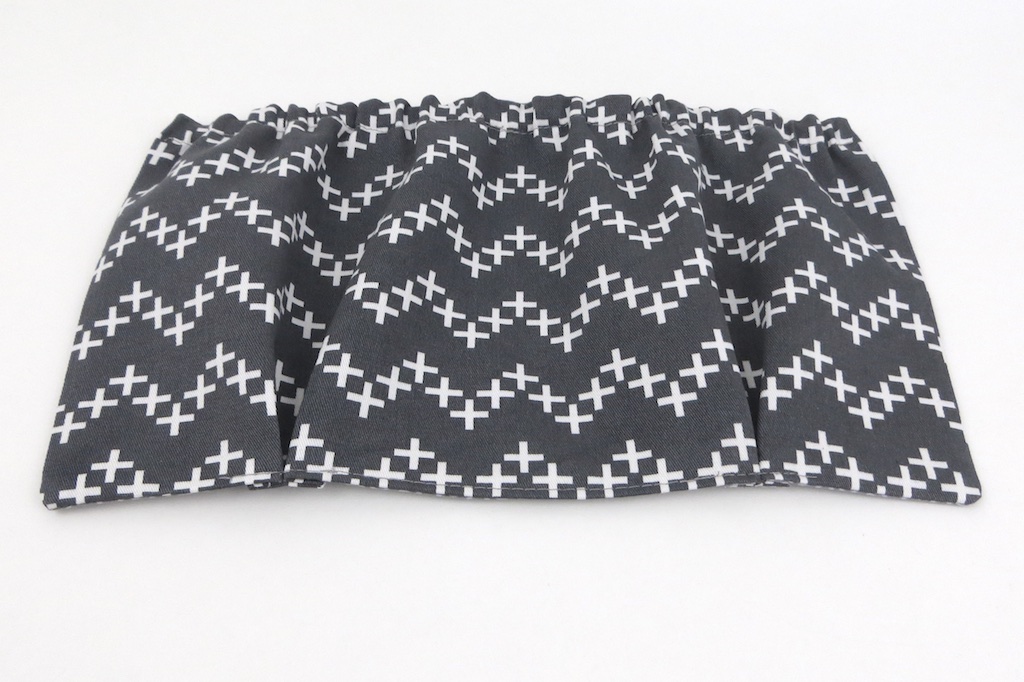
 It should look like this…
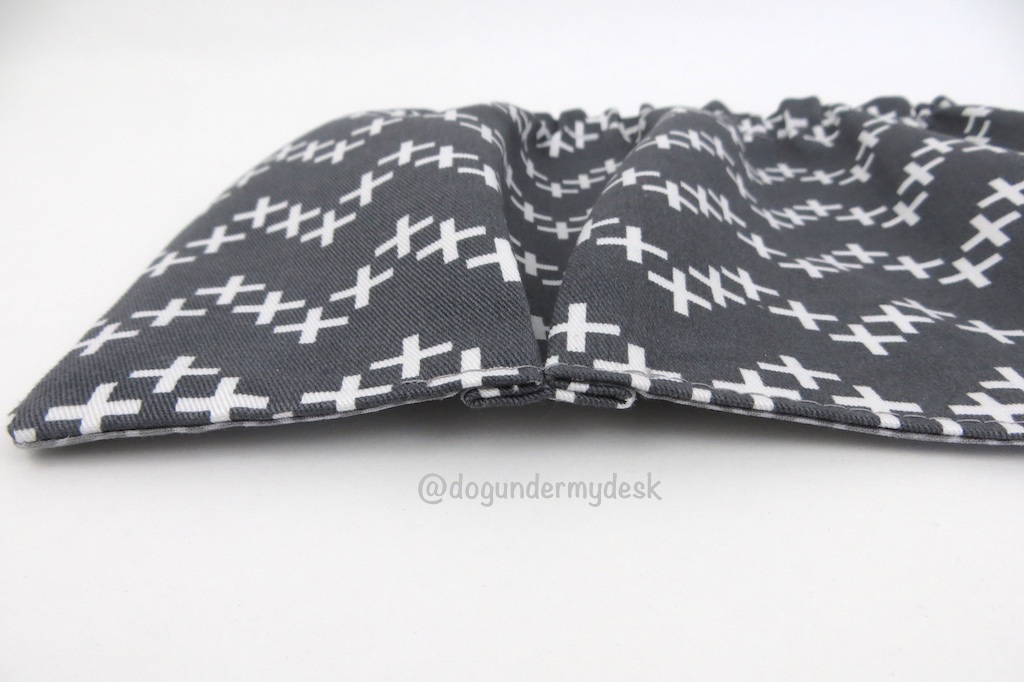

And from the back side…
 It should now be a rectangle (-ish) and fit into the original pocket pattern piece!

Stitch into place just like the original pocket in the pattern!
I really hope this satisfies your elastic pocket needs! :)

LOVE this way of doing a pocket, thank you for sharing!!
Ramona
Burlington ON Canada
Excellent step by step explanations and illustrations. Very clear and concise! Thanks for helping to expand my sewing universe. I hope to use this on a project bag.
So, looking at the pattern, this is a replacement for the side pockets on either side of the main bag, or piece D once they are all joined together?
I’m planning this out for the first time, trying to make a Pokemon themed bag for friends.
It’s for the inside of the bag. Either in addition to the inside pocket or to replace it. :)
Could this elastic pocket be put on the snide or outside of the Takeoff Tote?
Thanks! You just saved me from big mistakes. :D Now you are my pocket GOD.
Thumbs up and good luck in every step.
I love the fabric you used for the baby bags. Is it canvas and do you remember the line? I cant find anything I like :-) especially for boys. Cindy S
Hi Cindy! Which one did you mean? The teal one with the circles is Premier Prints canvas and I highly recommend it. The rocket ships are David Walker Jeans & Things Spaceships for Free Spirit fabrics, and it’s quilting cotton. The blue floral is a long out of print Michael Miller fabric called Santa Barbara. I hope that covers it!
Pretty much all of the baby bag fabrics are cute so you definitely covered it. Thanks.
Thank you for this tutorial. Will this inner pocket work with either the toddler or baby size version of It’s Time for a Change bag? I’m making the Toddler version of the bag and wondering if I should look at adjusting the size of this elastic pocket. Thanks, Sue
Erin, is there a way to print this tutorial as a pdf or save it as some sort of document? I like to save tutes to a folder on my computer. It’s hard to have to save random website addresses and then go online to see if it’s the one I’m looking for. Appreciate it!
You can right click and save webpage as “html” and it will make a folder with the images, and a HTML page, you can click and will see everything on this page. Other than that I don’t think there is. Love this pocket style and will be trying it out in the next week on my baby bag sized Time for a Change bag. Thanks Erin! ♥
Thanks for this. I want to make a protective bag for my light box, but need a pocket for the plug. This is perfect !
Great pocket and instructions! How do you calculate the measurements of the fabric, lining and elastic so that the finished piece matches the space I want to put this patch pocket in? Thank you!!