
 I am SO EXCITED for Halloween this year. Halloween hasn’t always been big in Australia, but they seem to be importing American traditions recently. Last year we headed out to our friends’ house in the suburbs to hand out candy, and the boys decided to interpret TRICK-OR-TREAT in their own way and shot silly string all the newbie Trick-or-Treaters. :P
I had no idea pumpkin carving wasn’t a thing there, so when our friends asked me to show them how to carve a pumpkin, we drove around to every grocery store in the area and called a dozen more and they were ALL sold out. This year, we will secure our pumpkins early, and I brought one of those kiddie carving kits.
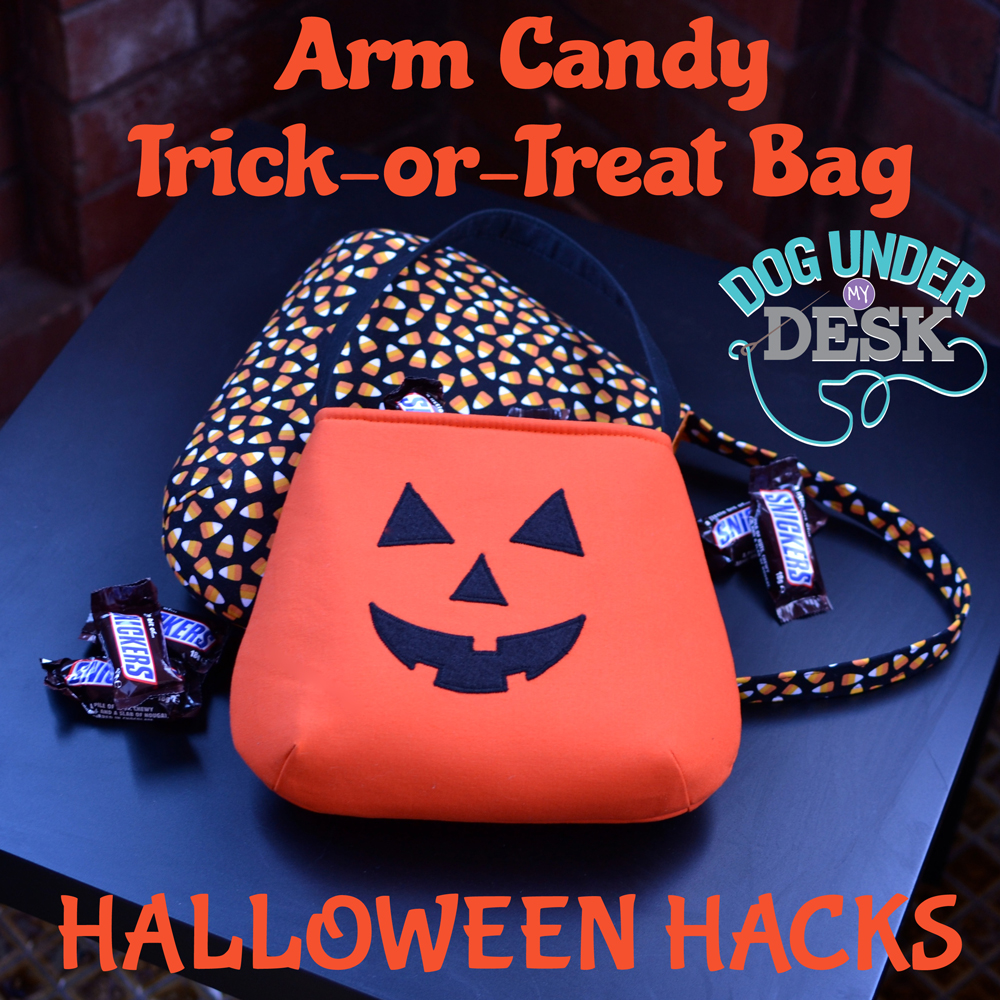
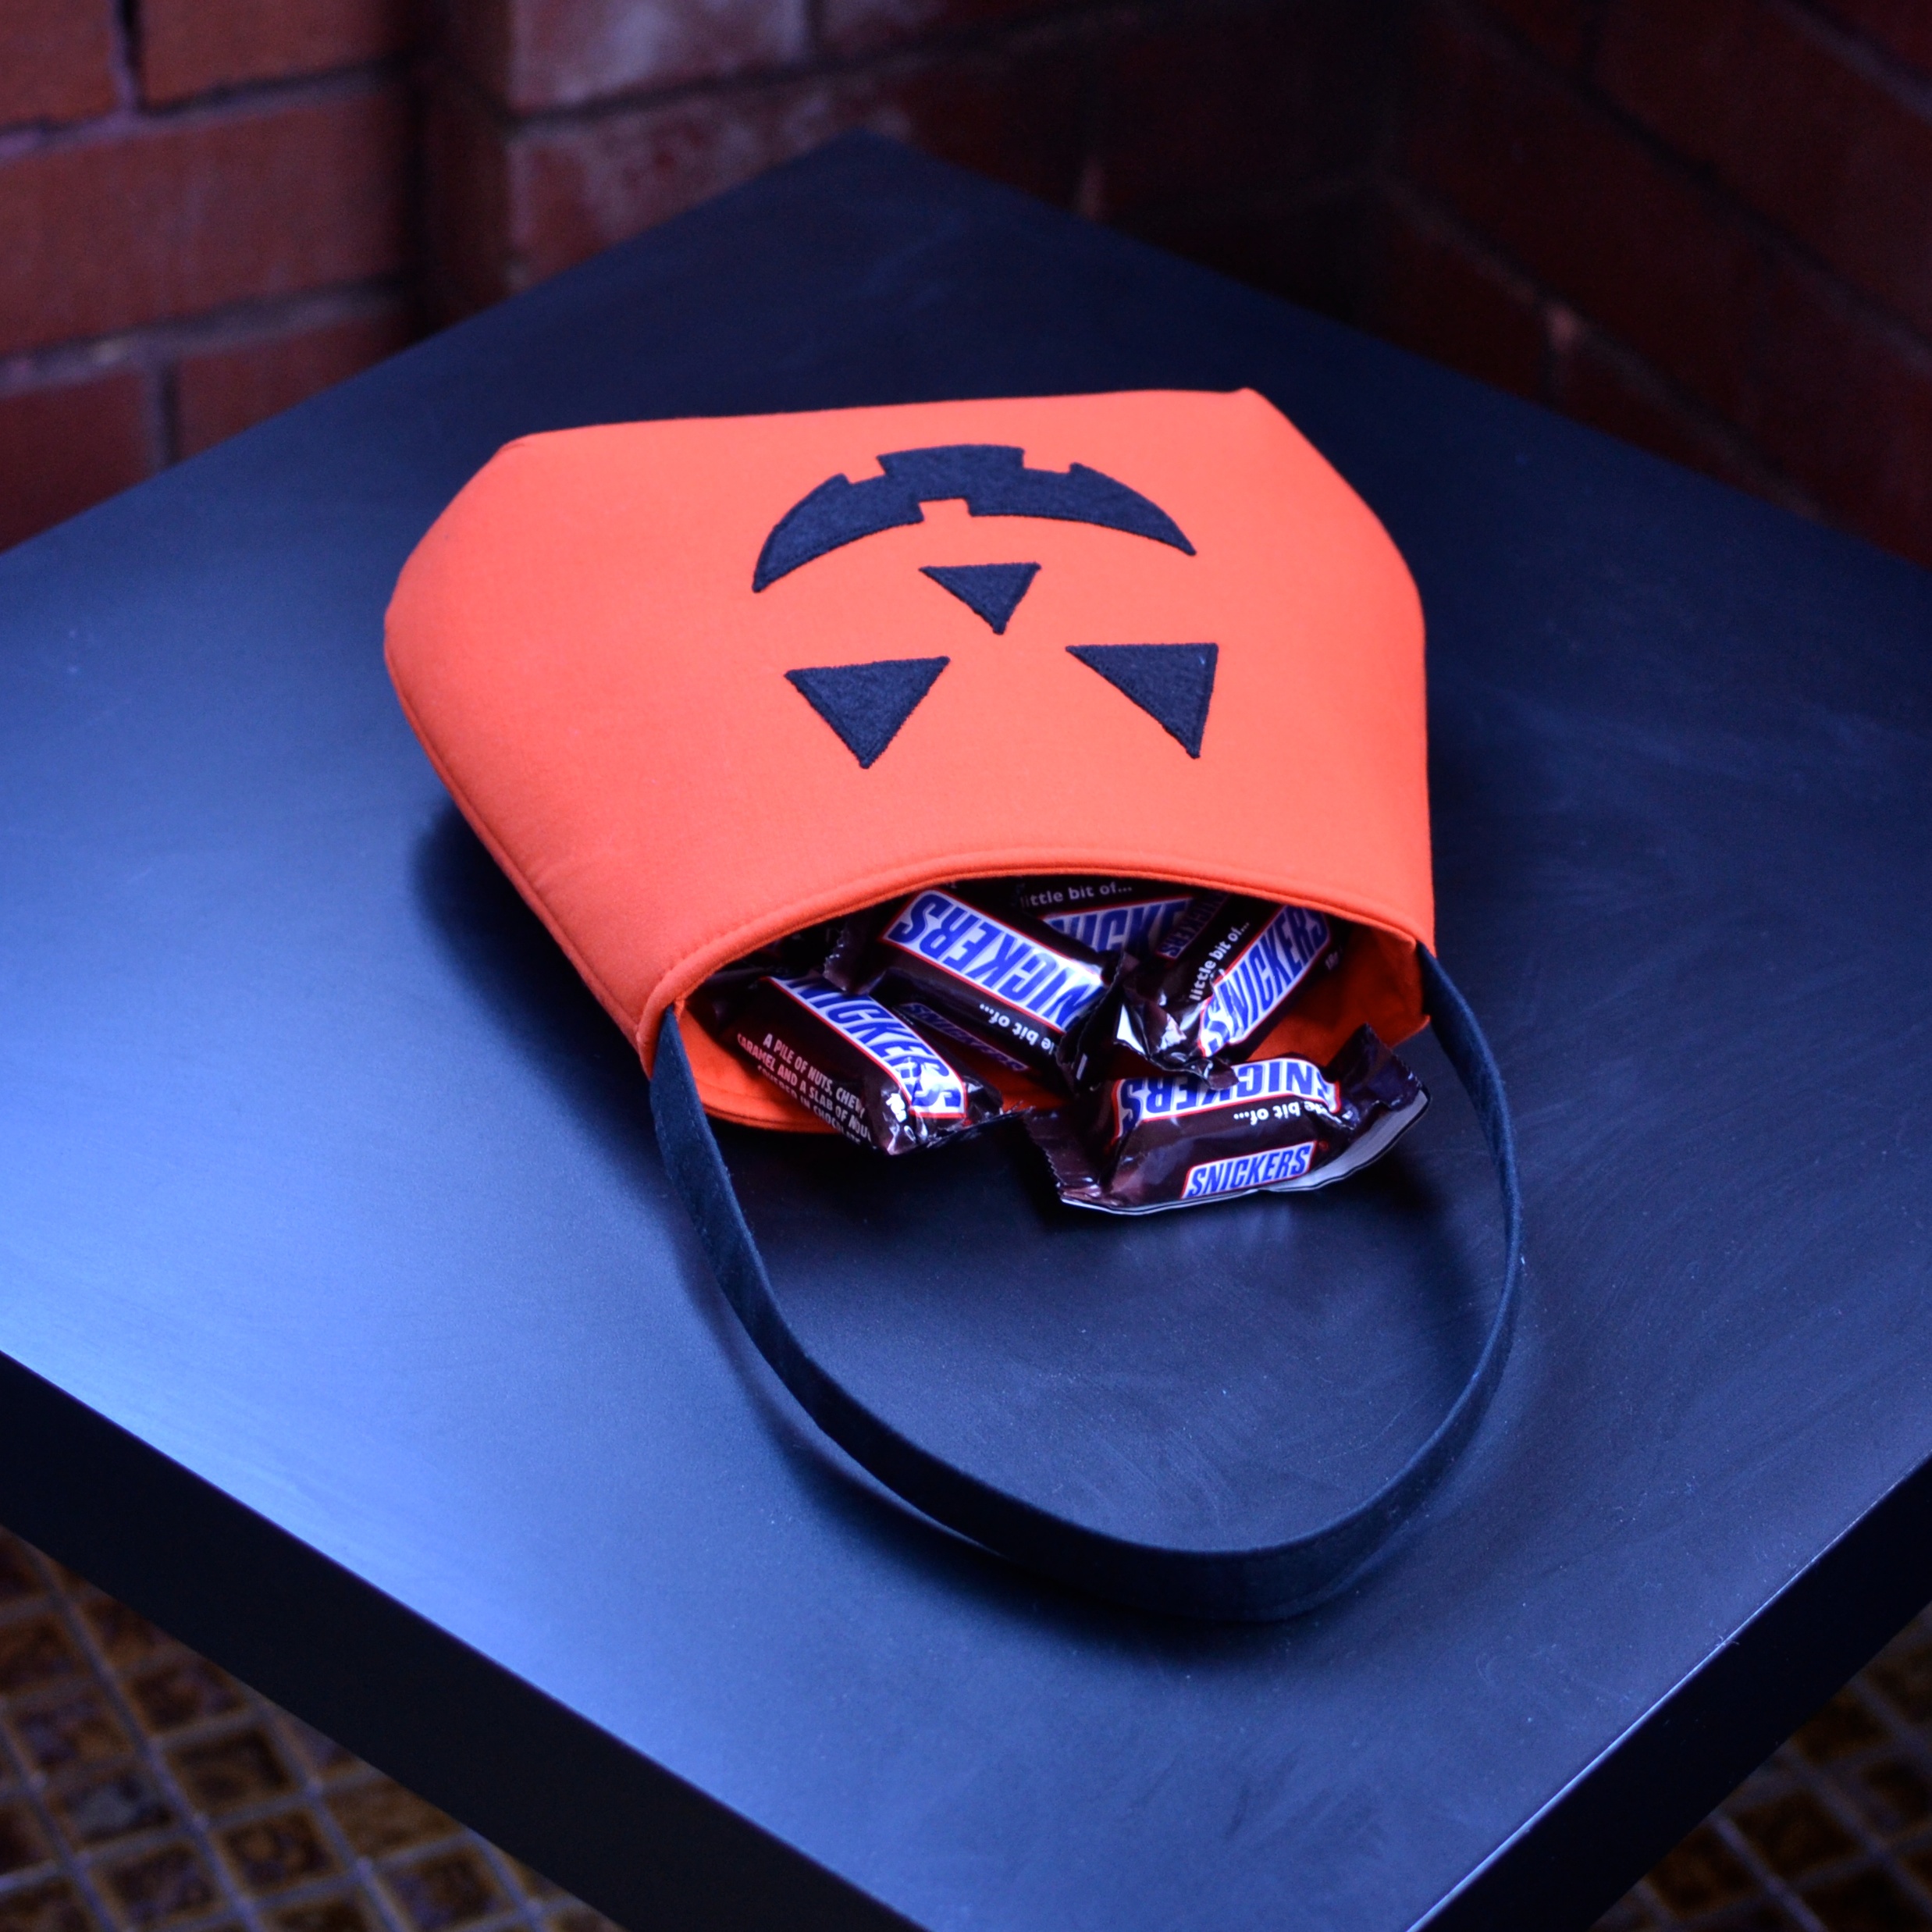
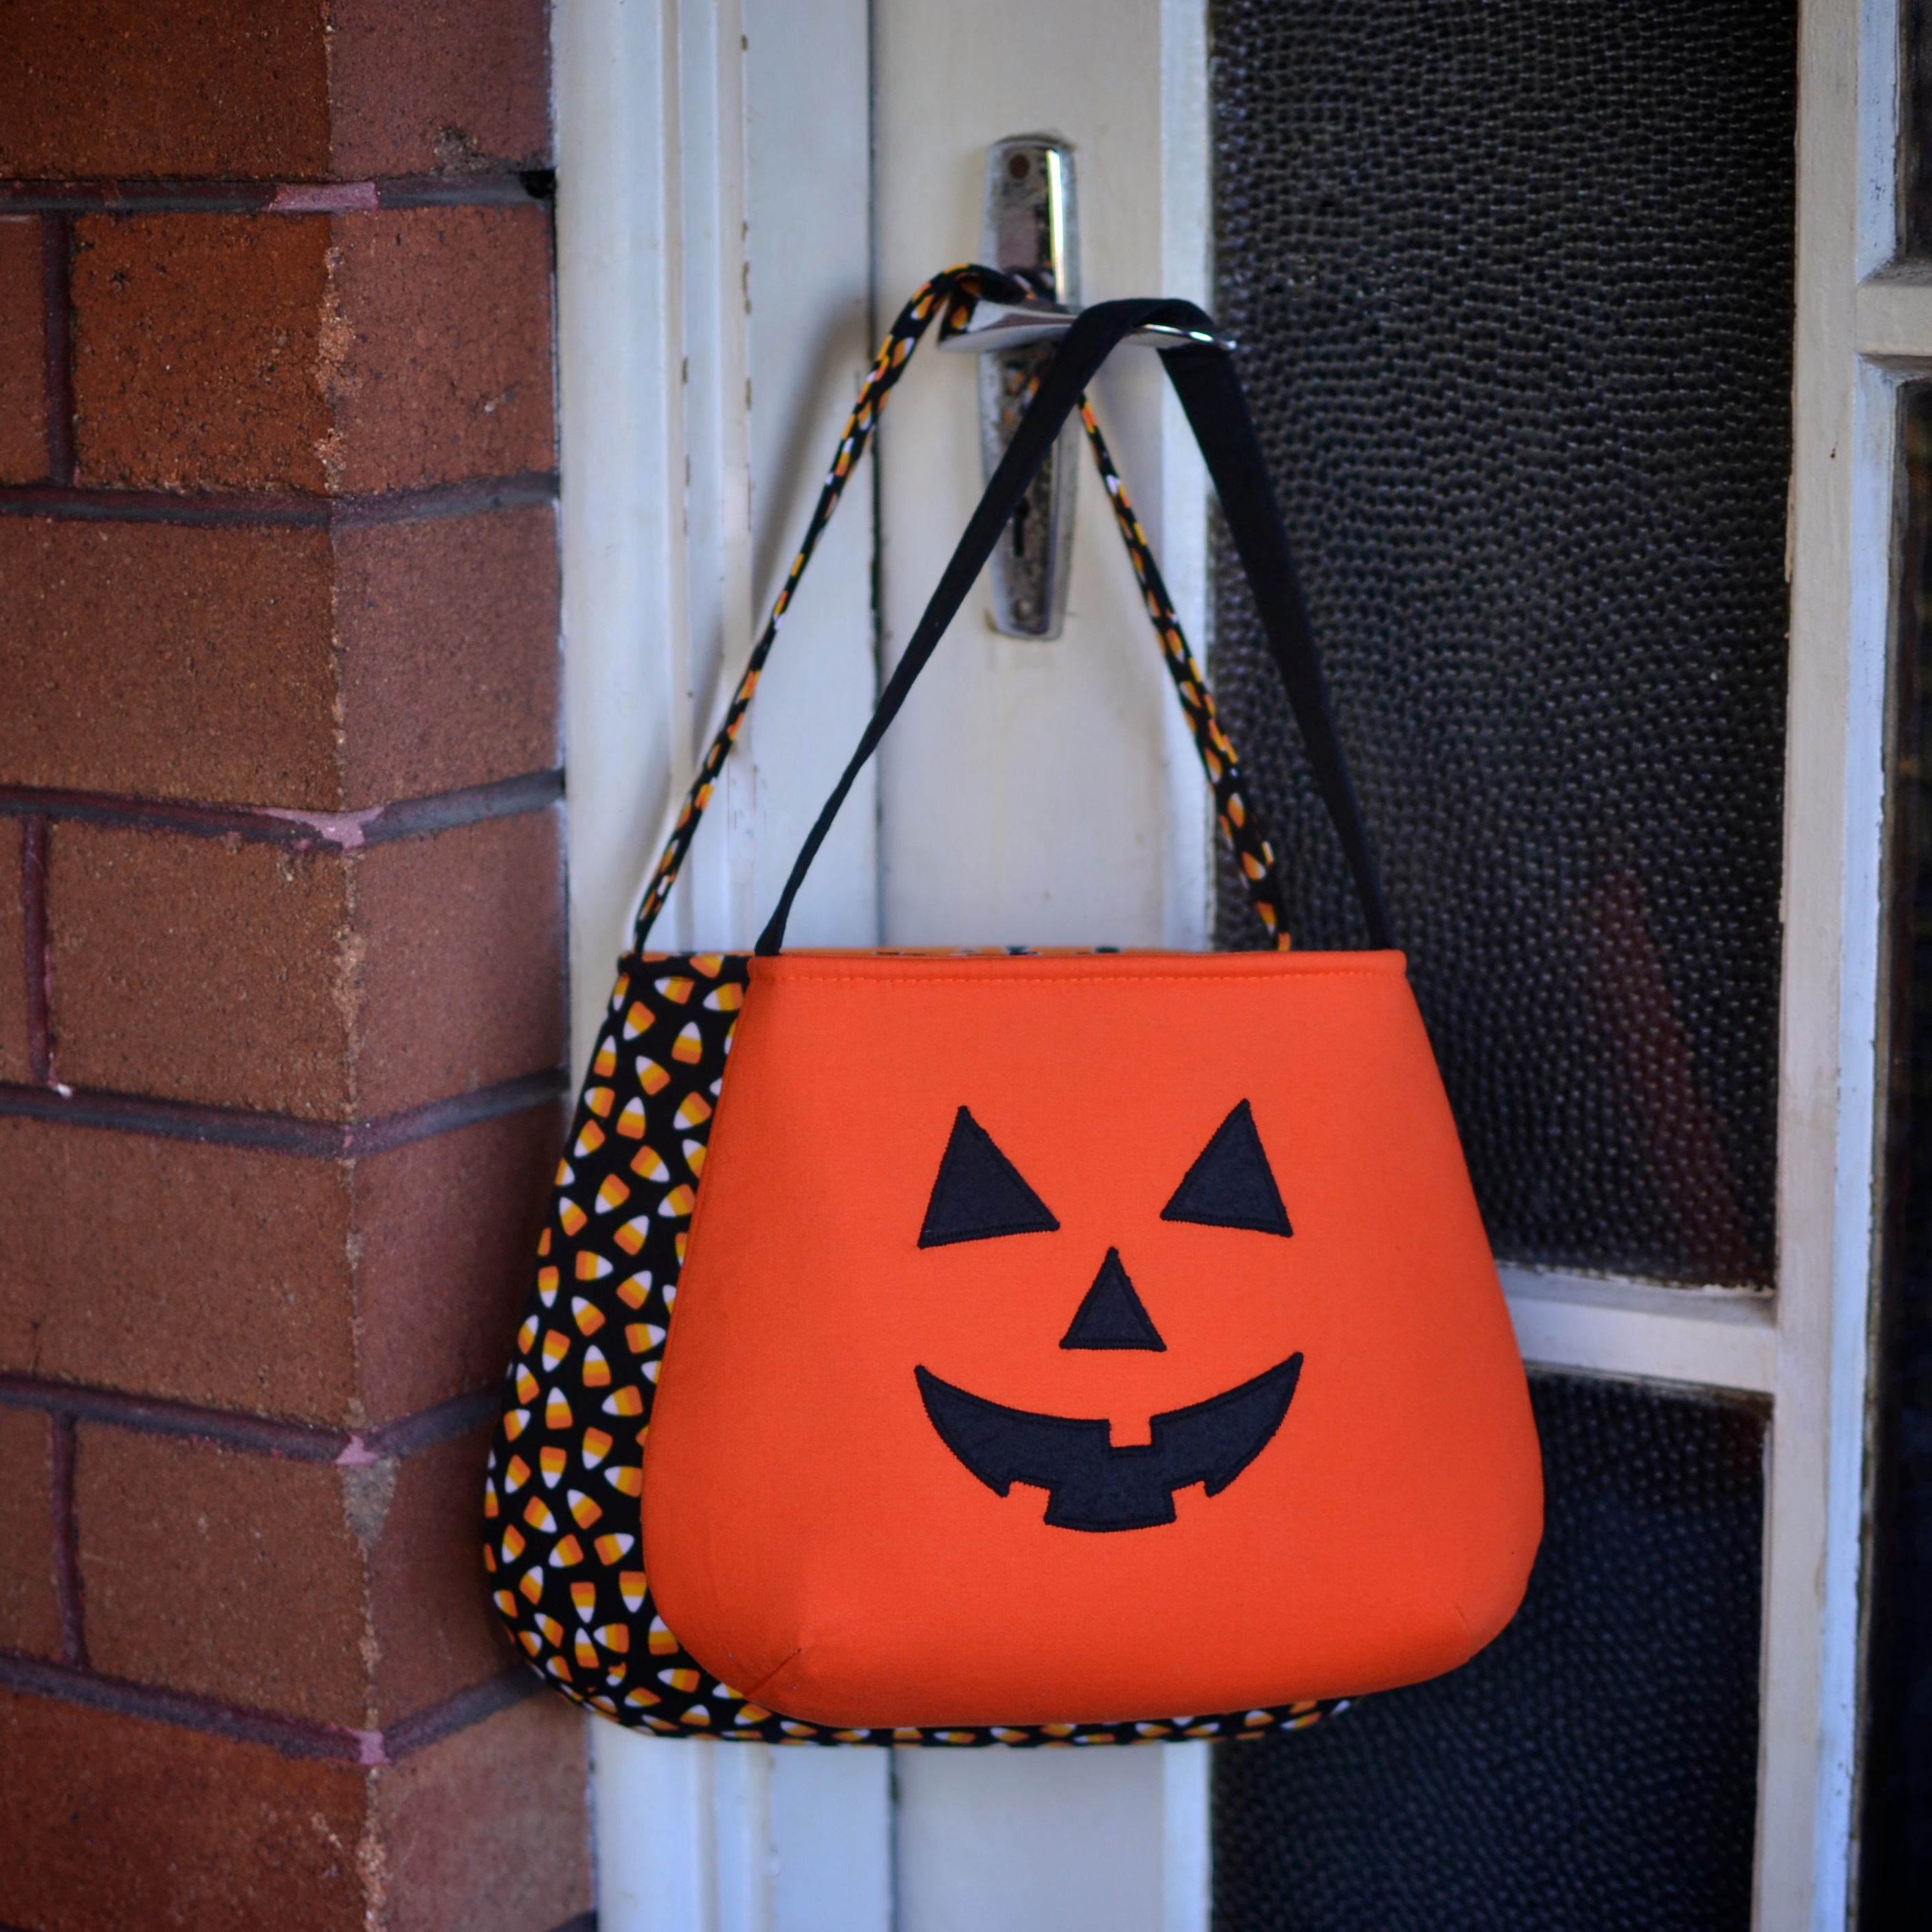
Anyway, when Stephanie from Swoodson Says contacted me last month to ask if I wanted to participate in the Halloween Hacks blog tour, I said YES!! I was working on Arm Candy and I just thought it would be PERFECT and EASY as a Trick-or-Treat candy bag.
Now for the Trick-or-Treat Bag!!
First, you’ll need the pattern: Arm Candy
Tape Pieces A & B together before you cut anything out. I suggest rough cutting and block fusing before cutting the quilting cotton. This will replace the Pieces A & B in the pattern.
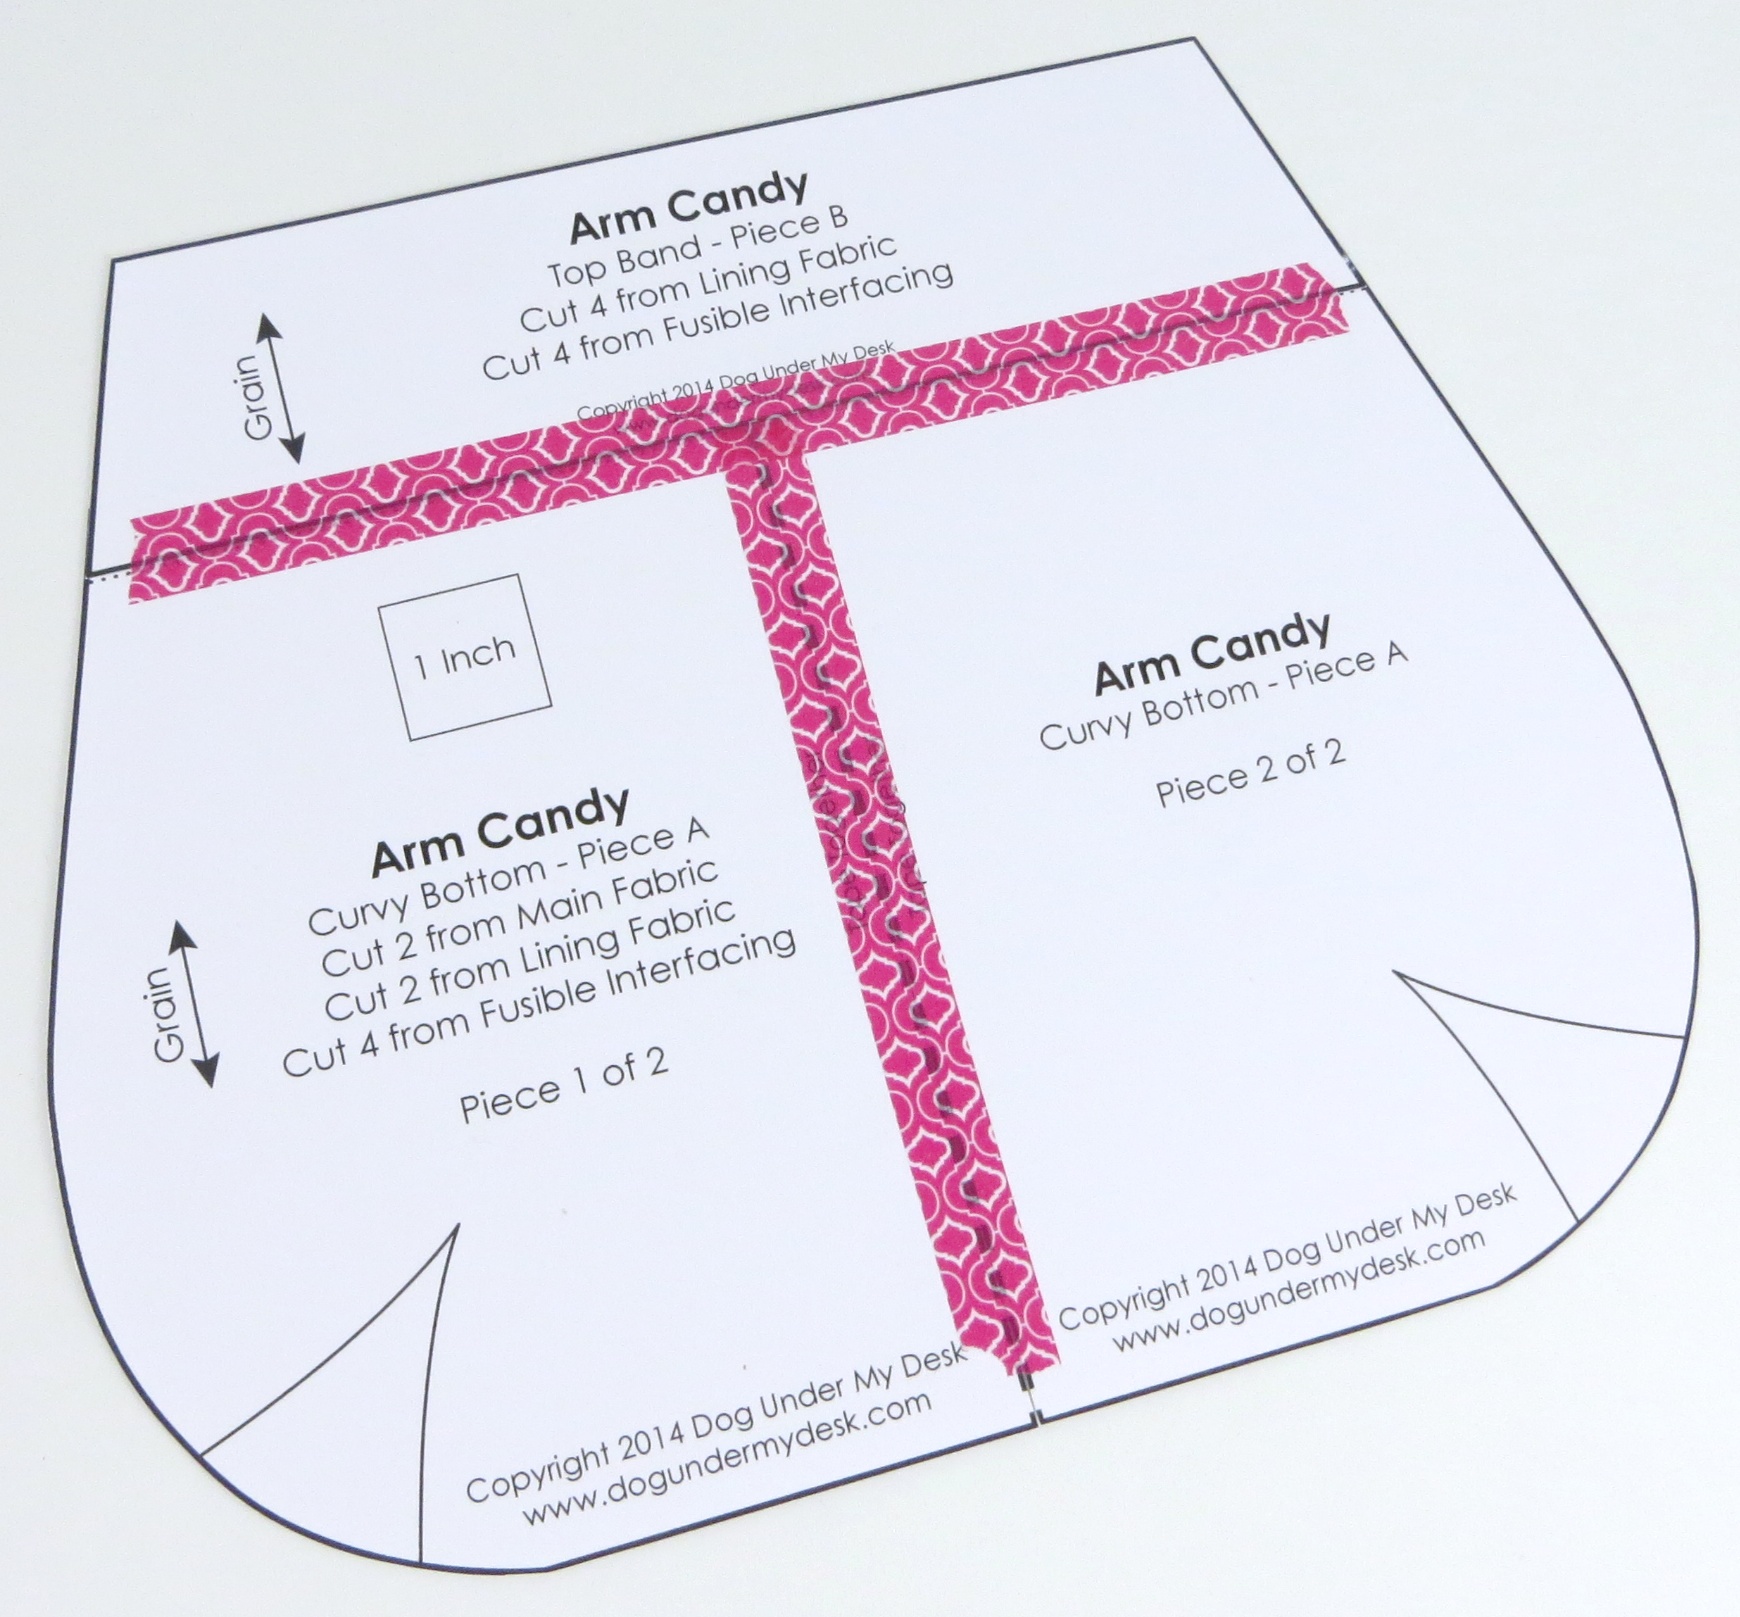
From the combined A&B pattern piece:
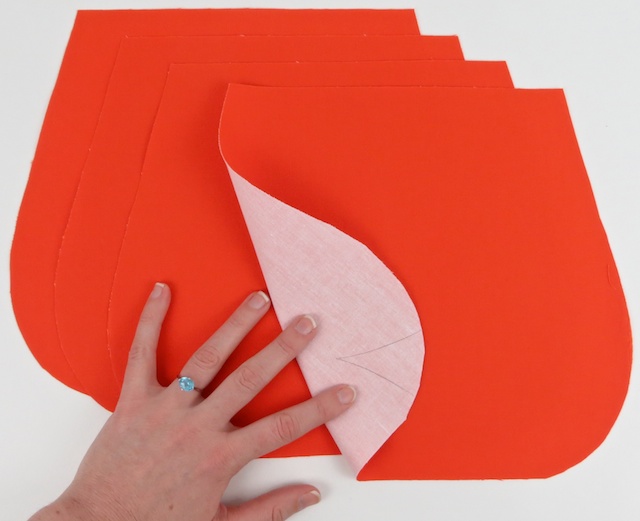
Cut 2 from main fabric
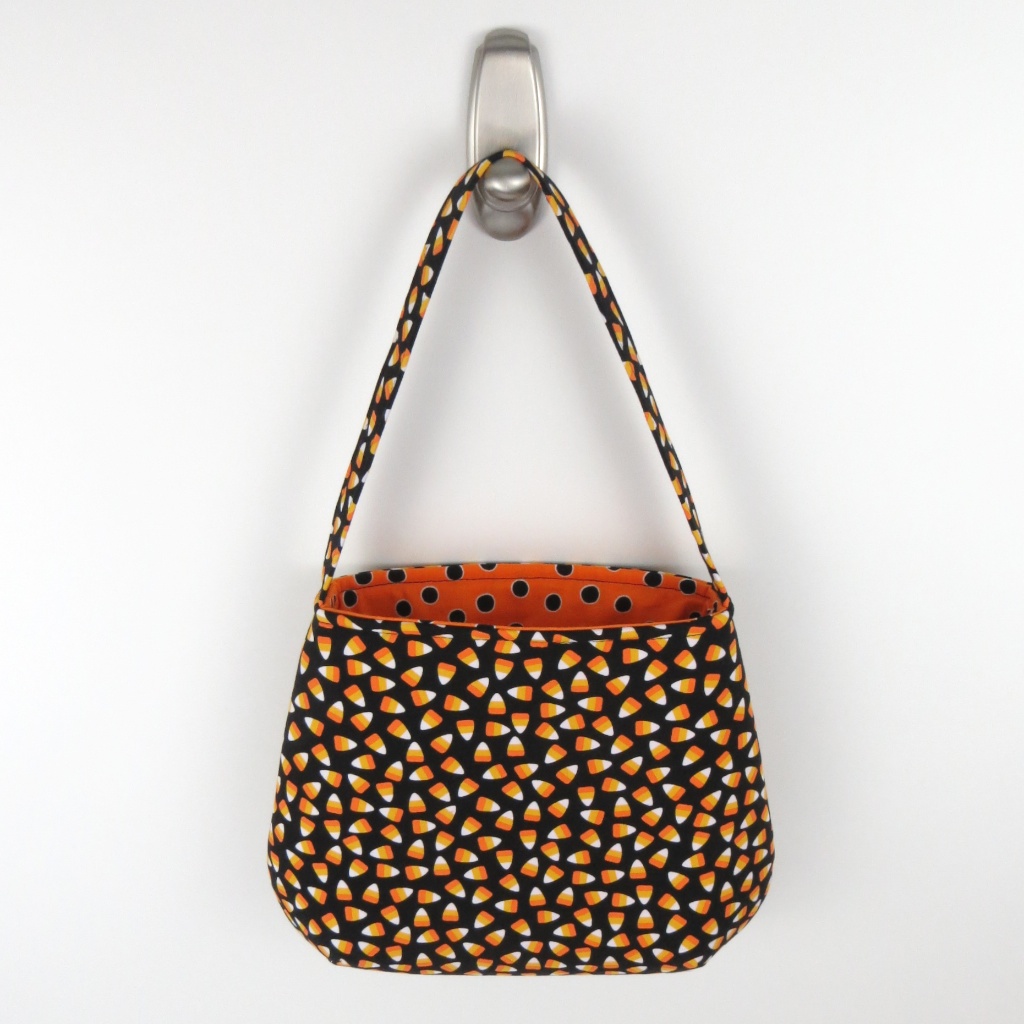
Cut 2 from lining (I used Kona Orange for all four pieces)
Cut 2 from foam batting alternative
Cut the strap to 3″ x 17″ like in the pattern.
Mark the darts on all four main body pieces and the foam.
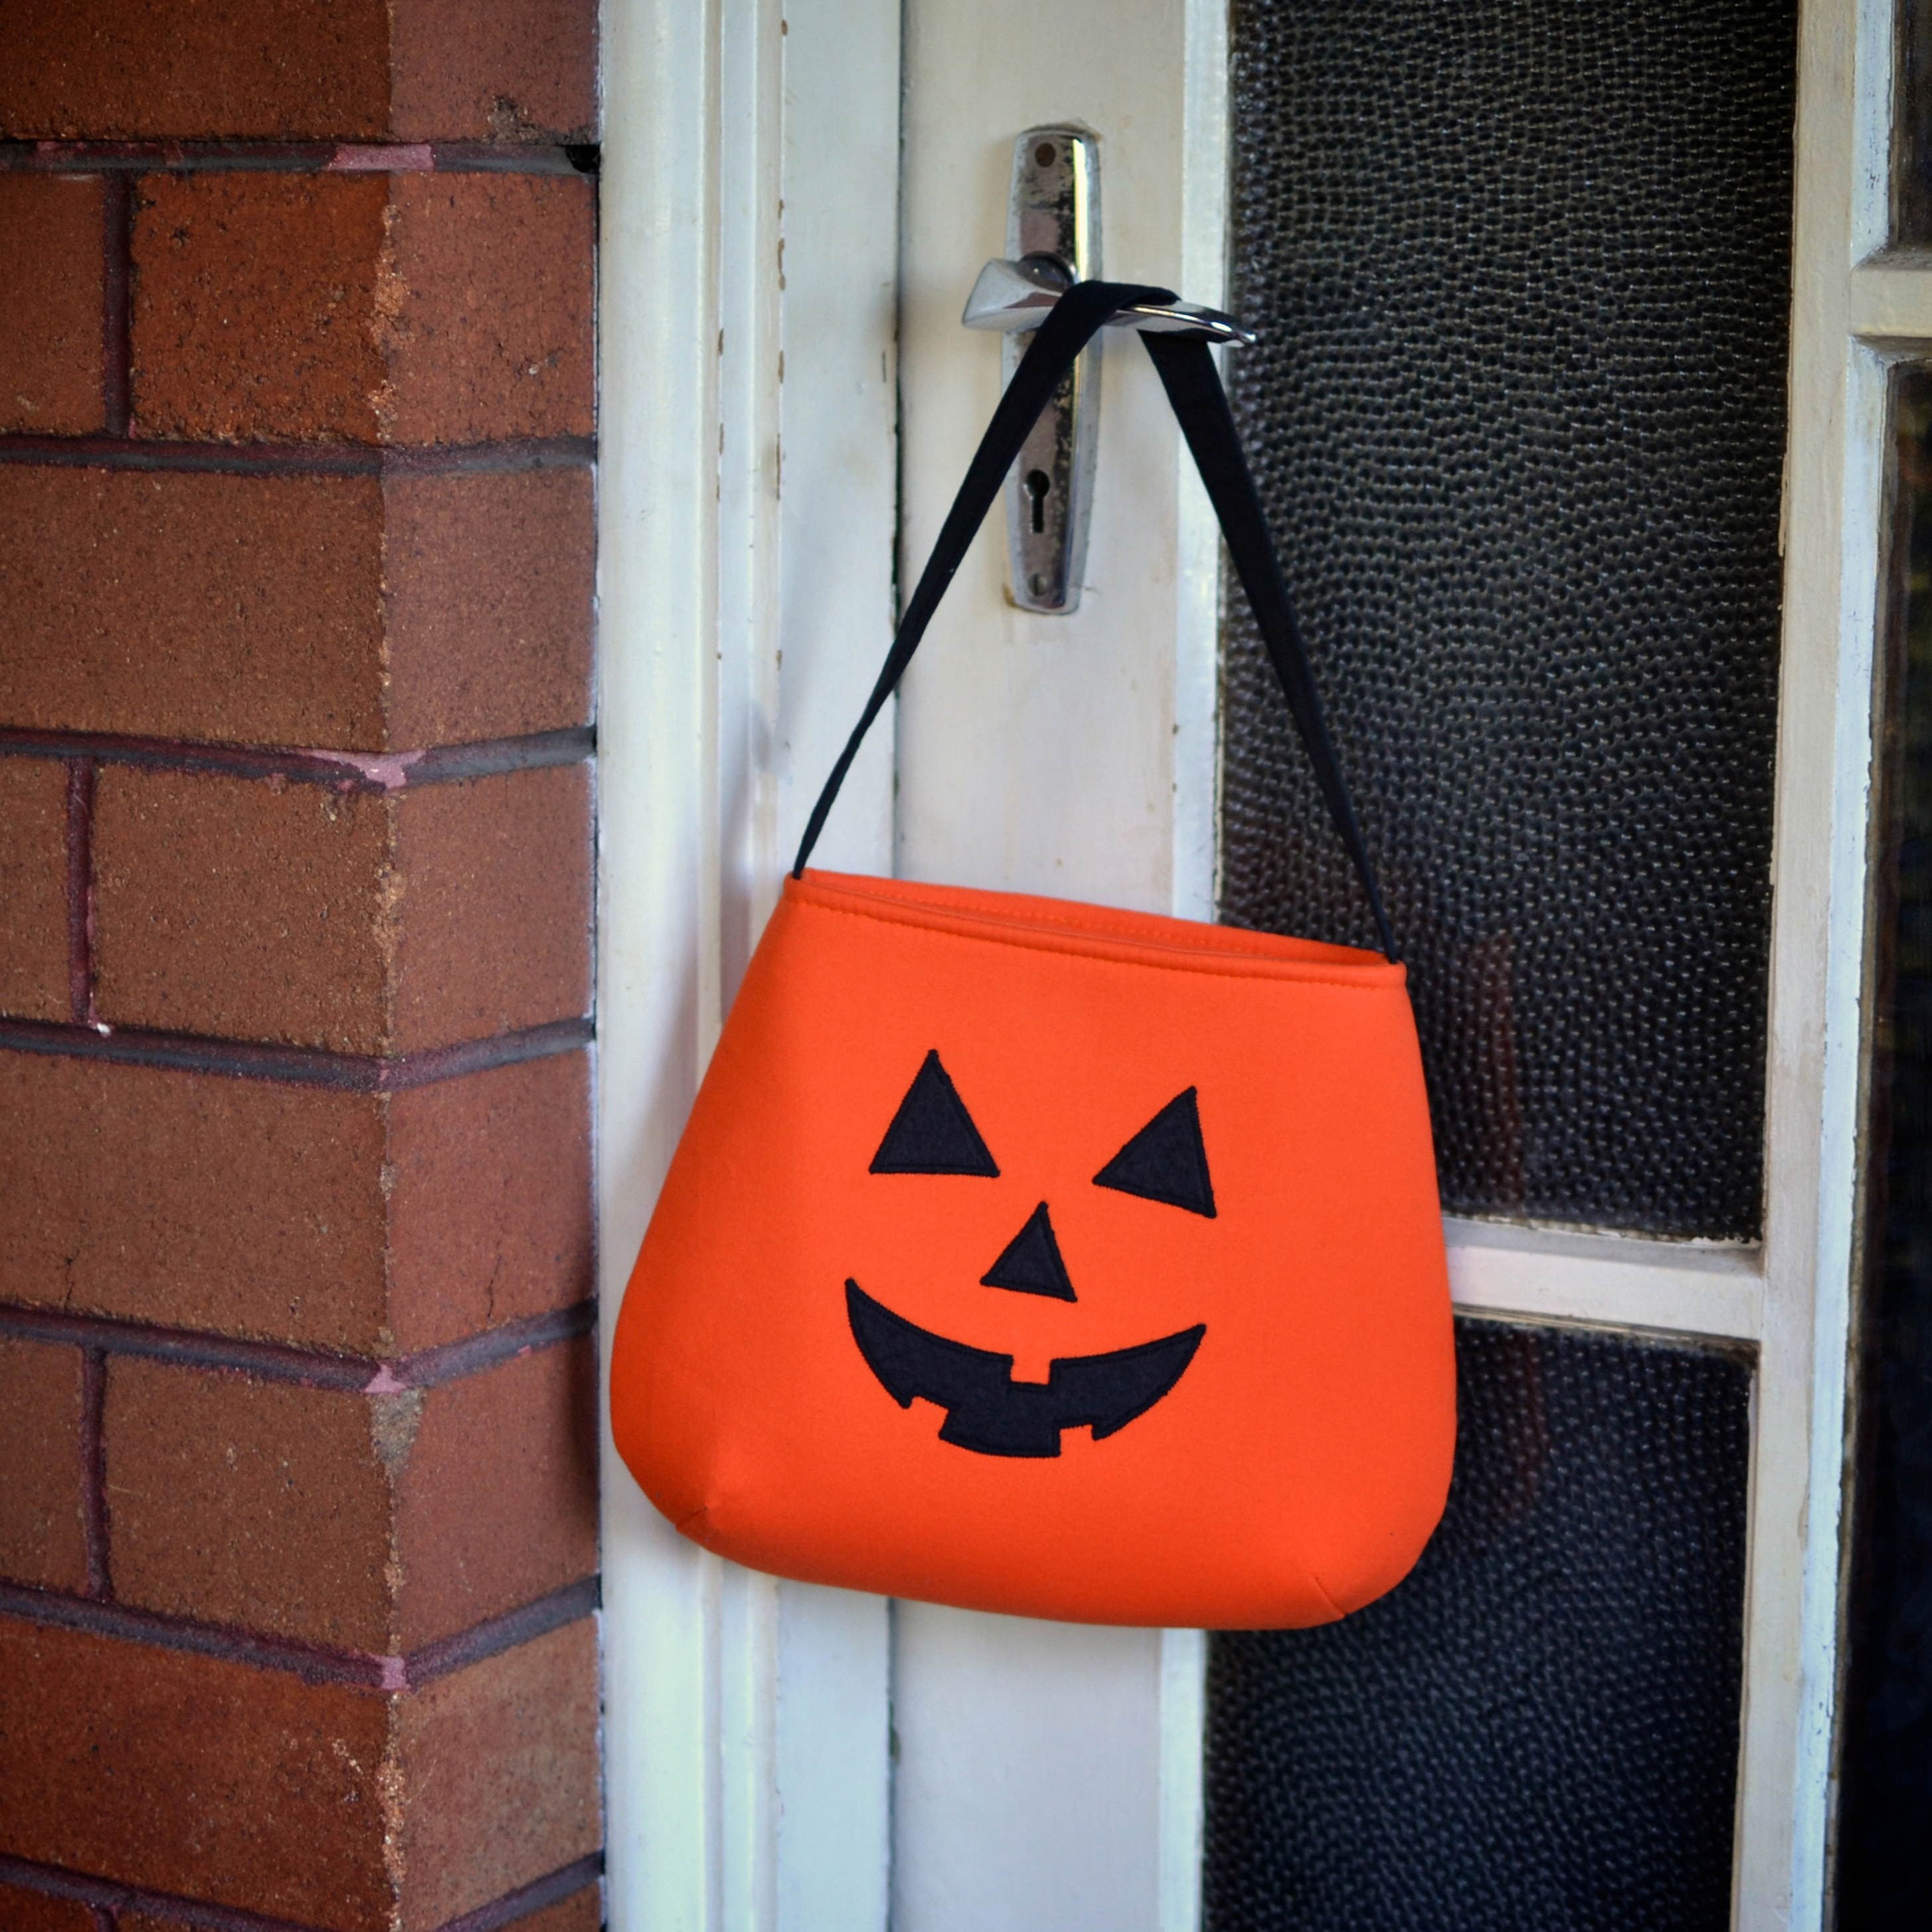
Print the jack-o-lantern template HERE, and rough cut a piece of black fabric or wool felt and a piece of sewable, paper-backed fusible web (I’m using Wonder Under). You can totally draw your own face, just make it the same size!
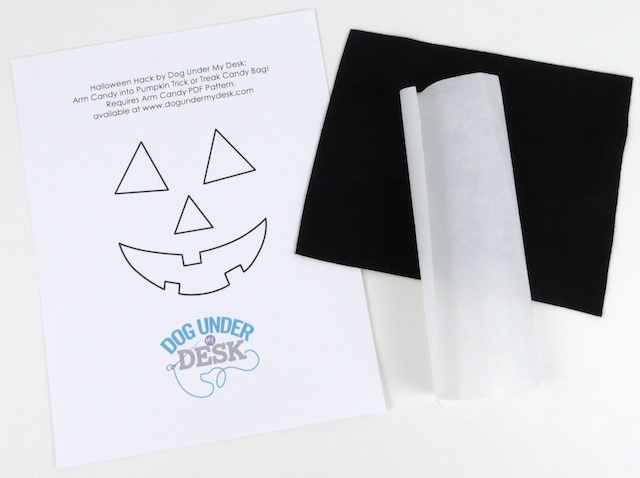
Place the fusible web over the face, and trace the face onto the paper side with a Sharpie or pencil.
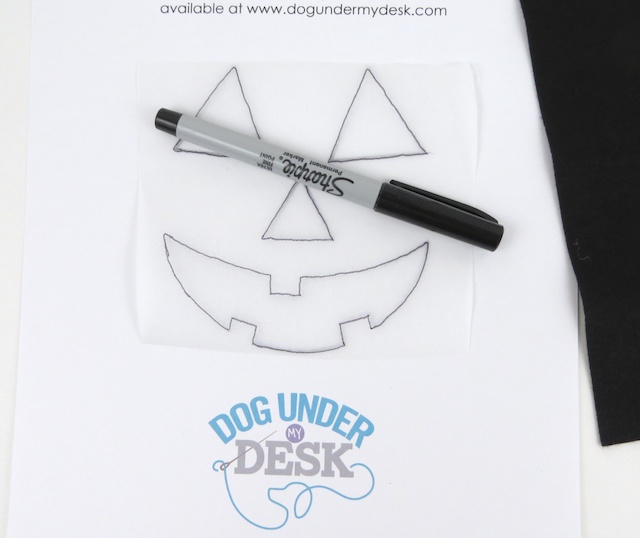
Cover with a press cloth and fuse the glue side of the fusible web to the fabric or felt (on the wrong side, if you’re using fabric with a RS/WS). Read the instructions on your fusible product, but it usually only take 5-10 seconds, and you can see the color change.

Cut out the pieces and peel off the paper backing.
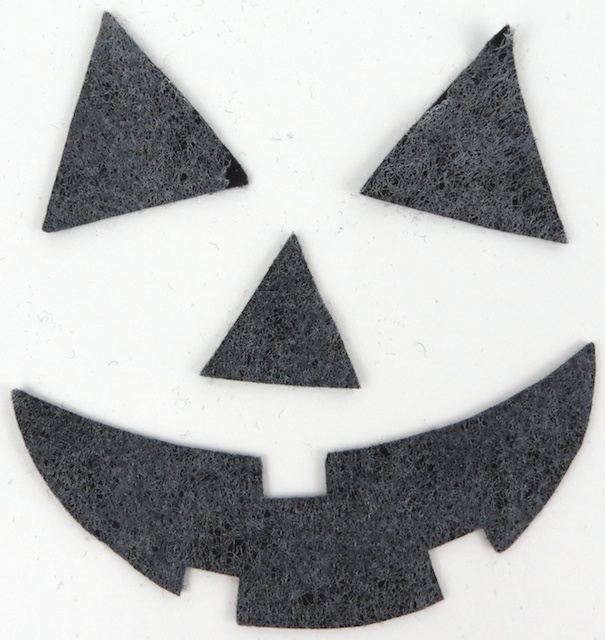
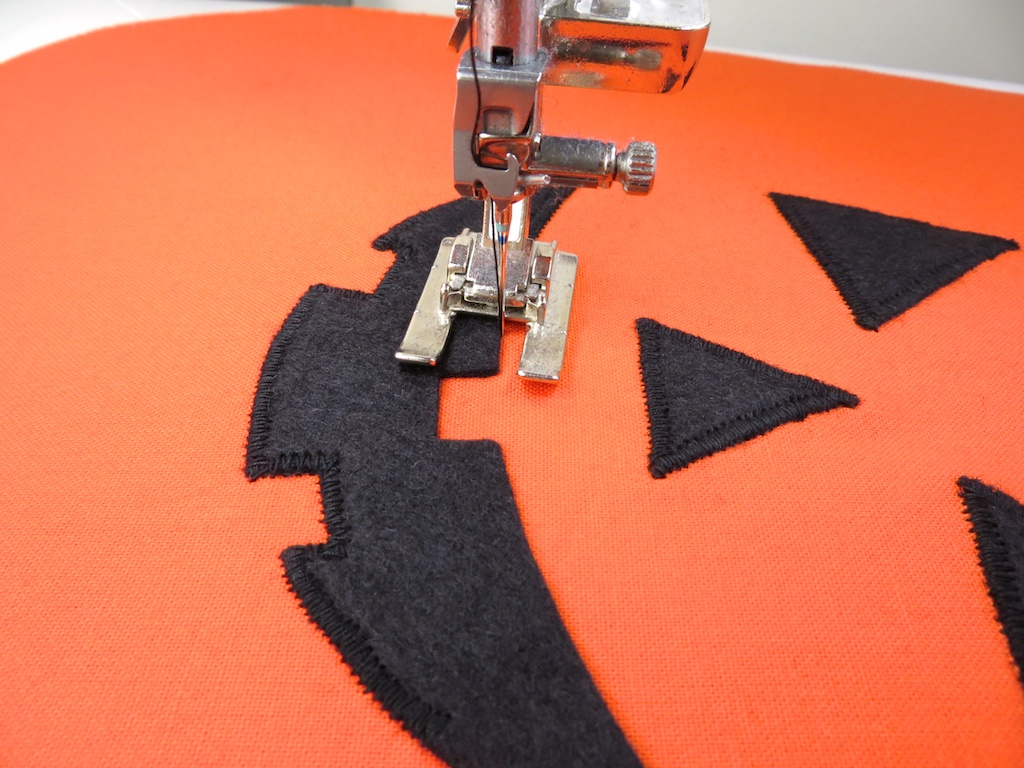
On one main fabric piece, arrange the face pieces (glue side down) 2″ down from the top. Cover with a press cloth and press, and then flip over and press with steam from the back side.
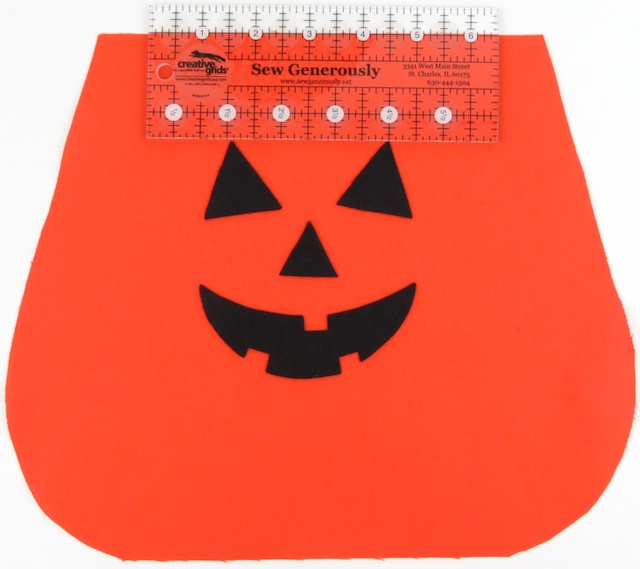
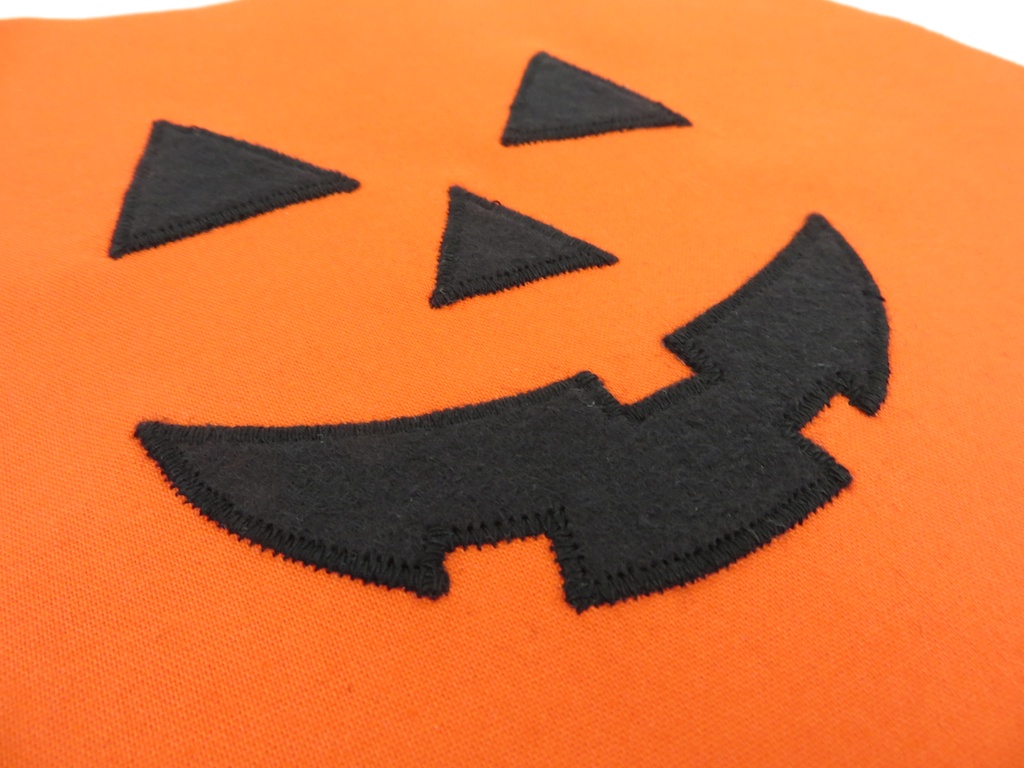
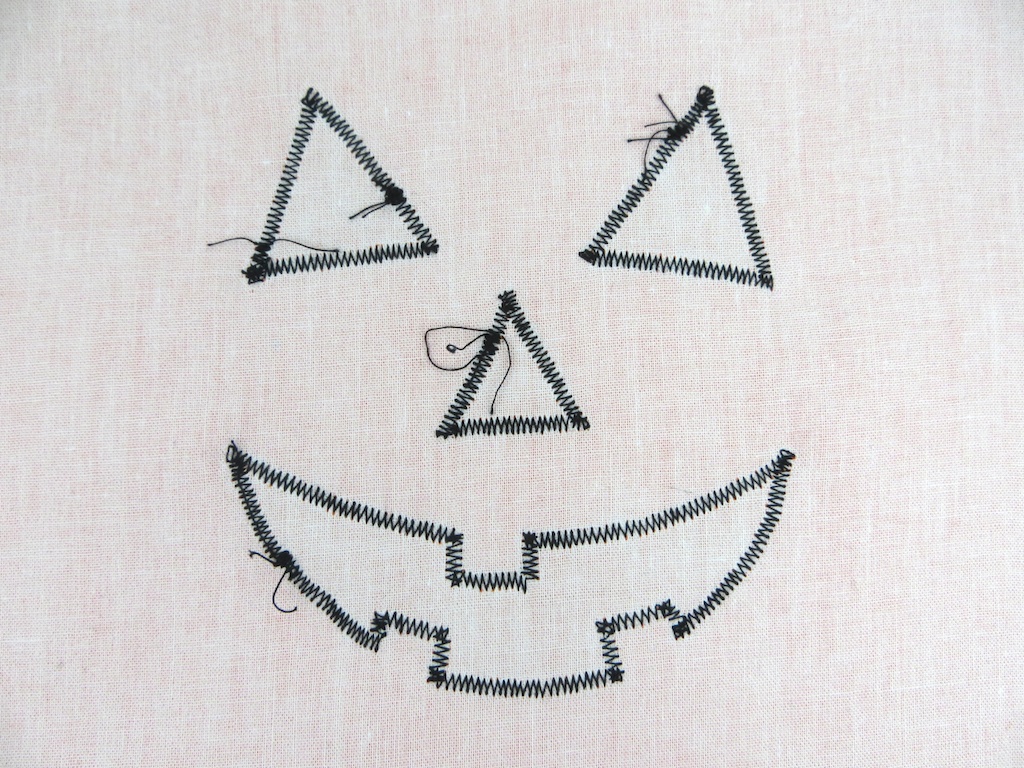
Stitch around the edges of each piece with a zig-zag, straight, or satin stitch.

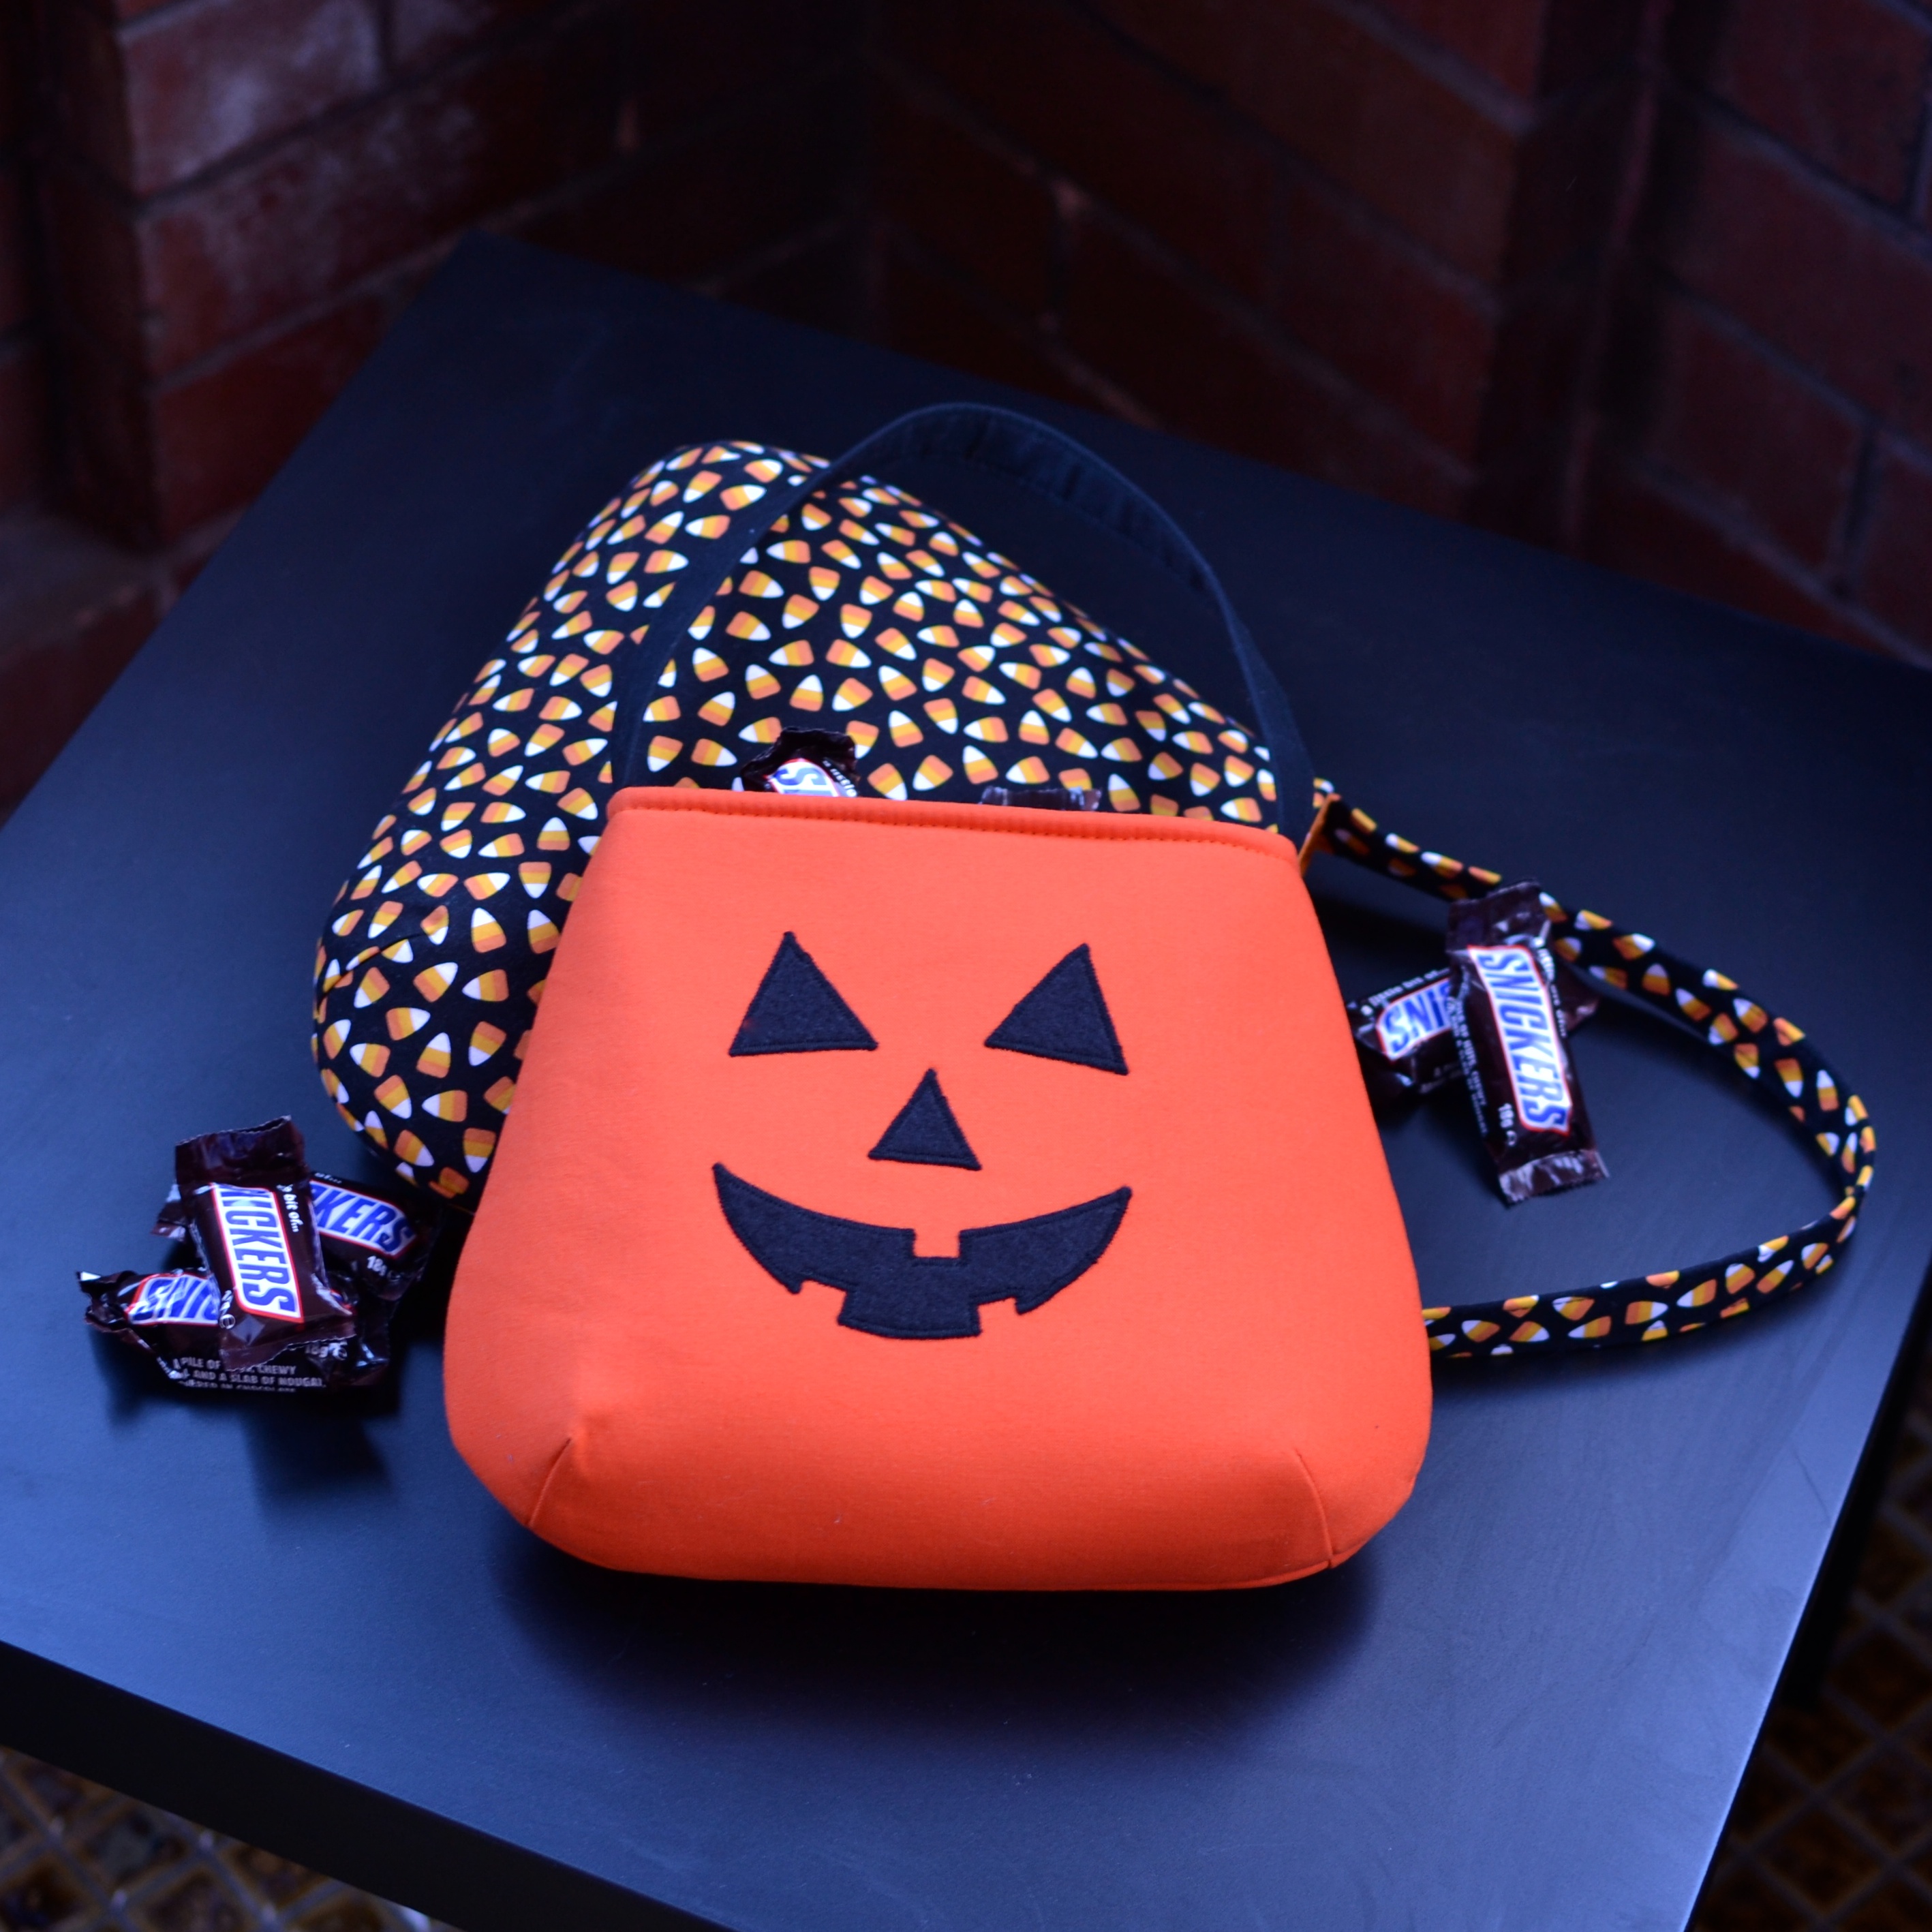
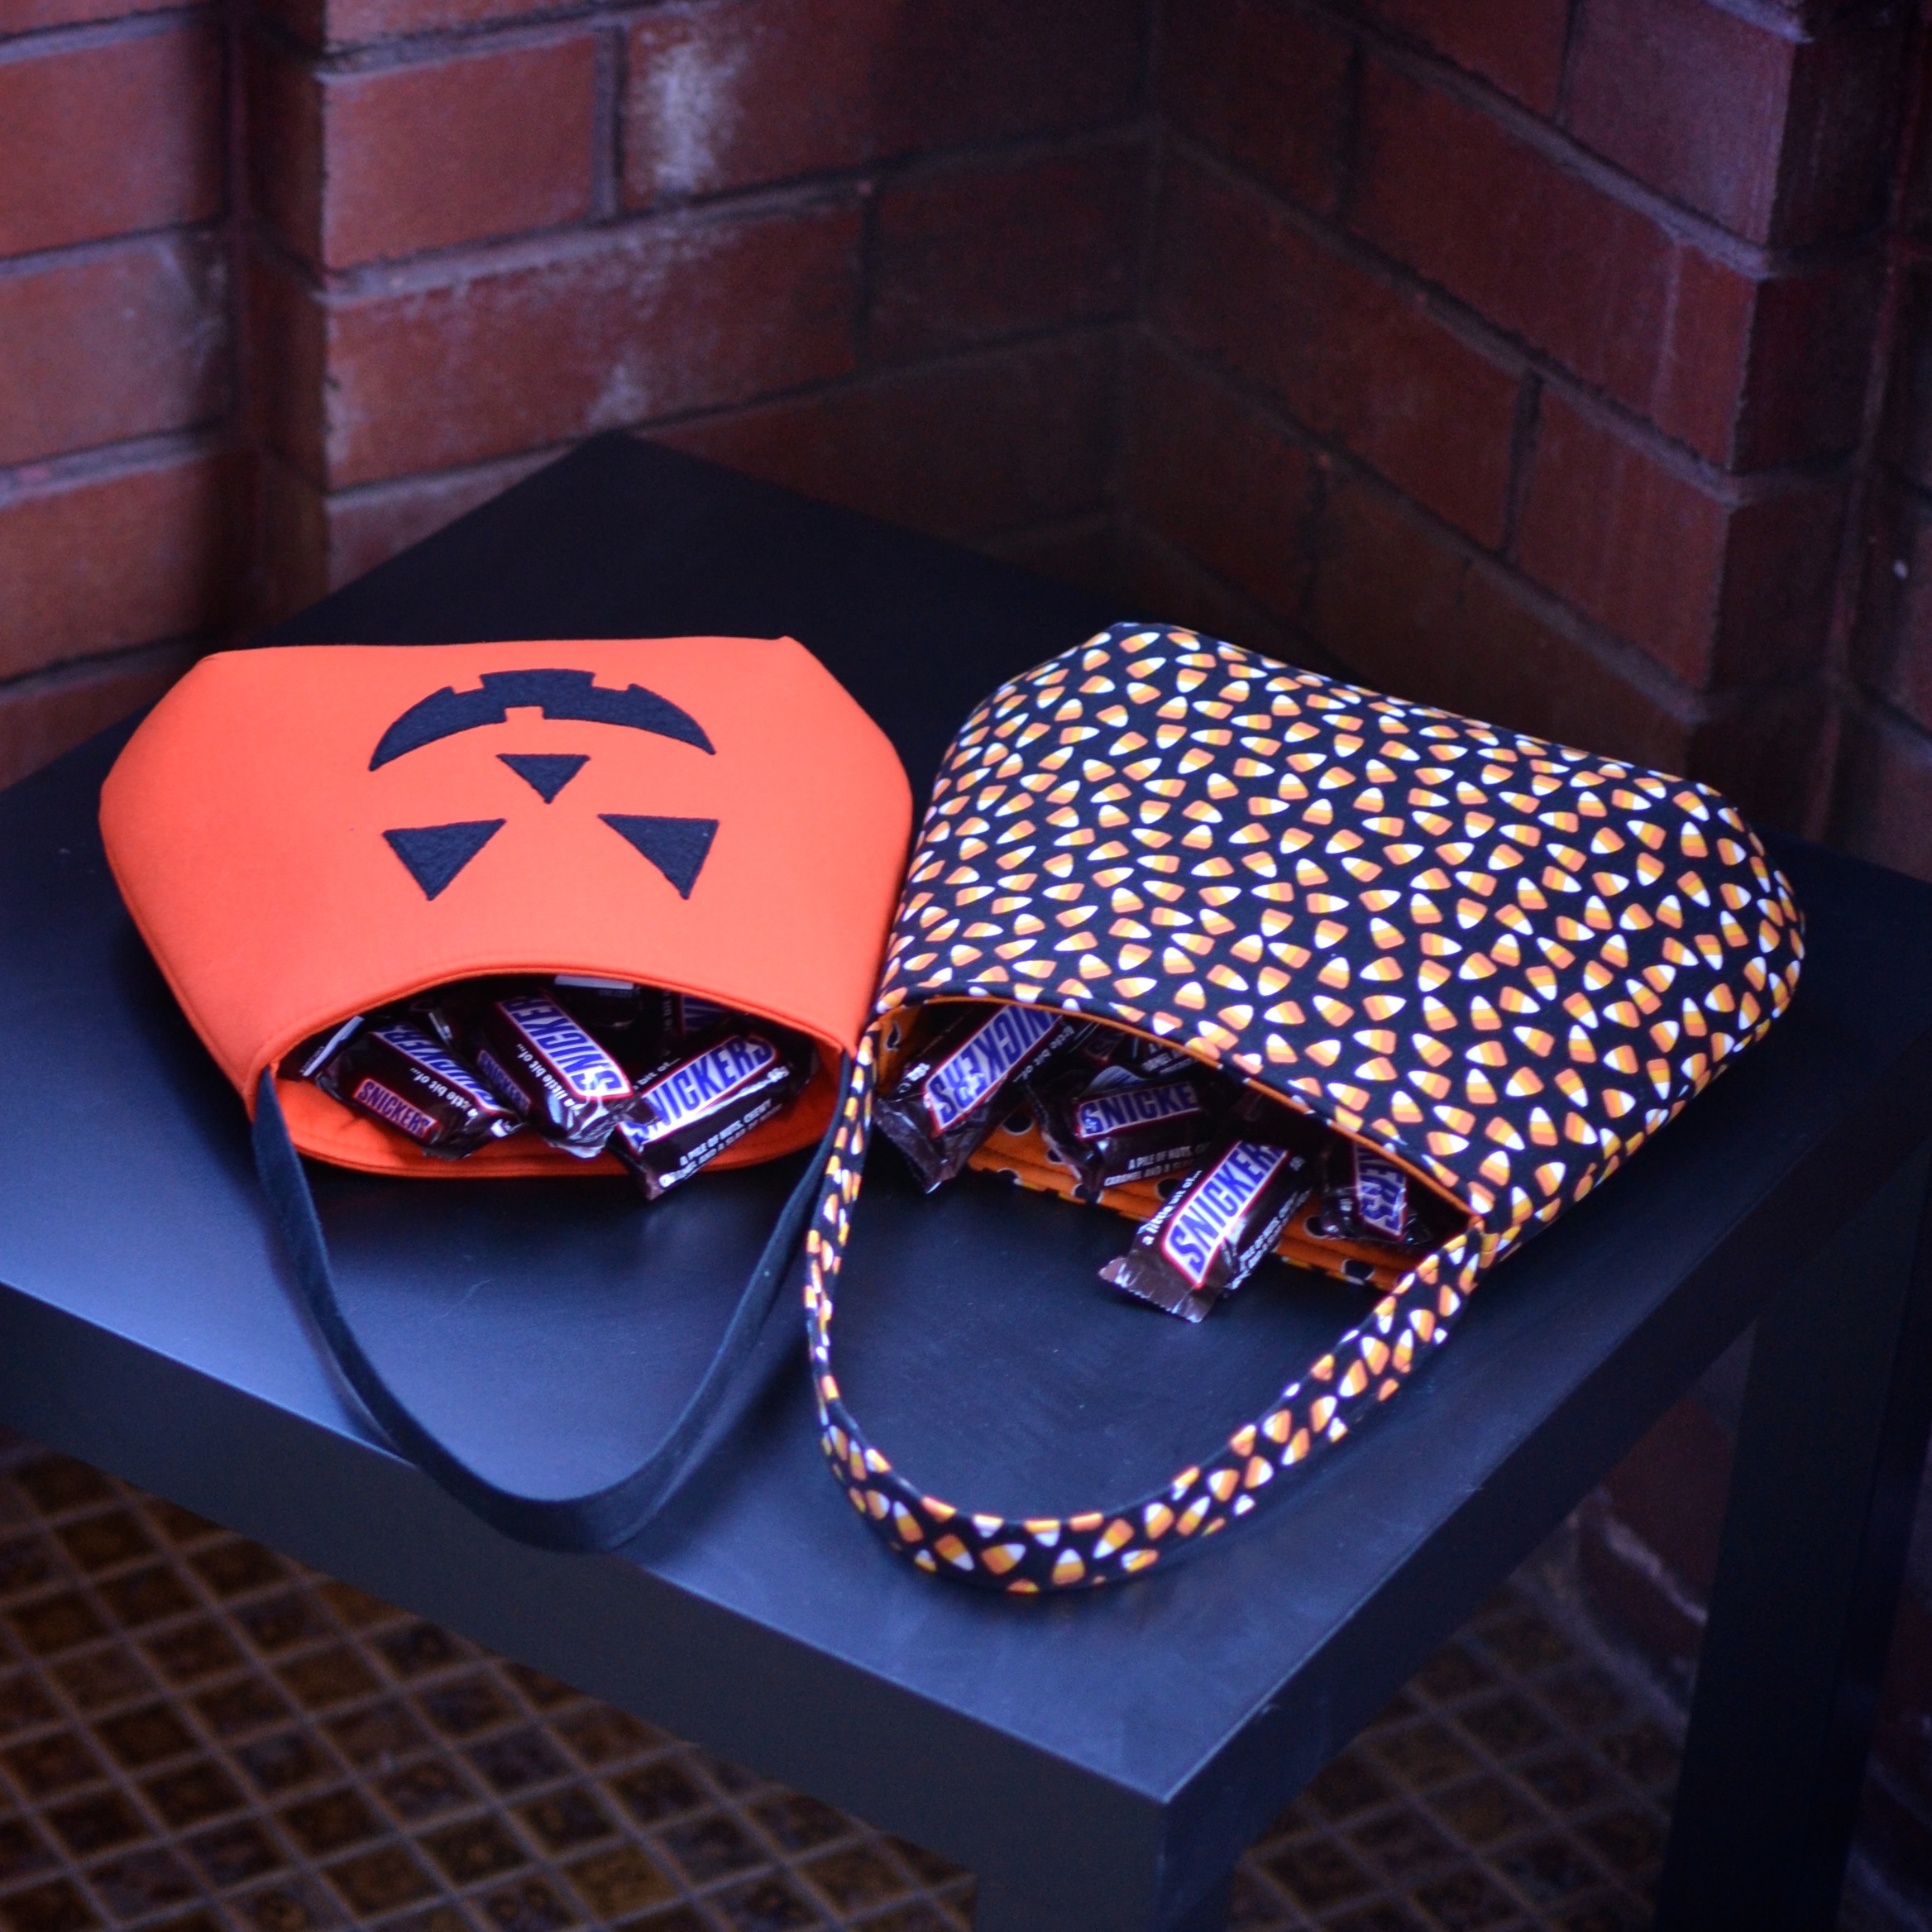
Sew darts, baste around the outside and assemble. I added a black strap because the plastic pumpkin buckets have black handles. :)

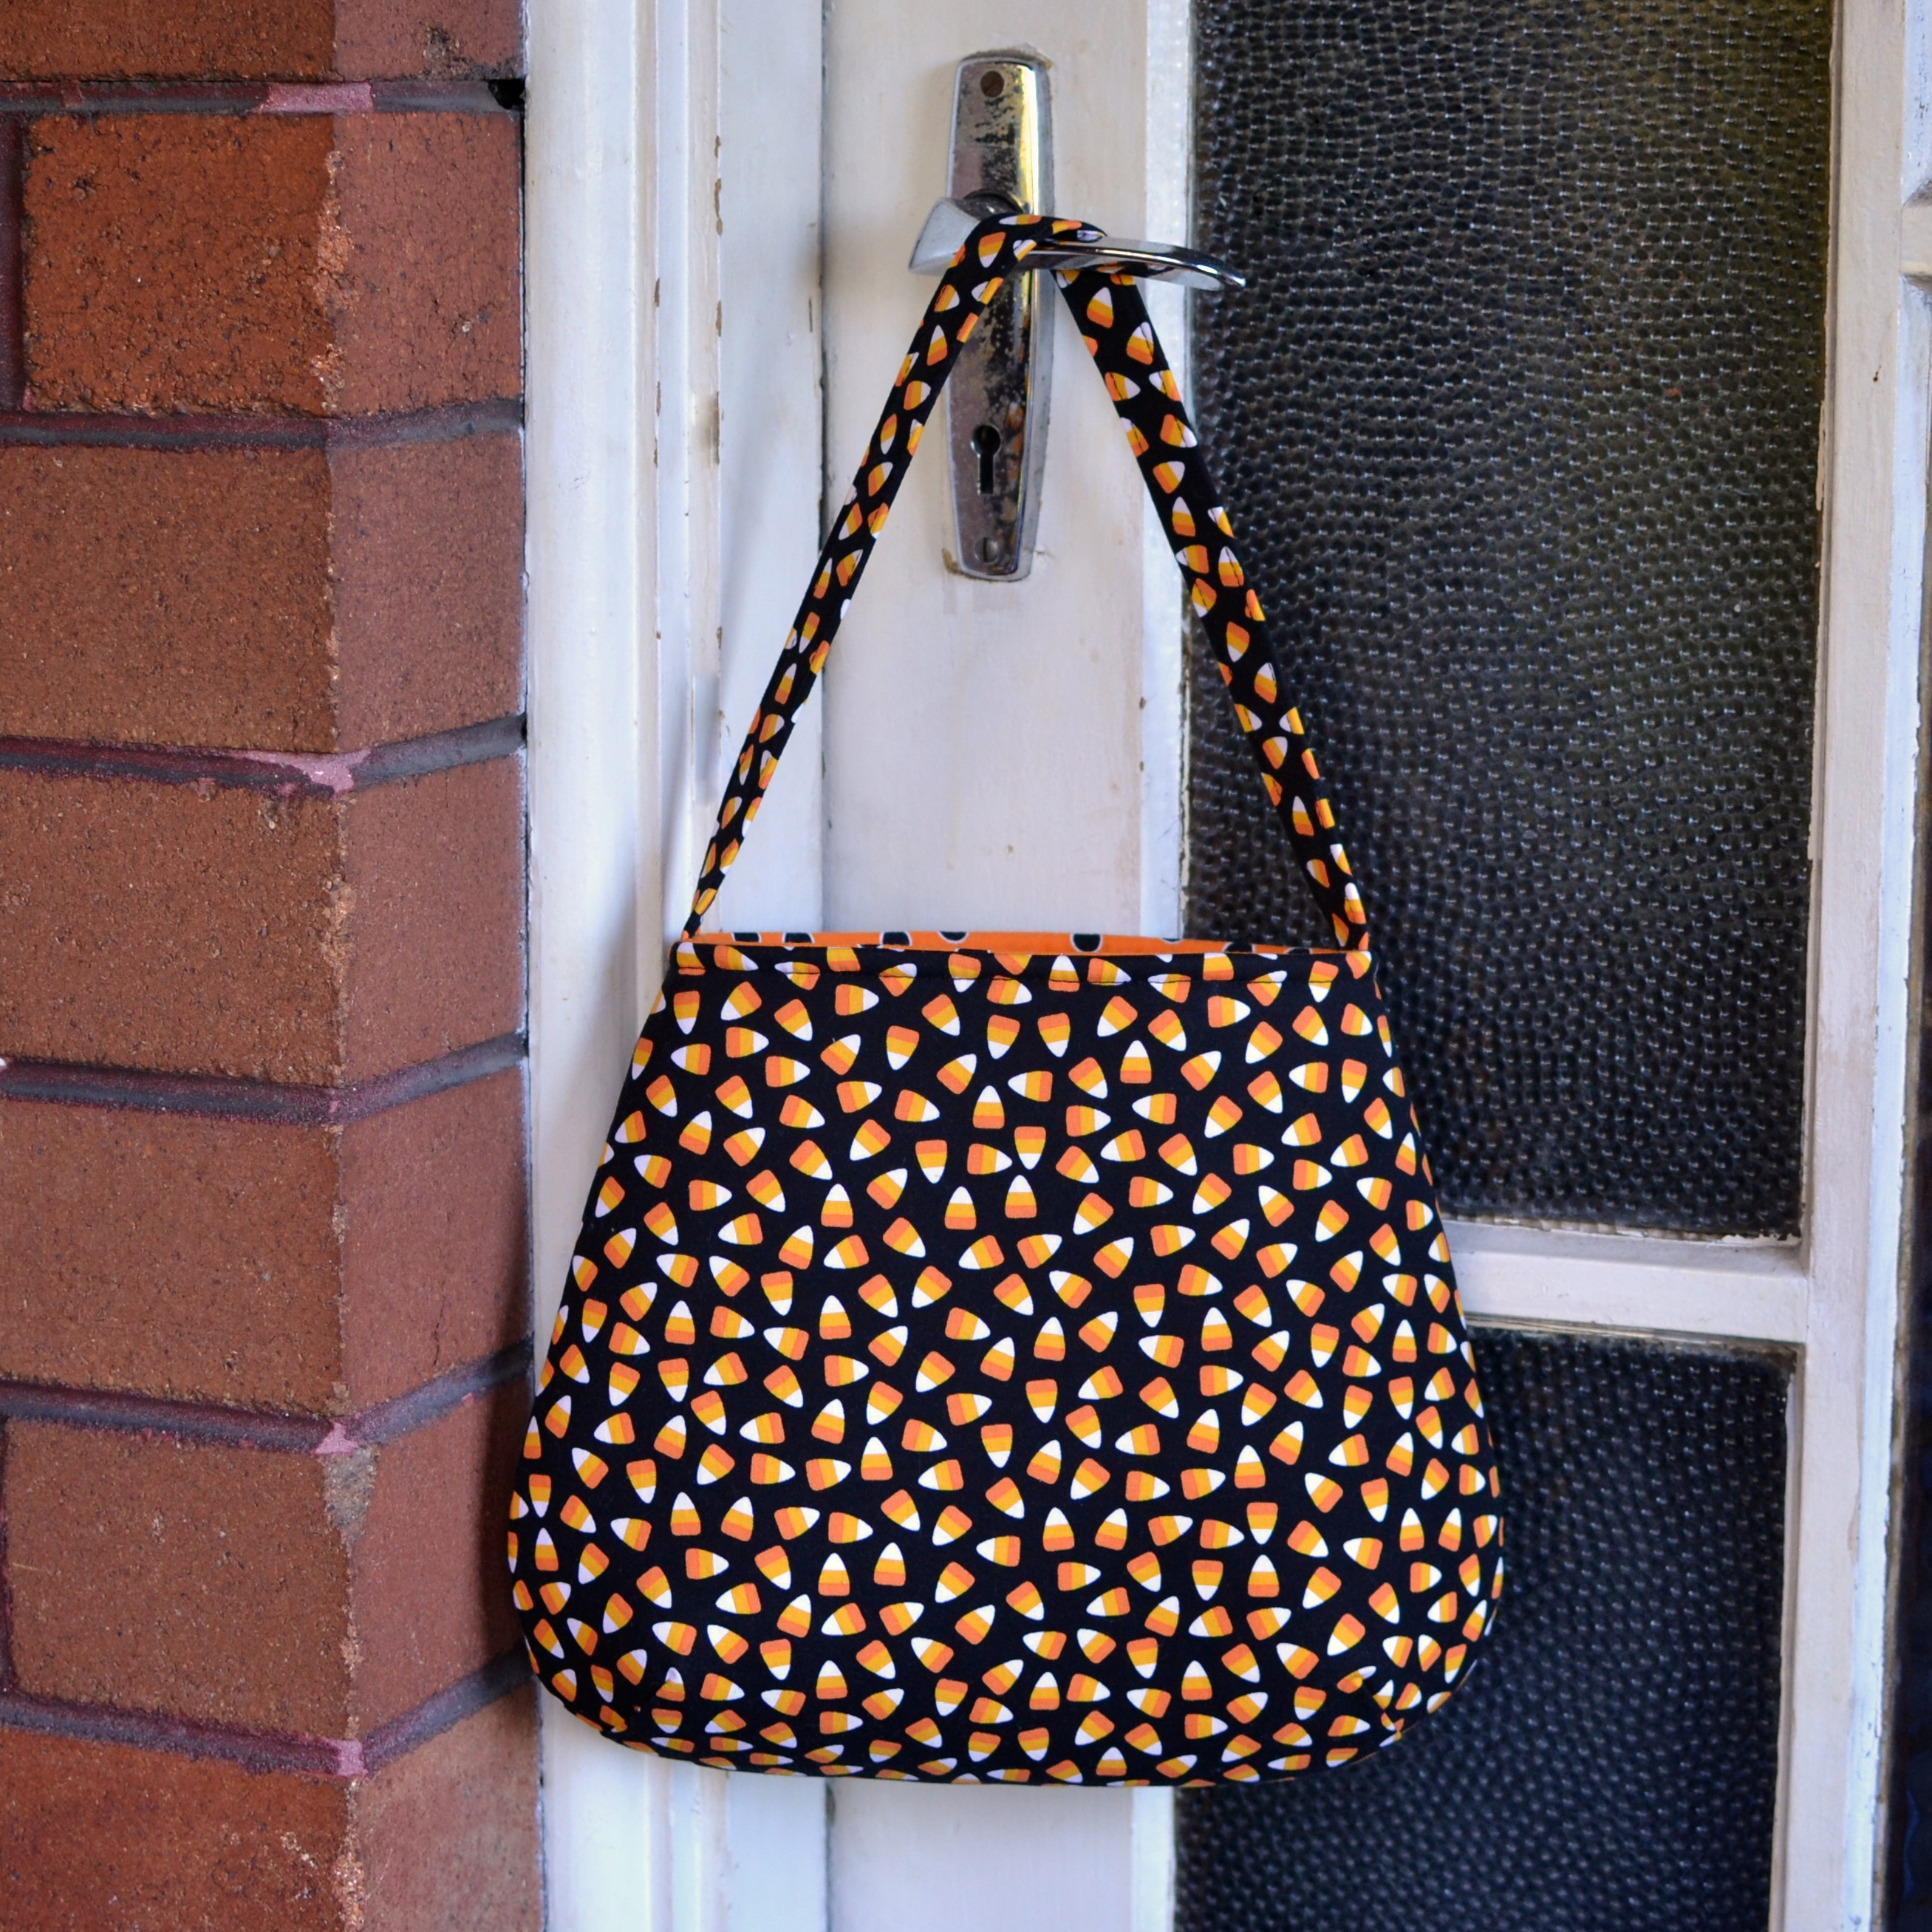
For the candy corn bag I printed the pattern at 110% and left off the face. I cut the strap to 3.5″ x 18″.
Blog Tour!
Wednesday, October 1st: Rebekah Sews & Dog Under My Desk
Thursday, October 2nd: Friends Stitched Together & Sew Pandi
Friday, October 3rd: That’s What She Crafted & Everything Your Mama Made & More
Monday, October 6th: Shawnta Sews & Handmade Boy
Tuesday, October 7th: Muse of the Morning & Swoodson Says
Wednesday, October 8th: Call Ajaire & Sew McCool
Thursday, October 9th: Once Upon A Sewing Machine & imagine gnats
Friday, October 10th: The Sewing Geek & Feather’s Flights
Monday, October 13th: Get Your Crap Together & Needle and Ted
Tuesday, October 14th: The Shaffer Sisters & The Inspired Wren
Wednesday, October 15th: Pattern Revolution & Just Joshin
Scavenger Hunt!
Time to go trick or treating! Use the Rafflecopter below for a digital scavenger hunt. You’ll be looking at each blog’s posts for the month of September to find this icon:
for a chance to win one of THREE awesome sewing prize packs! Three winners will be chosen randomly (and their form completion verified) and emailed within 3 days of the hunt’s closure.
A big thank you to all the sponsors who donated prizes!
Pack 1 { $30 to The Ribbon Retreat +2 patterns from GYCT Designs + 1 pattern from Dog Under My Desk}
Pack 2 {$30 to The Fabric Fairy + Kids Pattern Package from imagine gnats}
Pack 3 {$30 to Fat Quarter Shop + 2 patterns from Everything Your Mama Made & More +Ramblin’ Raglan Mega Pattern Pack from Muse of the Morning}
Awww! These are SO super cute, Erin! What a neat way to use Arm Candy!:)
Sooo cute, I love it!! Thanks for joining in!!
Great idea Erin. They look awesome and can be used year after year. And with a name like Arm Candy this is the perfect pattern for a trick or treater.
Honestly, I’m not making or buying anything for halloween. I’m British and it’s not as big here as it is in the US, although it’s growing. There is a pumpkin growing in my garden though!
Love the pumpkin!! Great idea.
I just printed my first DUMD pattern: The Date Night purse. Thank you, thank you for putting that 1-inch square on page 26! I’m never quite sure what my printer is going to do with sizing (despite all of my attempts to chose the right settings in the Print Preview).
I’ve got two prints from the Geek Chic Collection (Robert Kaufman) that will look fabulous with this pattern- it will be a Christmas gift for my DD.
The last time I used SF101 interfacing it was with some pillow-covers. It puckered upon the first trip through the washing machine. So I will be prewashing the SF101 before I use it in this project for sure.
Have fun in Australia and Happy Halloween!
Sue – ever since Erin posted on IG about pre-washing the SF101, I have done so (my hubby always thinks I’m taking over the bathroom when it dries!) for that and all flexible stuff. It makes a HUGE difference…as does a lot of steam and a press cloth. My first DUMD, a 2ZH, puckered really badly.
Love it! So great to be able to make your own treat bucket.
Girls! I’m loving me new abbreviations! 2ZH will be its new hashtag!!!