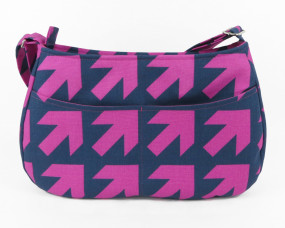
I recently made this Daytripper for The Needle Shop, and I thought I would show you how to fussy cut the front pocket. :) Many of you know how to do this, but I am still asked this question a lot, so here we go! It’s very simple.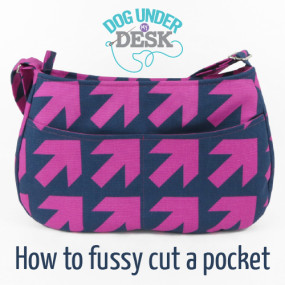
On a print like this, it’s important to fussy cut. If you are using an all over print in a smaller scale, it matters less, but if your print is big and bold or geometric, you want everything to line up.
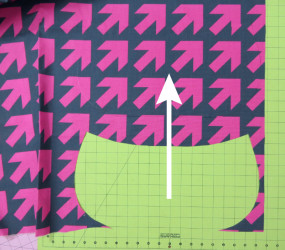
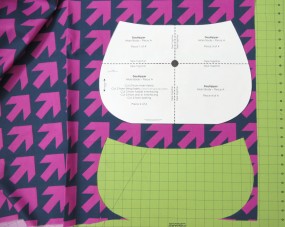
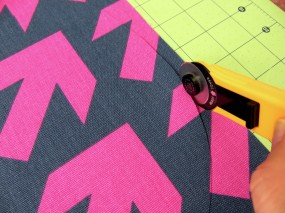
First, cut out your pocket. (I center mine on the part of the design I want to feature.)
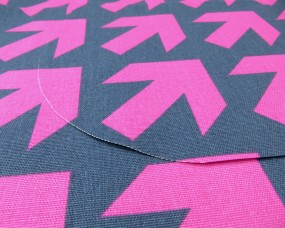
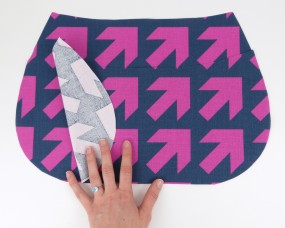
Then slide the pocket piece up or down to the next section of the pattern repeat that it matches. Line it up carefully.
If there are any little techniques like this that would help you, let me know and I’ll put it on the list! :)

Sweet – thanks! That is helpful!
What about re-sizing patterns? I thought of this today as I found 5″ x 8″ paper pads at Costco for your notepad holder pattern. They were a super value, so I’m going to use those rather than the 3″ x 5″ or 4″ x 6″ as in the pattern. I’m chicken to do the math – LOL!
I’ve recently seen your bags on IG where others have adapted the size – like a wider 2ZH, etc.
I can figure out normal 75% or 125%, etc. because the printer can do that.
I probably sound like a dork – but I’m math challenged since chemotherapy (it is NOT fun!). It’s one reason I love your patterns so much!
I can add things to your patterns – like a wrist strap on my Gadget Guard (following Get Carded or Wristlet) or a pen loop on the notepads, but these other changes just get me flustered!
I suppose I could always practice on cheap muslin!
So that fabric is canvas? Any tips on working with it for a Daytripper? I’m getting ready to use some IKEA canvas-like fabric for a Daytripper. Should I interface and other directions as normal?
There are some suggestions in the previous post.
Just saw that over on Bloglovin’ after I posted! For some reason only this post showed up in my e-mail.
GMTA I guess!
I don’t know if this helps, but what I did for the 2 Zip Hipster was enlarge it by 20%. I didn’t want it to be longer, so I measured the original back exterior piece and cut the enlarged piece to be the length of the regular piece.
OK here goes. Easy math conversion for resizing patterns. If you want to enlarge it by 25%, multiply all measures by 1.25. If you want to enlarge by 50% multiply all measurements by 1.50.
Get the idea? Thats what I do. Sizing down is the same idea. Just leave off the 1.
Want it half the size(50%)? Multiply everything by .50.
So…. say a piece is 18×24 and you want it 50% bigger. 18×1.5=27 inches by 24×1.5=36 inches. Use a french curve ruler to transfer out any curves and voila!
Now before my coffee I would be staring at the pattern going…hmmm…how do I ???? lol.
Thanks! I can do the simple math like this – and if it’s a printable pattern – easy peasy.
BUT on something like the notepad covers, or widening a bag, it’s trickier because it’s not an across-the-board size up or down.
For instance, the notepad covers are for 3″ x 5″ or 4″ x 6″, but I have 5″ x 8″ pads (24, 50-sheet pads for $5+ at Costco). So I can’t just upsize it. I suppose for this one, I can just print them, lay them on template plastic (patterns I make a lot get cut from that) and just add the 1-2 inches to the sides that need it, then draw out the diagonal lines to make them continue.
A bag like a wider 2ZH would be trickier. I want to make one, or a Z&G for my daughter’s talking device (the one it came with, that cost $90 is horrible!) But I need to change the width and probably the gusset of it.
Julie, the seam allowances are going to be the same on the notepads. Just take the 4×6 pattern pieces, and add 1″ width and 2″ height to each of the inside pattern pieces, and 2″ width and 2″ height to the outside piece (since it’s folded in half.) I’ll do it one of these days, but it’s one of the less popular patterns so it’s not top priority. Like two people a year ask me for 5×8 or 8.5×11 and it would take a week to draw the pattern pieces, test them, and re-PDF and upload it.
Don’t worry about the diagonal. Just eyeball it. There’s no science to the diagonal except so that you can see the coupons peeking out.
The Two Zip Hipster is easy to make wider. Just divide the total added width up among the front panel and side pieces. If you want to make it 3″ wider, add 1/2″ to each side piece and 2″ to the center panel pieces. If you want the gusset 2″ instead of 1.5, add 1″ to the width and 1/2″ to the height. Just don’t go more than 2″, I’ve tried and it just doesn’t work very well. It’s best as a flat, vertical bag.
:)
Super-de-doo! Thank you! I *know* it should be so easy but it’s not for me. Chemo brain has really made me challenged in the math area – drives me nuts!
Thank you for the tutorial, very useful
Thank you for this tutorial – reading this gave me the confidence to “waste” fabric so I could fussy cut a few pieces on the car seat organizers I’m making for my boys. I’m using Disney character fabric (Cars and Planes), so in the end it became really important to highlight the different characters.