
 I took fancy clothes on my trip in October and I didn’t want to get snags in my tights, so I bought a lingerie bag to pack them in. I decided I needed bigger ones to hold my other stuff and made a bunch of large zippered bags out of fabric. I loved having my small things contained and not floating around my big suitcase. Then I came across THIS fabric:
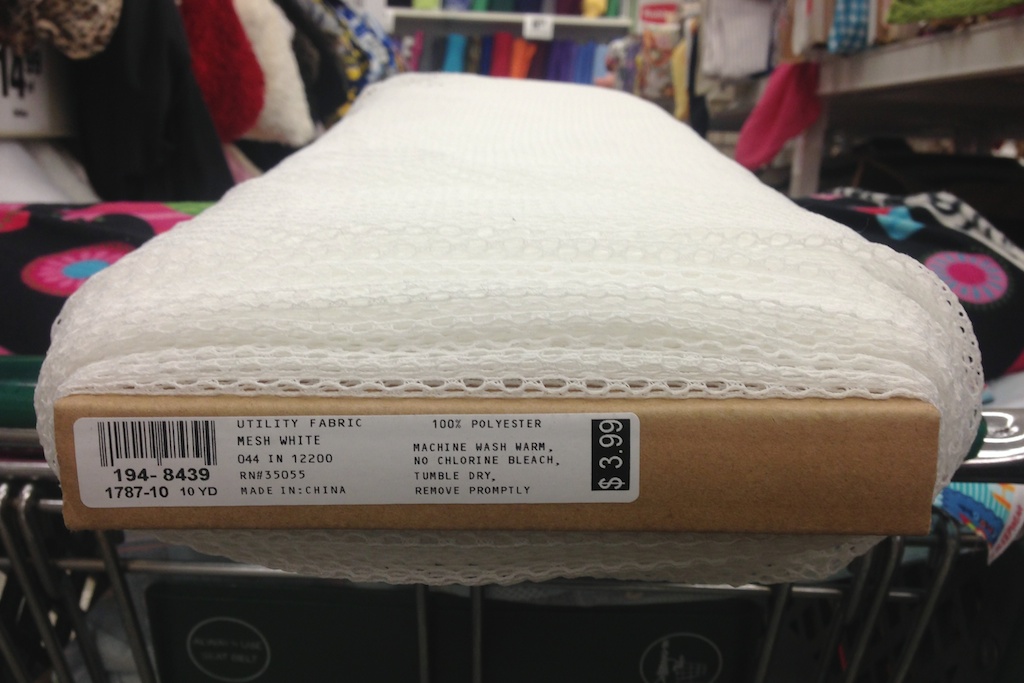 It’s mesh fabric! So it’s see-through! I found it in the utility fabric section at JoAnn’s. I was curious how it would attach to a zipper, but it worked just fine!
I bought a yard since it was so cheap, which is more than enough to make 2-3 bags. Make these any size you want, the only limitation is the width of your zipper. 14″ zips are pretty standard, so I will use that size. This stuff seems to be stretchy in both directions so I don’t think it matters which way you cut it.
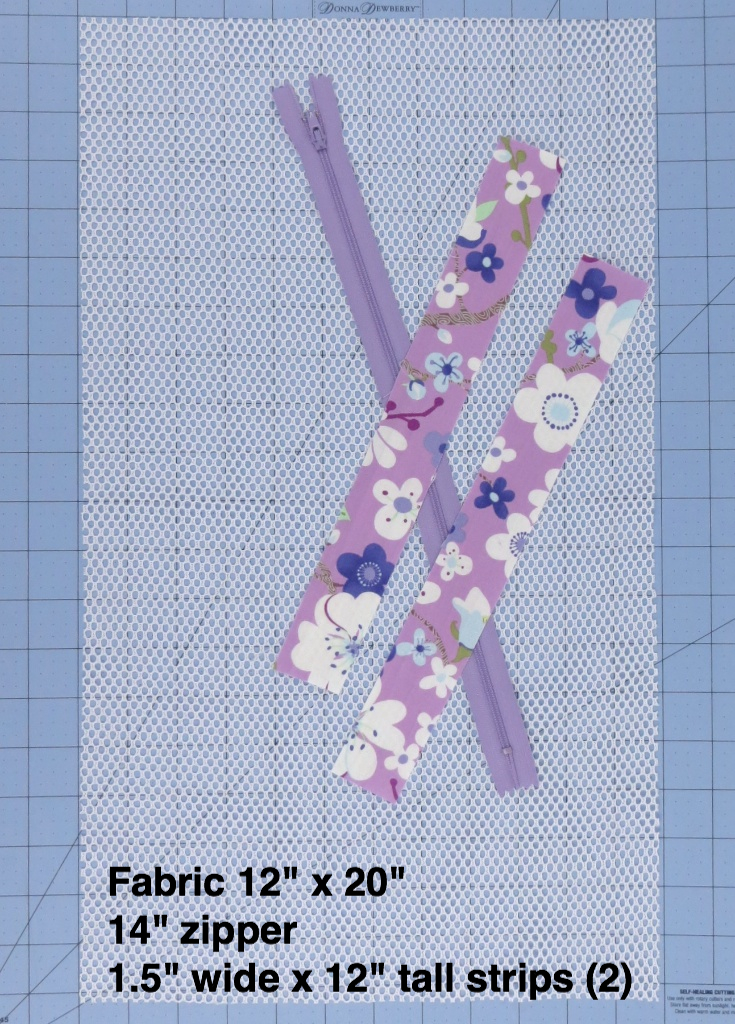
I started with a 12″ wide by 20″ tall piece of fabric. Then I cut two 1.5″ wide strips from quilt cotton about 12″ tall. You’ll cut off the extra length at the end.
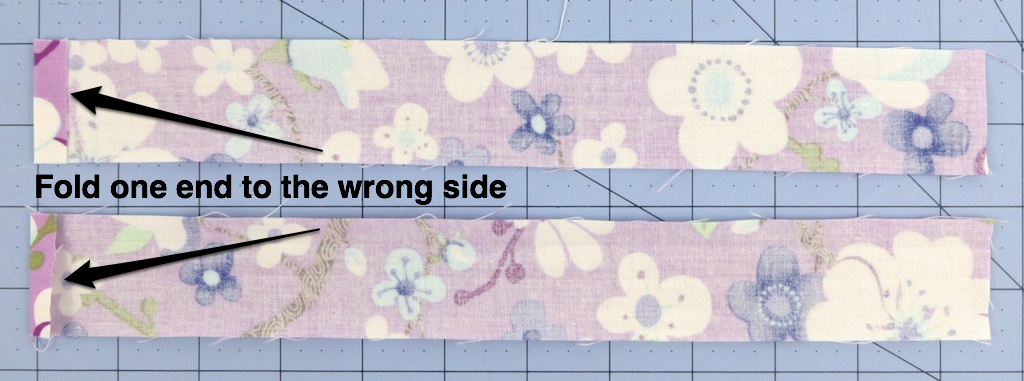
 Fold about 3/8″ of one end on each piece to the wrong side.
 Fold in fourths, like straps, raw edges to the center. (If you use pre-made, get the 1/2″ wide stuff. Not sure how that will wash up, though. I pre-wash all of my fabric so I don’t usually have a problem.)
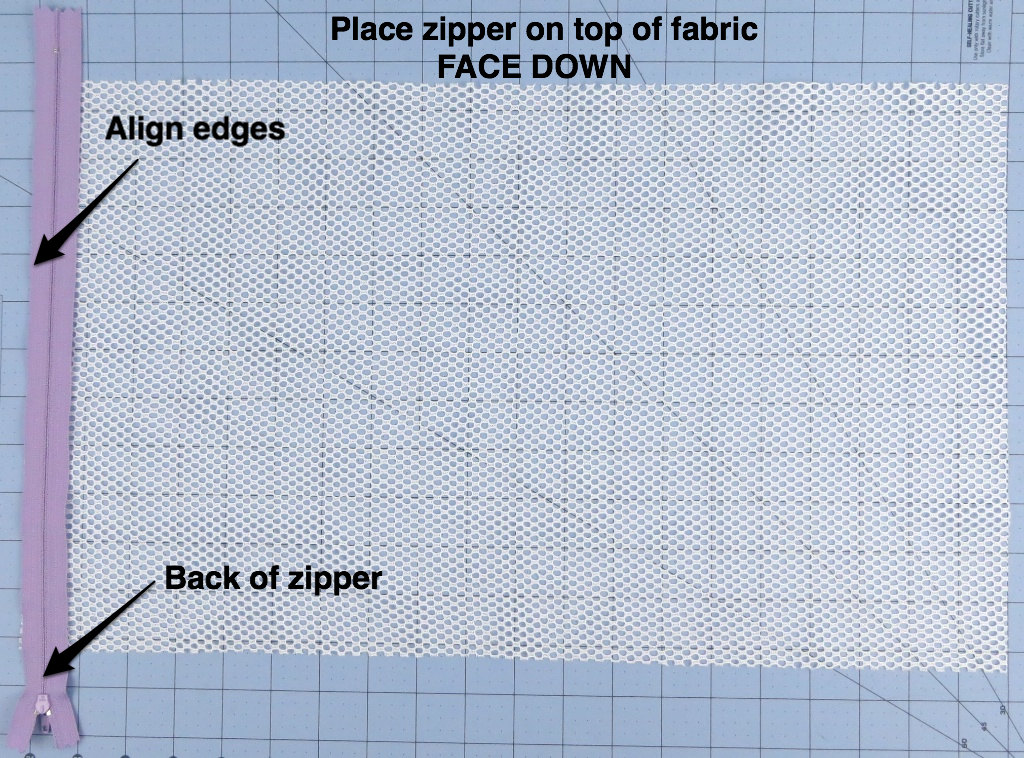
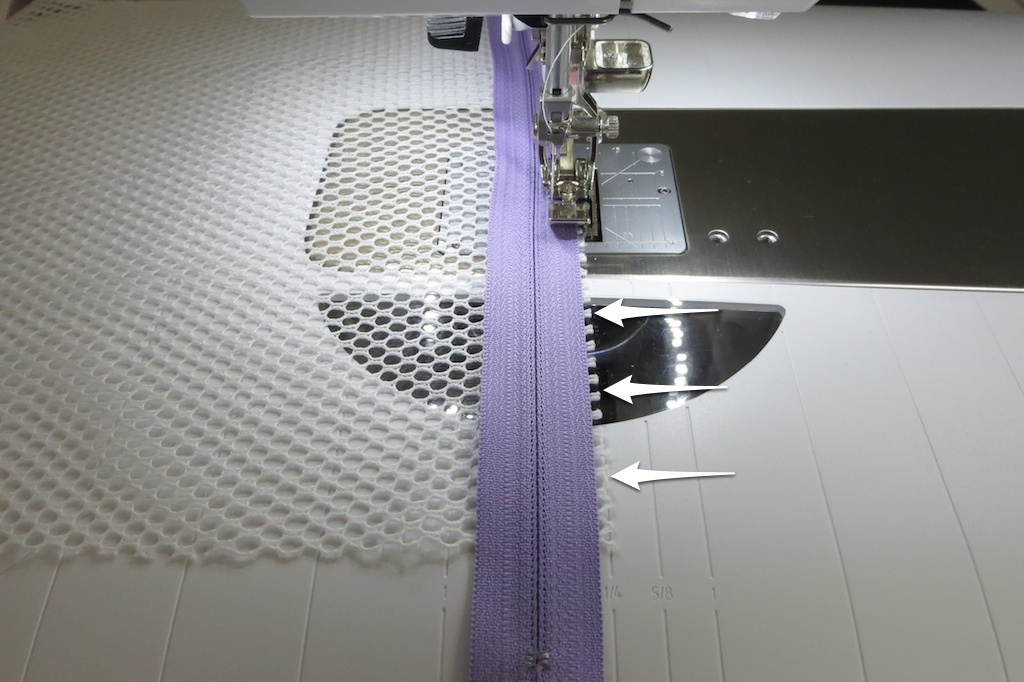
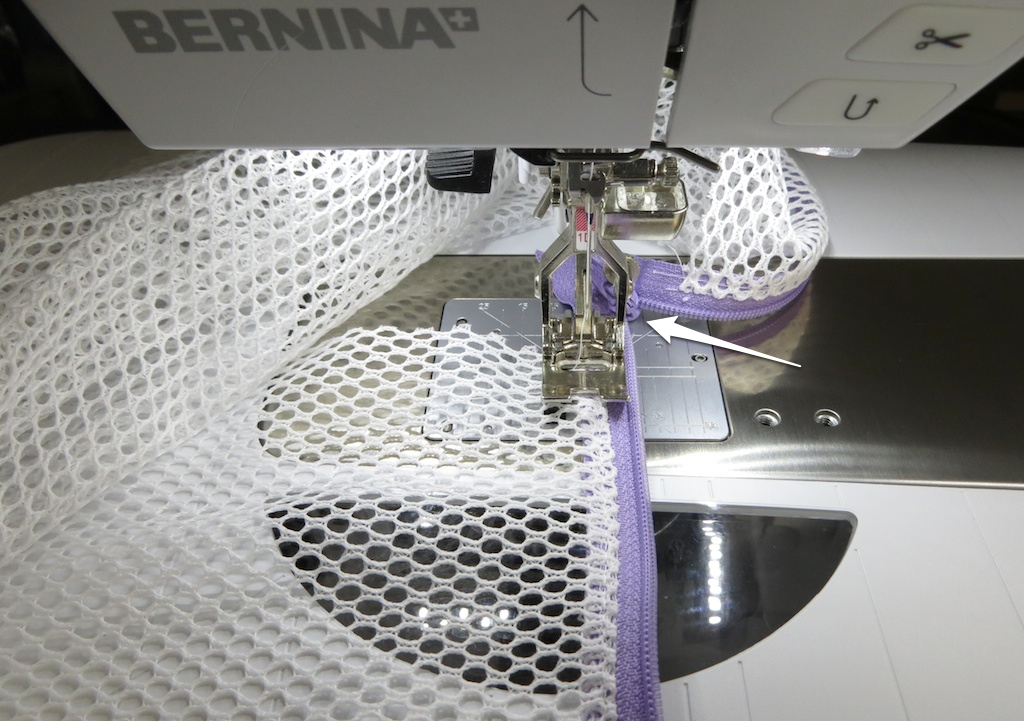
 Place the zipper along the short (12″ side), face down on top of the mesh fabric. (That means the zipper teeth and zipper pull are right sides together with the mesh. Yes, I know there is no right side/wrong side for the mesh. The zipper teeth are TOUCHING the mesh.) Let both ends of the zipper hang over the ends of the fabric about an inch so you don’t need to worry about zipper pulls or metal bits yet. Align the edge of the zipper tape with the edge of the fabric.
 Use your zipper foot to sew with a 1/4″ seam allowance. Use a short stitch length (2-2.5) to make sure you catch mesh fabric. SEW WITH THE ZIPPER ON TOP. The zipper will be upside down, but it’s OK. If you sew with the mesh on top, the presser foot would stretch it out. With the mesh on the bottom, the feed dogs will pull it through more evenly.
 If you are having trouble with the mesh slipping or with the edges not staying aligned, let it stick out a tiny bit from under the zipper so you can keep an eye on it.
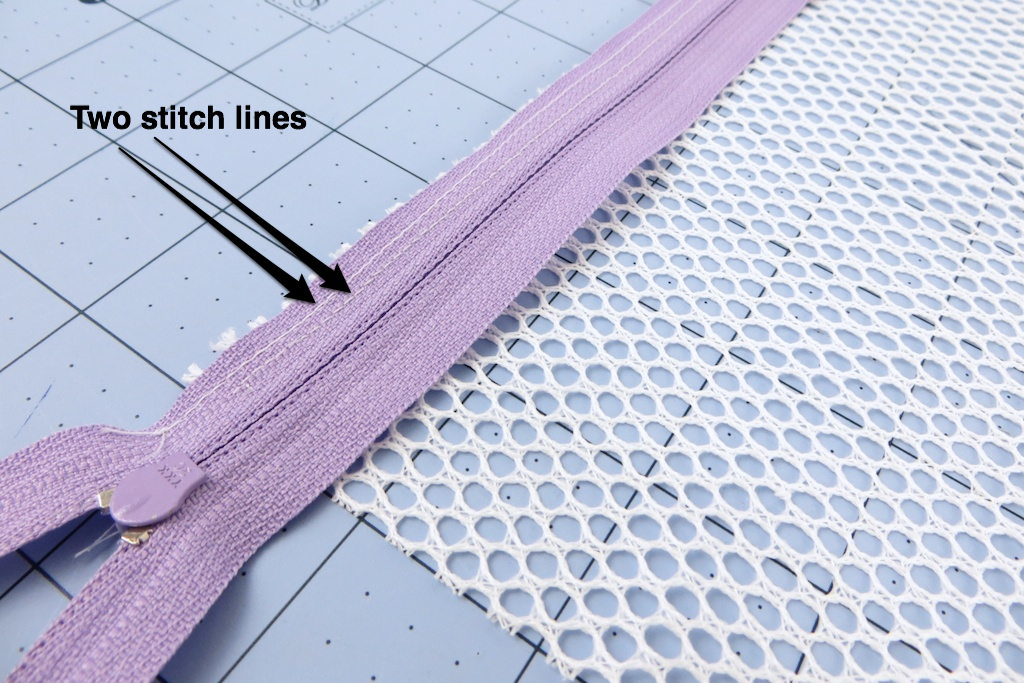
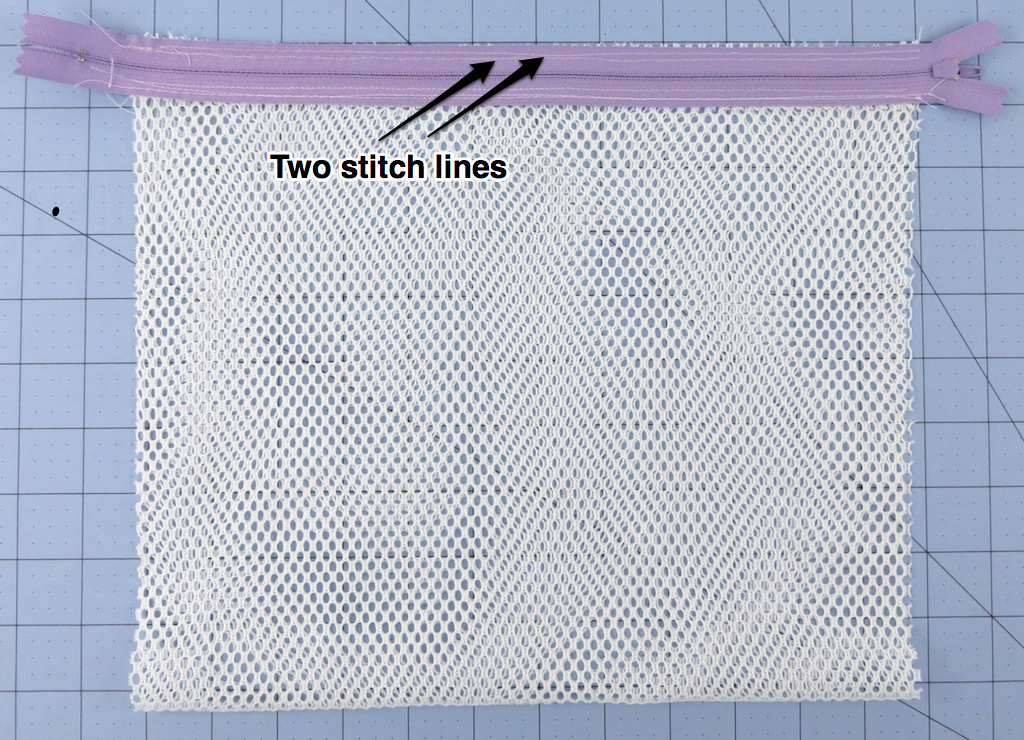
 Go back and make a second stitch line between the first 1/4″ stitch line and the edge. Since the mesh fabric is mostly holes, this helps make sure you’ve got it secured. (Enlarge this pic if you’re confused.)
 Fold back the zipper and topstitch. I turned my iron down a setting and pressed it lightly.
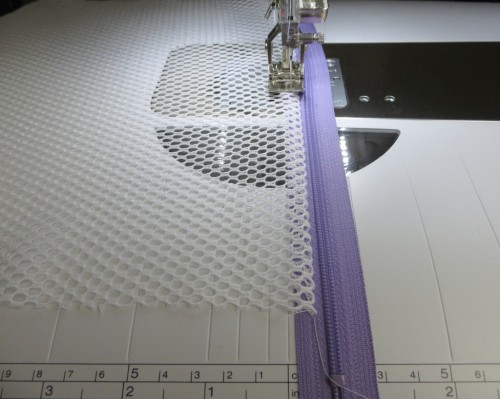 Fold the mesh fabric up so that it meets the edge of the zipper tape on the top/right side of the zipper.
 Flip it over and sew like the first side – zipper upside down but on top, mesh fabric on the bottom, sew two stitch lines.
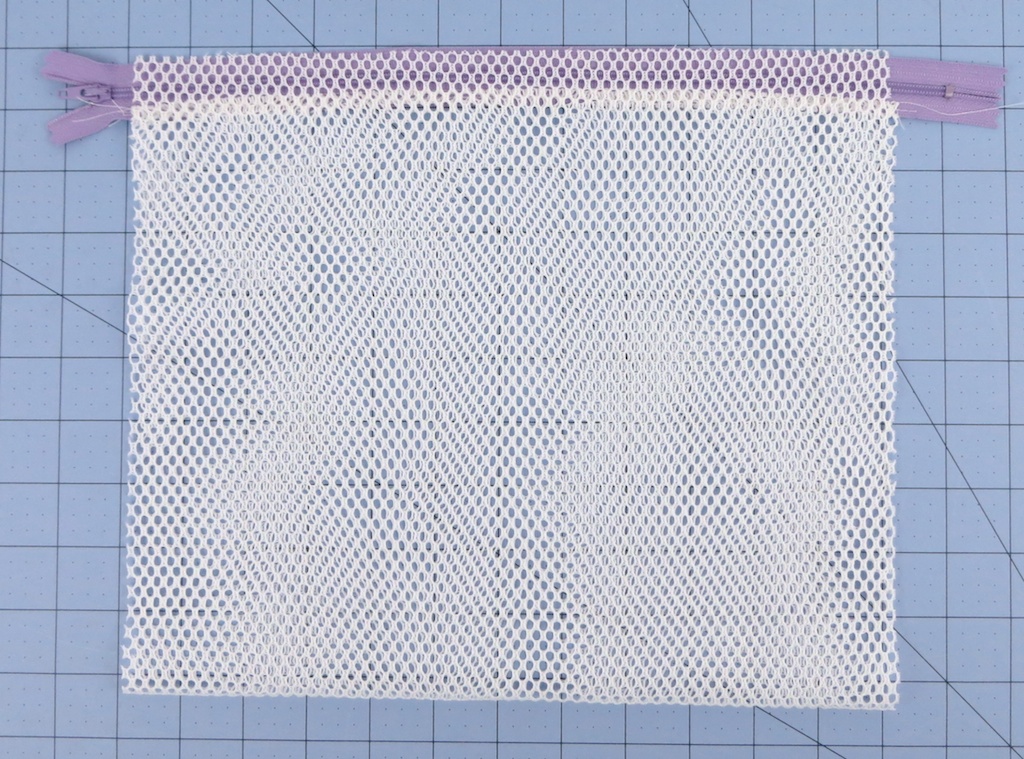
 UNZIP, fold back the zipper, press and topstitch the other half on the fabric side.
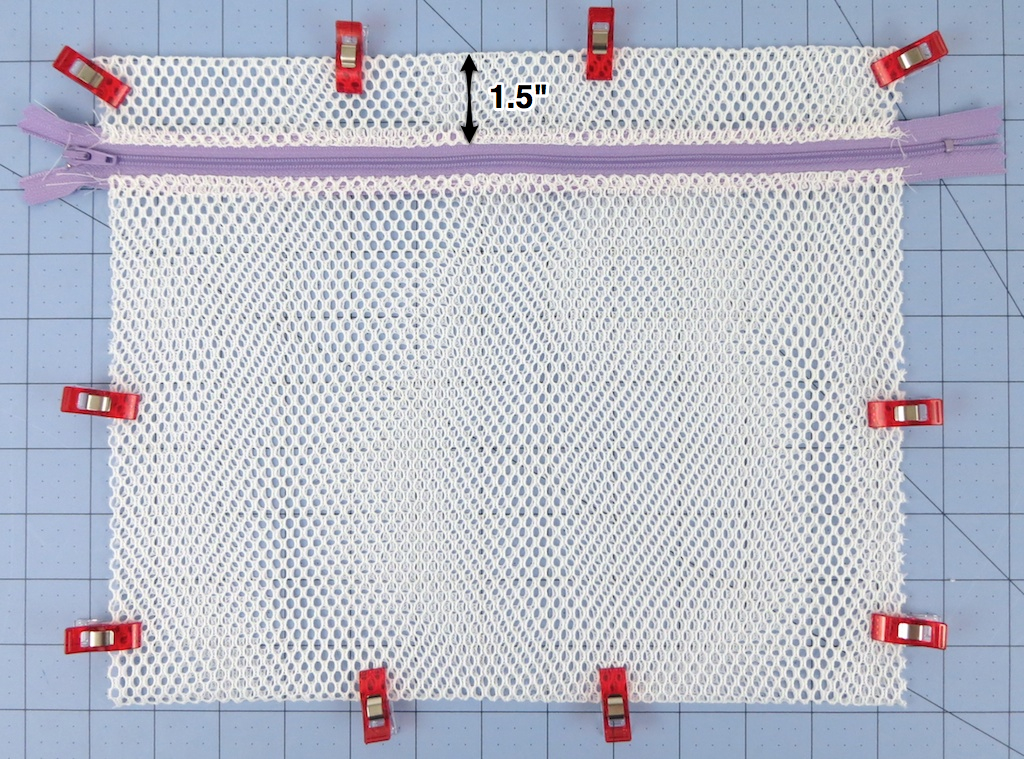
 Zip the bag and make sure it’s turned right side out. Fold the zipper down to about 1.5″ from the top. Press lightly and use either binder clips or quilt clips to hold it in place. (Pins won’t work ;)
 *Unzip part way* and tack the open end of the zipper (use a wide zigzag stitch).
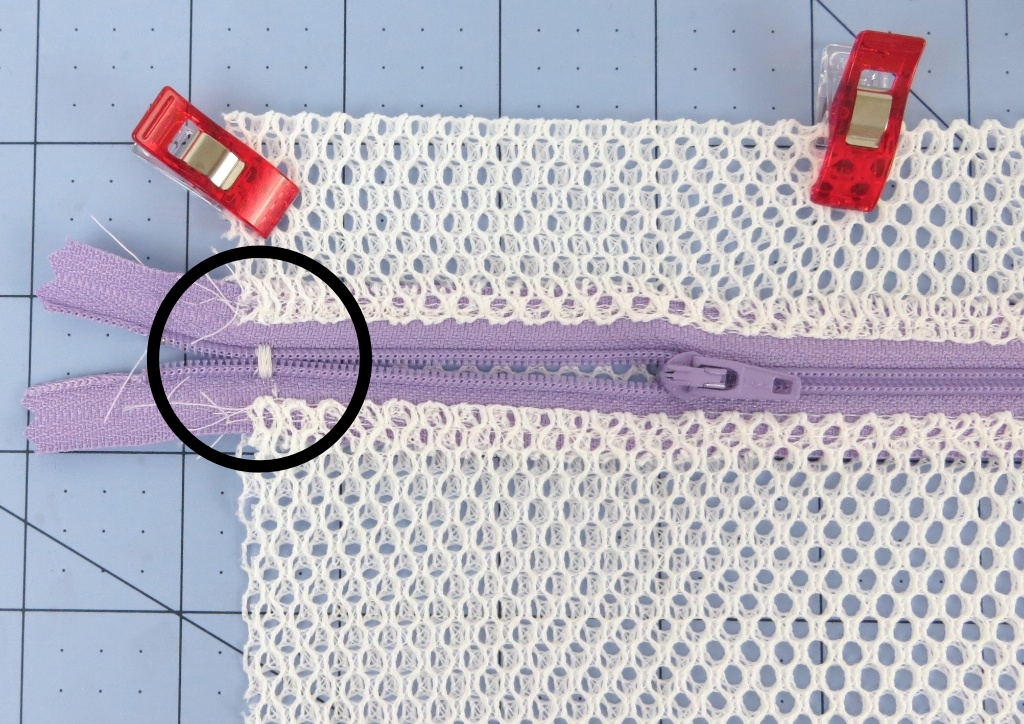 Then trim the zipper even with the sides of the mesh fabric. DO NOT CUT OFF THE ZIPPER PULL.
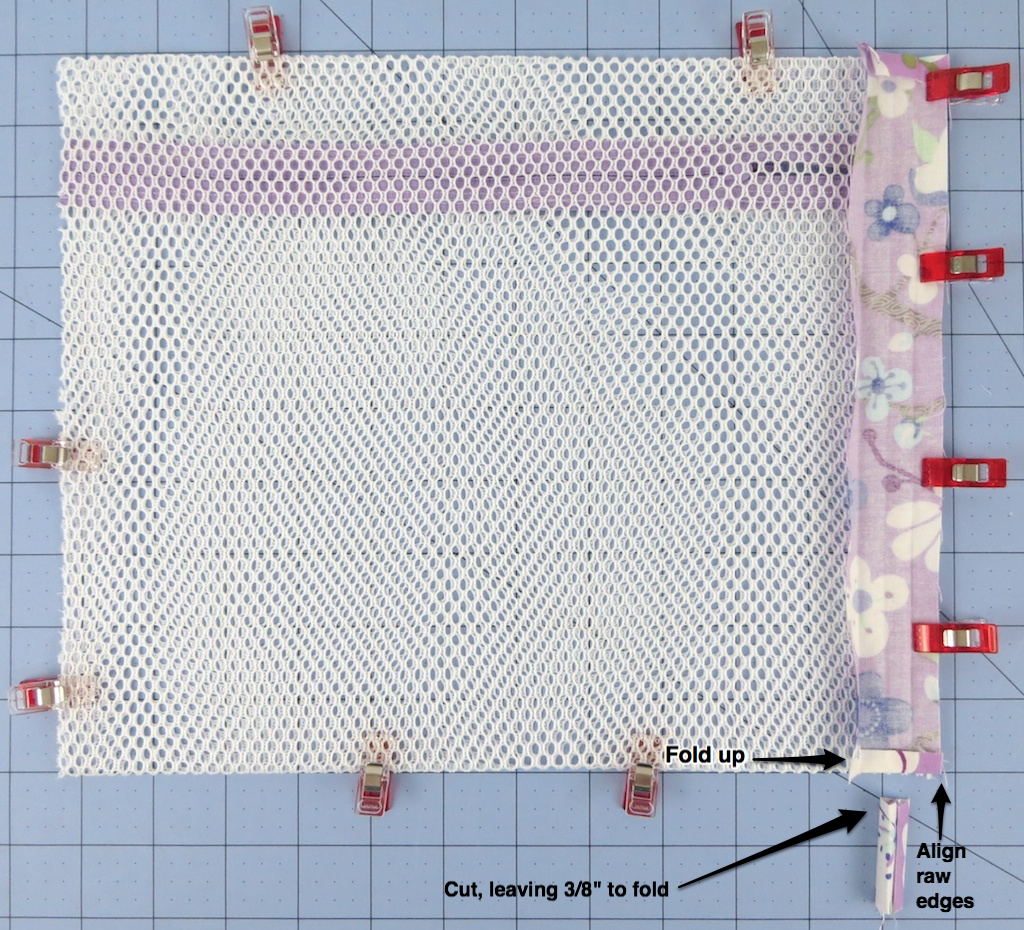
 Flip the bag over so the back side is face up. Start at the top with the folded short edge of the fabric strip. Unfold the long edge of the fabric strip so you can place it right sides together with the mesh fabric, aligning the raw edges. Cut off the excess fabric at the bottom of the strip, leaving 3/8″ to fold up and press.
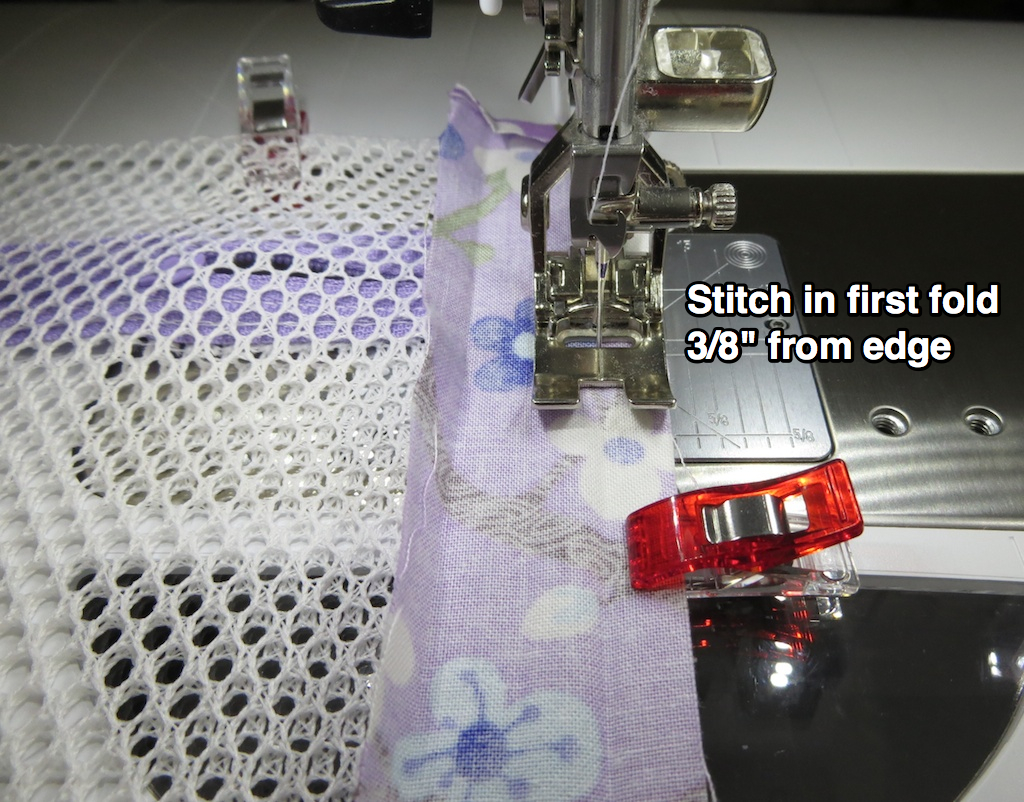
 Stitch right in the fold, 3/8″ from the edge, backstitching at the top and bottom.
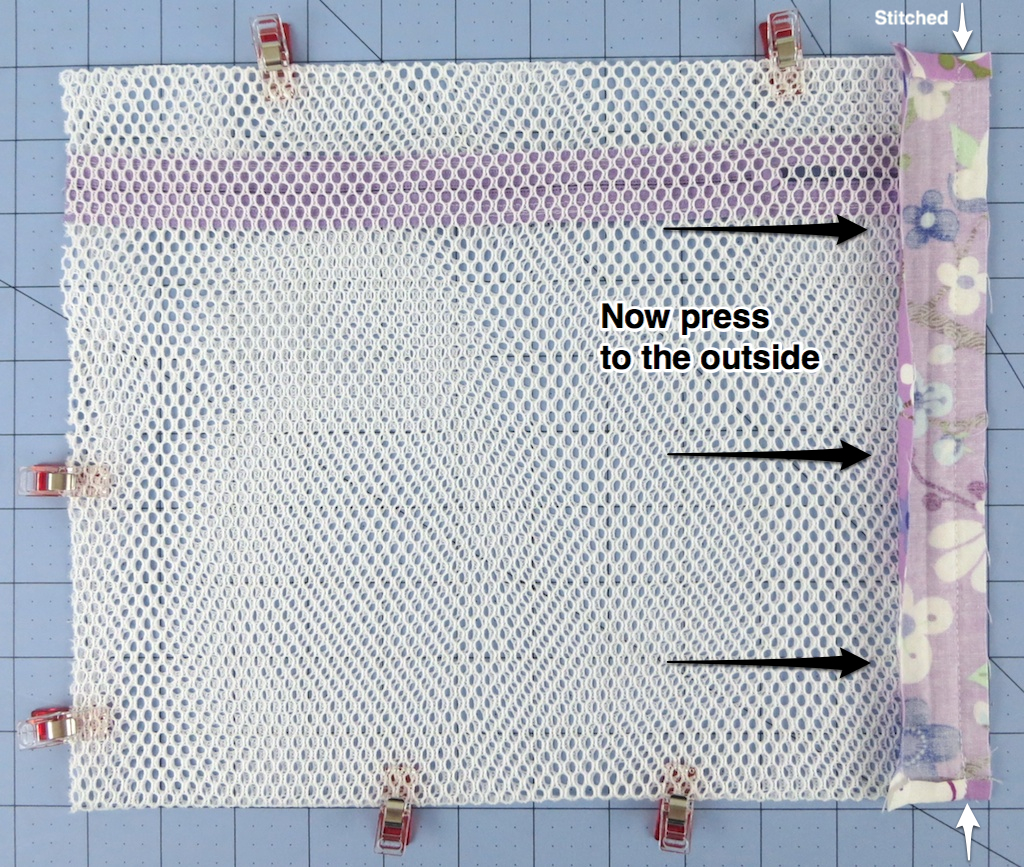
 Fold the fabric strip towards the outside of the bag and press lightly and carefully so that you don’t press out the creases.
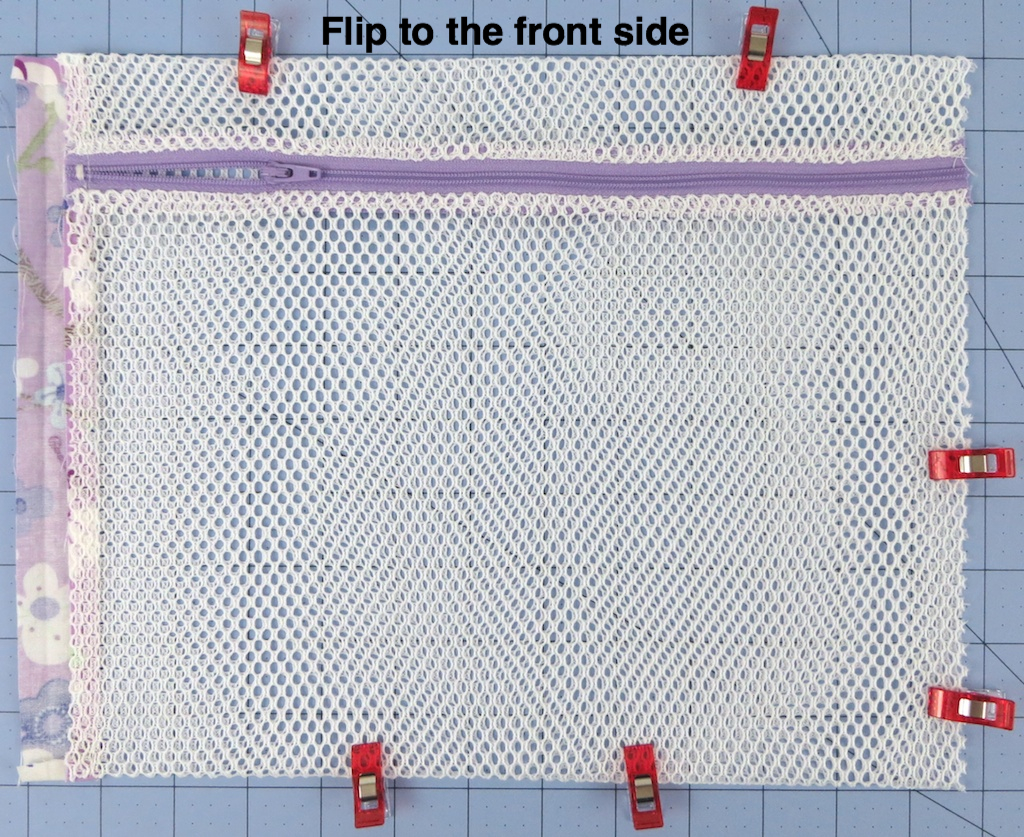
 Flip over so the front of the bag is face up.
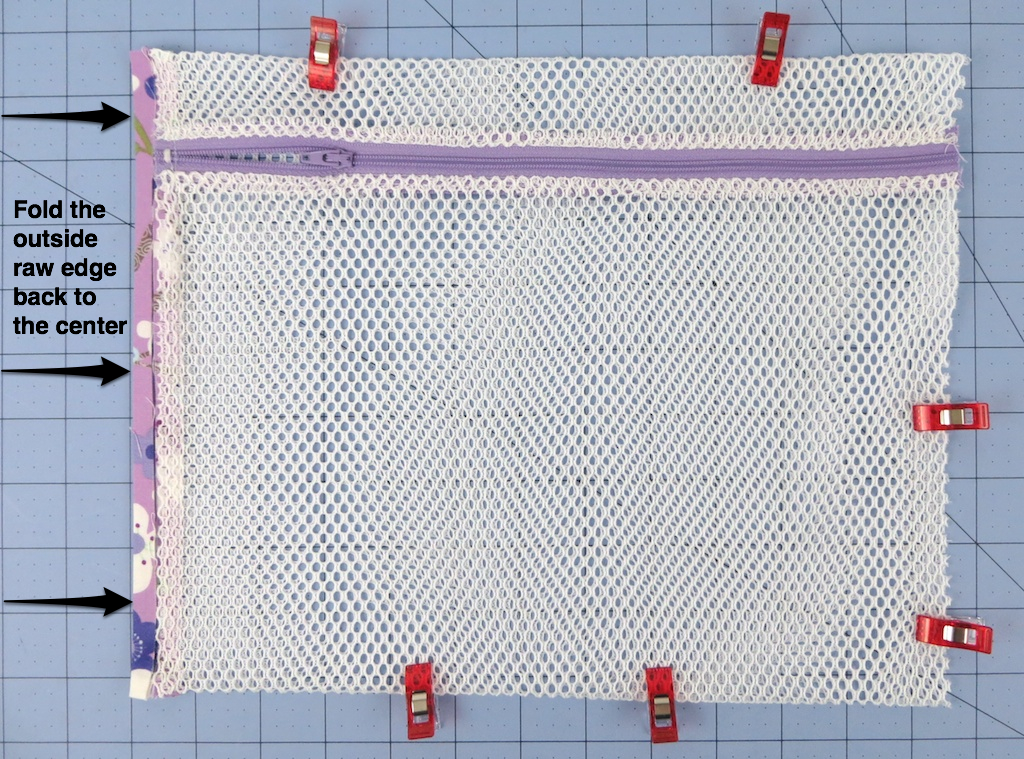
 Now fold the outside raw edge back to the center and press.
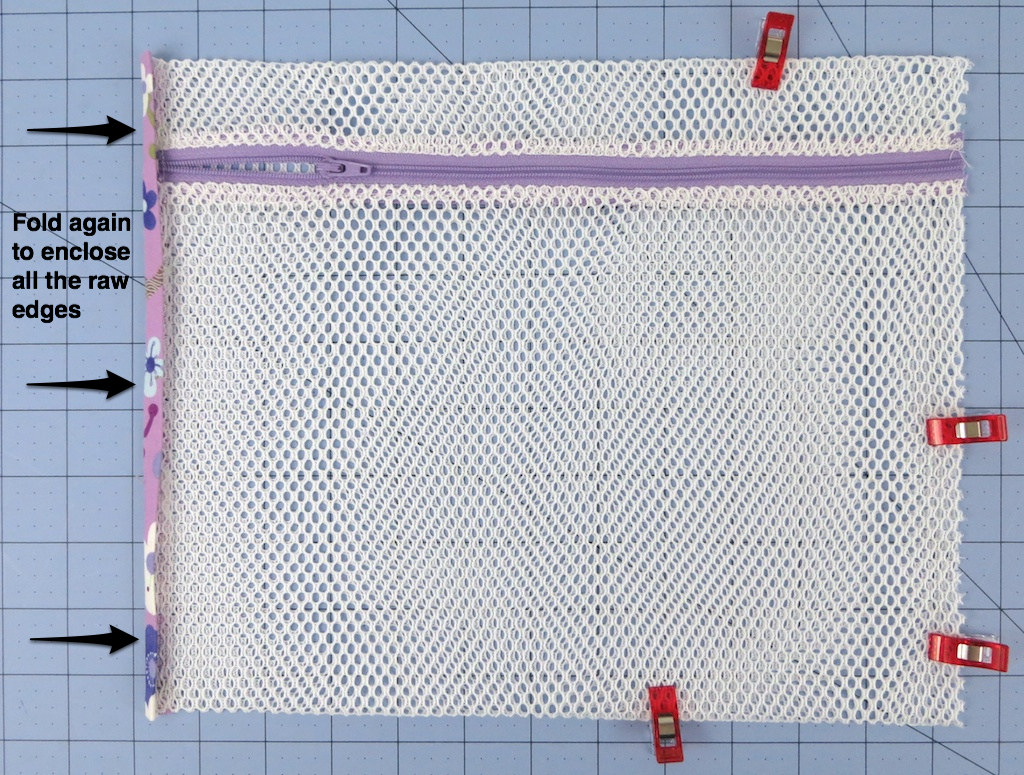
 Fold again so all the raw edges are tucked into the center and enclosed. Press.
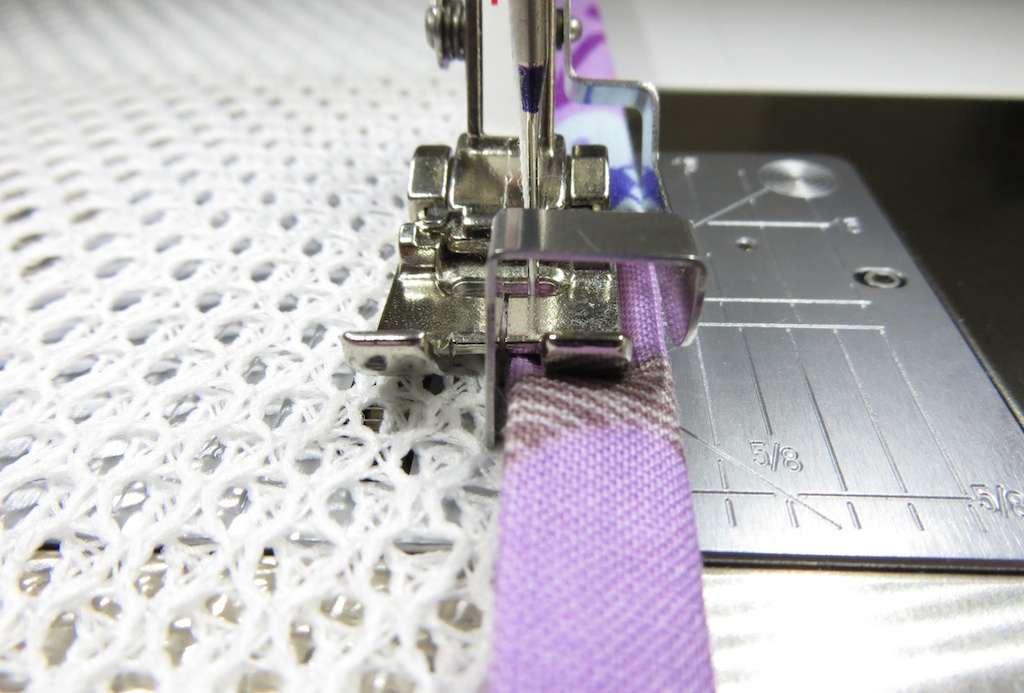
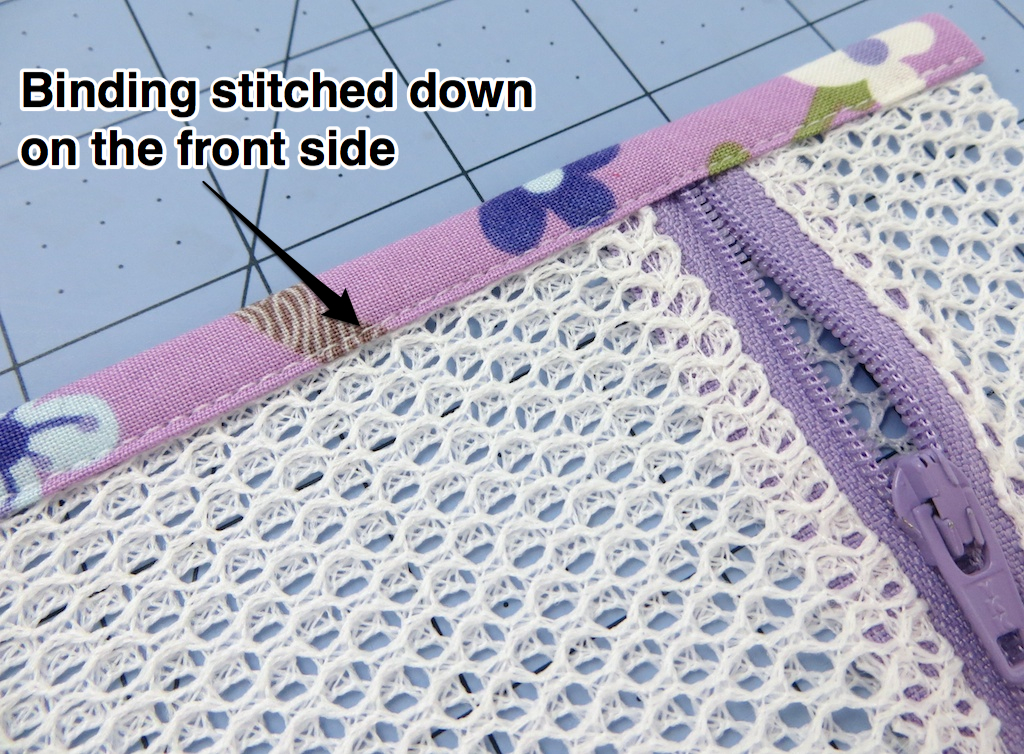
 Edgestitch on the front side of the bag.
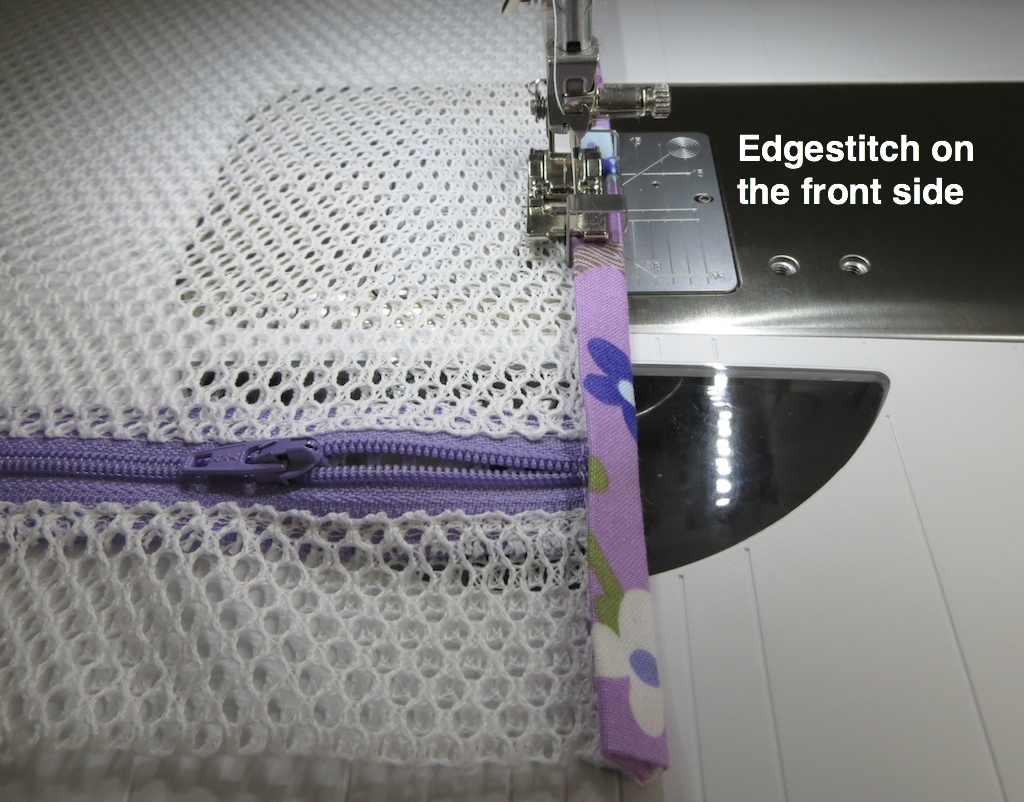 An edgestitch foot helps! Try to catch the fabric on the underside to reinforce the stitch through the mesh.
 Doesn’t that look nice?
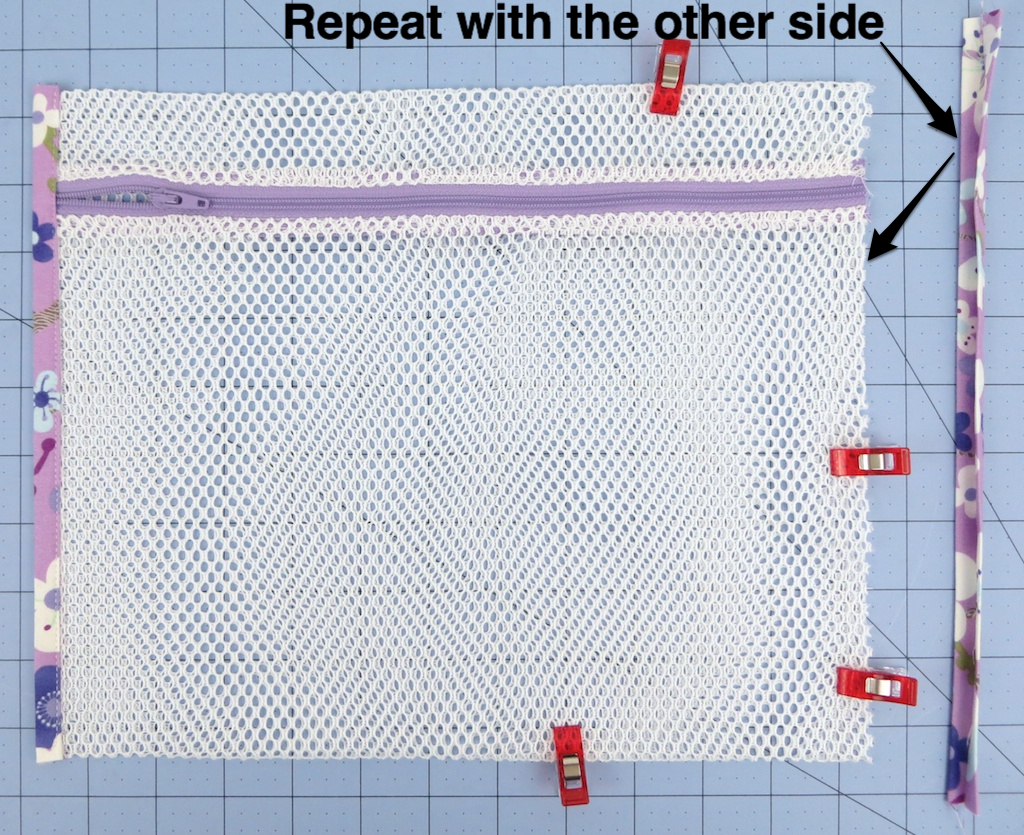
 Now repeat with the fabric strip on the other side!
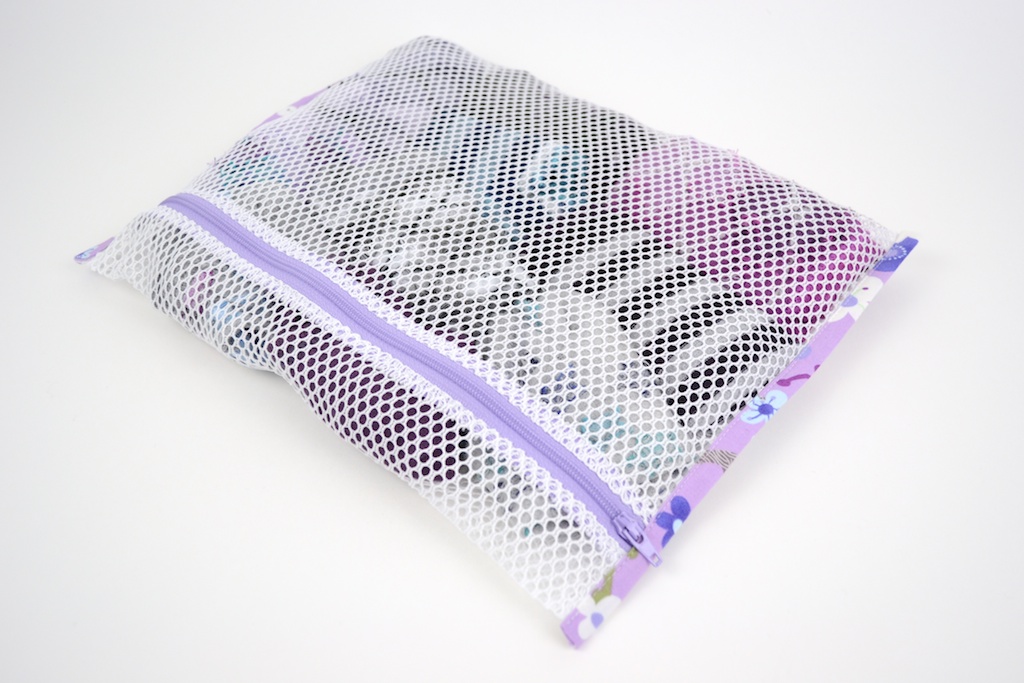
 I filled mine with $1 Target fun socks! :D I LOVE using these in my suitcase to stay organized. One for socks, one for underwear, one for bras. I like how the fabric strips help keep them relatively flat.
When you aren’t travelling, use them for tights that you don’t want to get snagged in your dresser or maybe WIP’s you want to keep together, instead of using ziplocks.
Finished size is about 10″ x 12″. Make them as big or small as you’d like!

This is a wonderful idea! I can see using it for the kids to take their gym clothes to and from school too. Thanks.
And not get too stinky from a plastic bag, yes!
Love these! I was just thinking a trip to Joann was needed. I’ll look for that mesh. Don’t have time this week to make the Daytripper but I may have time for these. Gotta love that #10 foot.
I love that foot. :)
These are great! If I hadn’t just dropped my machine off to be given the once over, I would quick make a few before I go out of town next week!
Did you get to try them? :)
You make wonderful, easy to follow tutorials. The best I have ever seen.Thanks
Thank you so much, Carol! :)
Oooooo! I am headed to Joann’s now! I need to make 24 goodie bags for a scrapbooking retreat and these would be cute and useful for the guests. Thanks for the idea!
This is just what I was looking for- thanks! I would also LOVE to link to your tutorial if you didn’t mind, this is fantastic!
Great tutorial! Wouldn’t these work as wash bags, to protect underwear and hosiery in the washer?
Great tutorial for a wonderful project!
Do you mind if I suggest one easy improvement? When you sew on the binding strips for the side seams, if you fold the little 3/8″ turned edge the other way, back over the top of the mesh seam allowance (just reverse the fold) at the top and the bottom, it will cover the mesh seam allowance at the ends of the side seams when the binding is turned over, and you will never have mesh sticking out of the ends of the binding.
Great bag!
Good idea!
Wouldn’t nylon netting work as well?
Probably! I used this because it’s easy to find at my craft store.
love these bags, now I can make my own! Nylon netting would not be as sturdy or durable.
Thank you for making an awesome tutorial . I like the way you did your photography, your explanations were spot on . I wish all tutorials that were posted on Pinterest were as inclusive as yours was. You gave the sewer a clear picture and directives . Thank you again for sharing . I will be following your pattern . My friends also say thank you too because they reap the benefits of what I sew.
This is just what I was looking for! I saw a set of mesh bags being marketed as diaper bag organizers but didnt like the price but thanks to your wonderful tutorial I can make my own AND color code them for each kid!
This would make a wonderful bag for shell hunting at the beach! I’m going to try attaching a long strap!
love your simple-clear directions!!! very nice ;) making a few for gifts!
This is very well written & explaining . I have heavy-duty sewing vinal on hand instead of the mesh .I’m going to try using it .I also have an up and coming trip to use these for . Thanks Nancy
Erin, Browsing today for mesh fabric and saw your lingerie bag tutorial stating you found it at JoAnn Fabrics. I’d already searched there and elsewhere to no avail but I won’t give up. I often give away rarely/never used possessions just to find that later I have a need for that very thing, which is why I am planning to make a mesh bag for my now ever-present (individual size) water bottle. FYI: my (retail purchased) original (for large bottle) cylindrical bag was very nicely made of black mesh with black cording threaded through a created channel on the top edge, a black cord stop, and a black nylon webbing shoulder strap. Good idea to add to your line of bags don’t you think! btw: Even though I’m well-stocked with lingerie laundry bags and won’t be making them, I find your lingerie bag tutorial as presented flawless.
Have you tried tossing these in the washing machine?? Wondering how well they would hold up in a machine… Want to make some for my boxing wraps so I can toss from my bag to the washer…
Hi Mary! Yes, I have. I don’t use them as wash bags so they only get washed before and after a trip but they wash up fine. I would definitely make sure that your fabrics are all pre-washed to prevent shrinkage.
Erin, I really enjoy making your bags. Your instructions and photos are so clear and easy to understand. My husband is a runner and his socks are expensive. I am going to make this bag and use it to put his running socks in so we don’t lose one in the dryer. It should be fine in the washer and dryer. I inherited my grandmother’s Featherweight along with multiple wonderful feet so I am looking forward to finally trying the binding foot out. Thank you for all you do!