

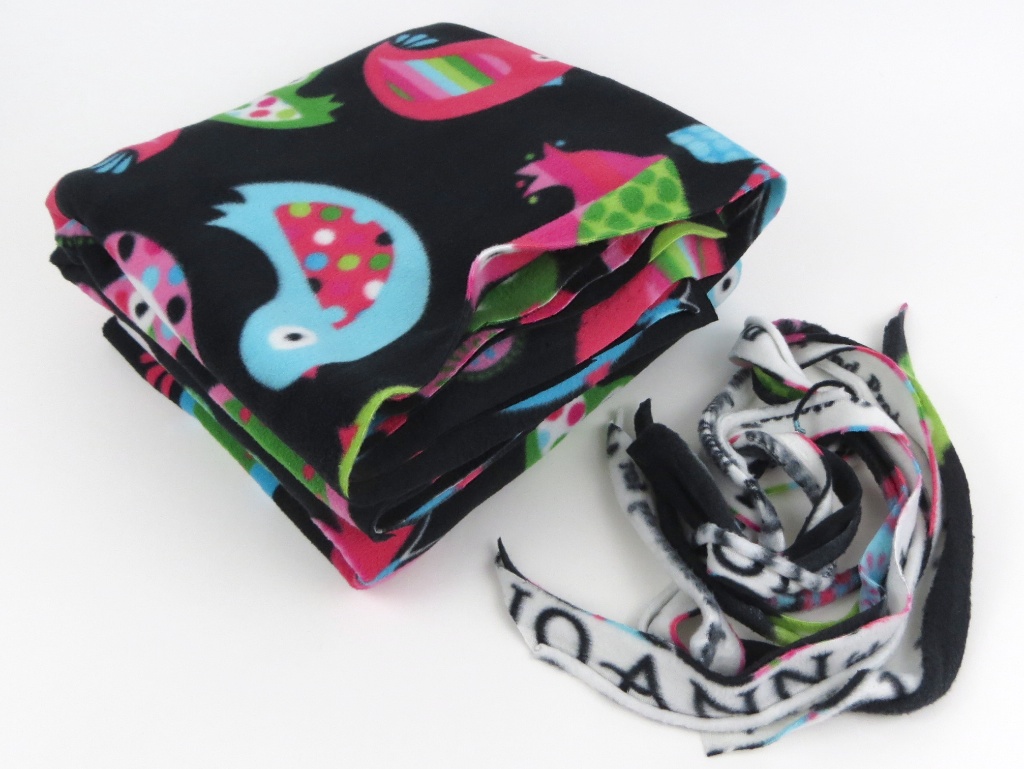
This is so easy, but the travel blankets out there are expensive and I’ve mostly seen poor materials (one of them felt like a microfiber cleaning cloth?) and boring colors. So, I made my own. :) I’ll probably use this more in the car than on the plane, but it rolls up really small so it would work in any situation!
I started with a yard and a half of “micro-fleece”. This stuff is kind of half way between polar fleece and minky softness-wise, and it’s super thin which is what I was going for. And 1.5 yards at 50% off was only $10.50, so about the same price as the cheapest travel blankets that I found and way cuter and softer!

Sweatshirt fleece would work too or any other fleecy fabric or even a thicker knit fabric. Keep in mind we’ll be hemming this so that it remains a single layer, so just make sure it’s nice on both sides.
1.5 yards of 60″ wide fabric is approximately 54″ x 60″ so it will end up about 52″ x 58″ finished. Perfect for travel size! Try to square up (not easy with fleece, and it doesn’t need to be perfect) and trim off the selvedges.
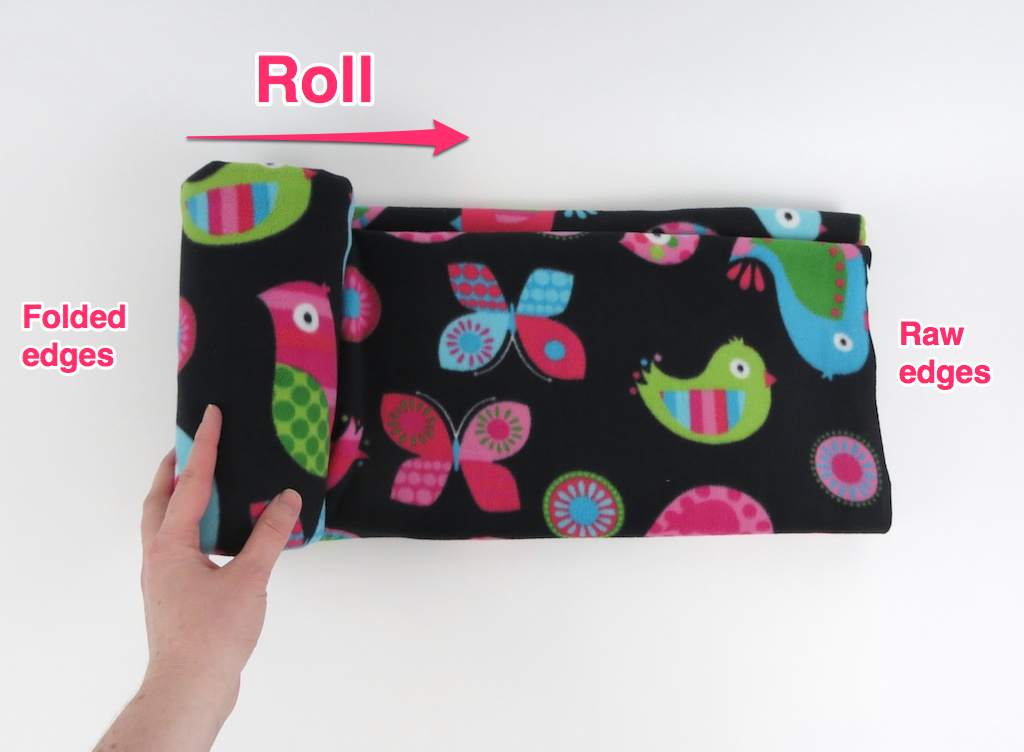
Once you’ve got it trimmed, fold it in half and half again, so it’s a big 30″ x 27″ rectangle (sorry this is too big to show). Then fold it in thirds towards the middle. (Or fold it however you’d like, but you’ll need to fold it that way each time!)

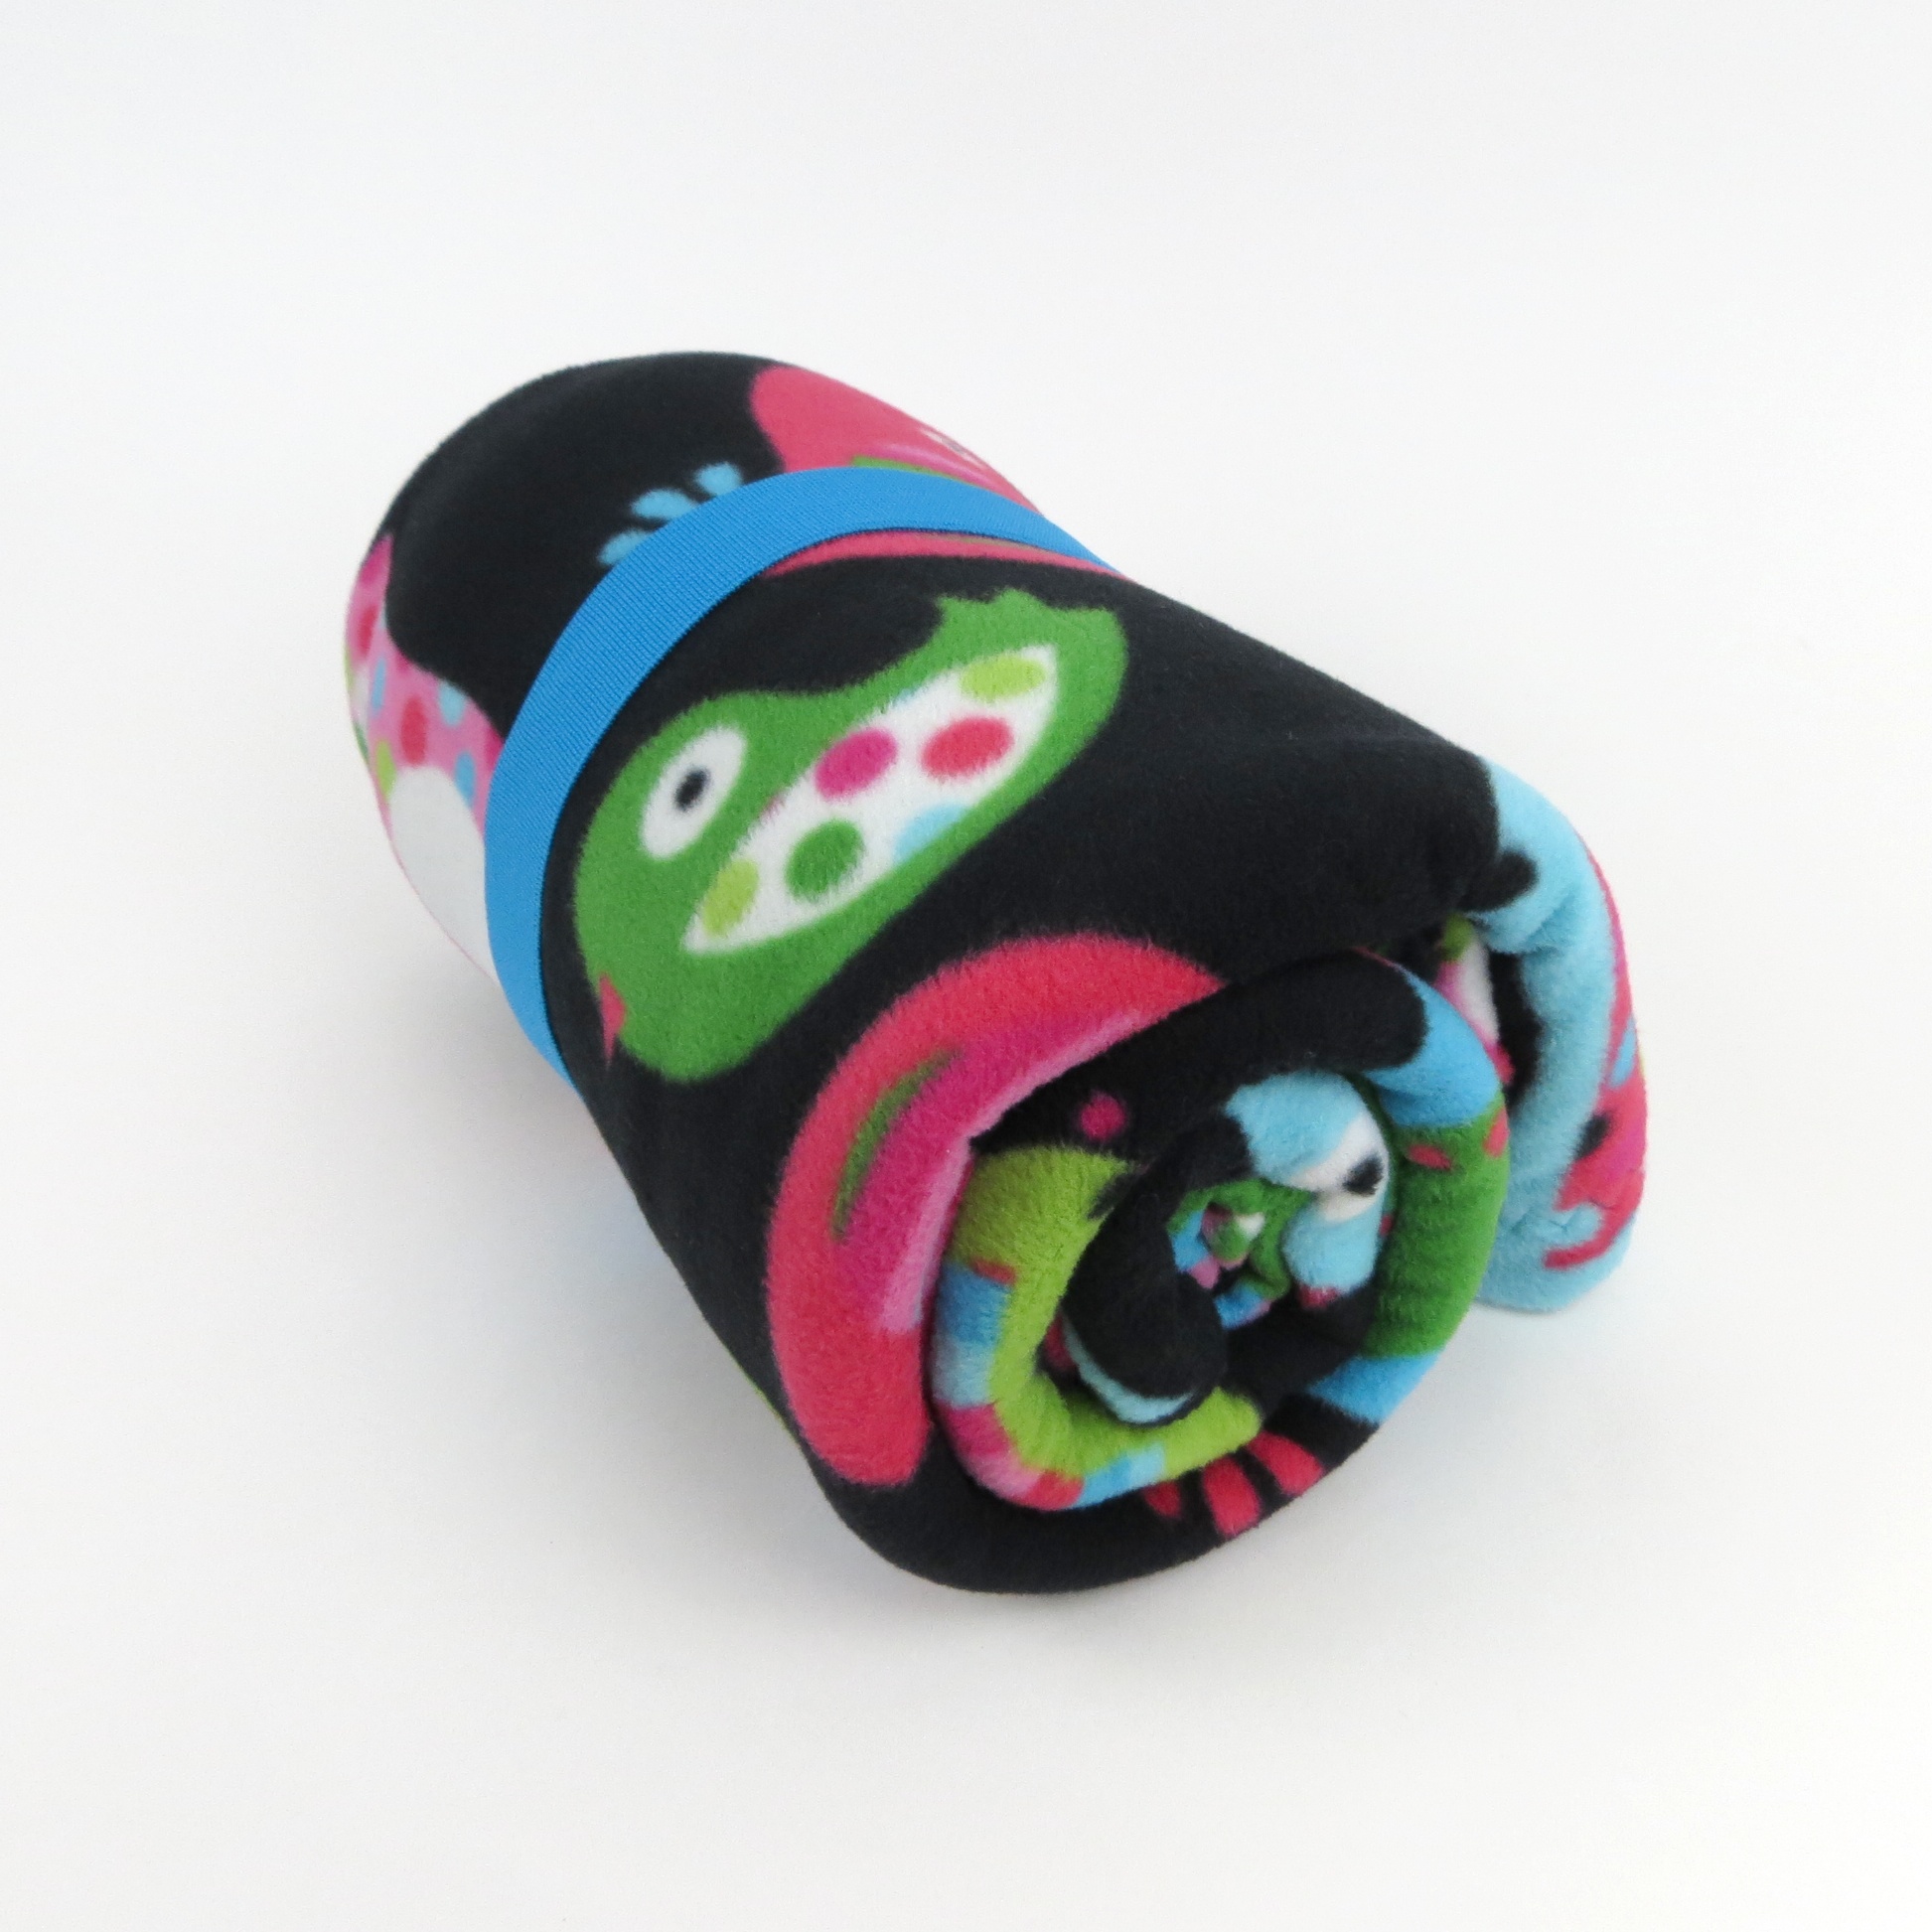
Roll the blanket up starting with the end with all folded edges.
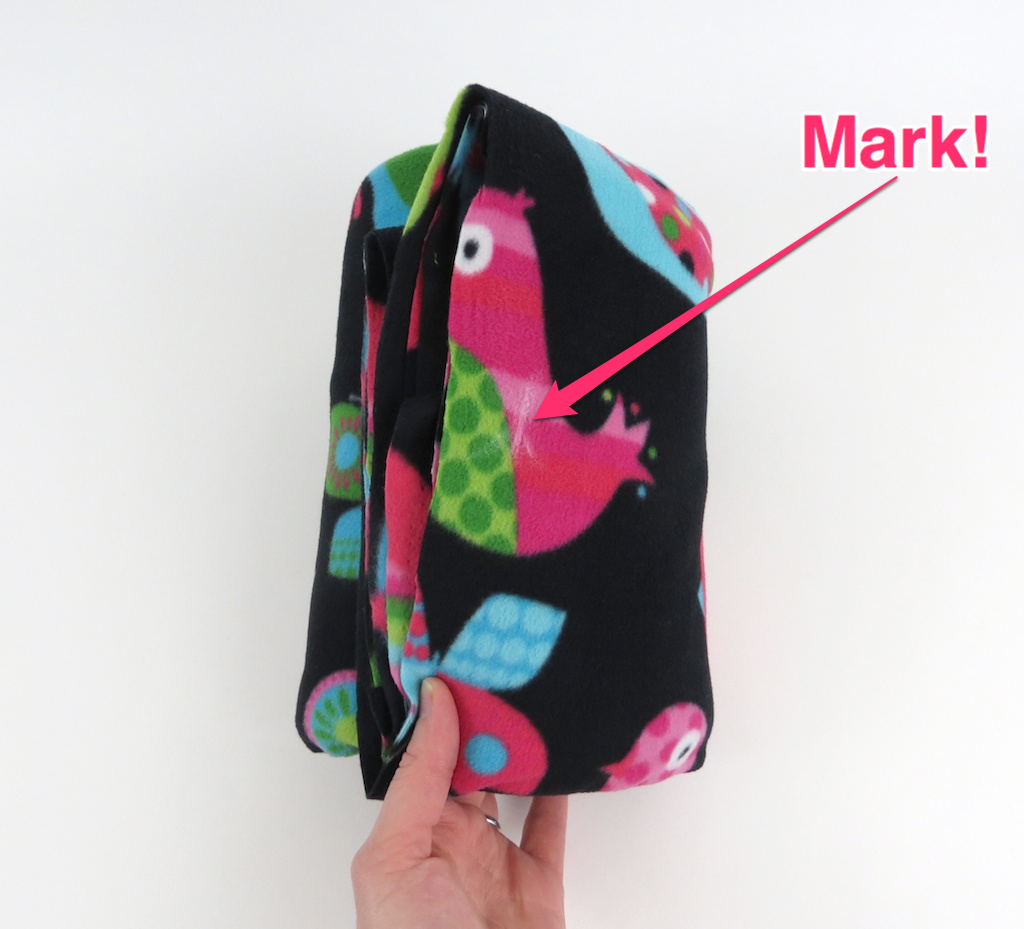
Take your elastic and measure around the rolled up blanket, then mark the middle of the outside layer with a pin or chalk. This is where you’ll attach the elastic later.
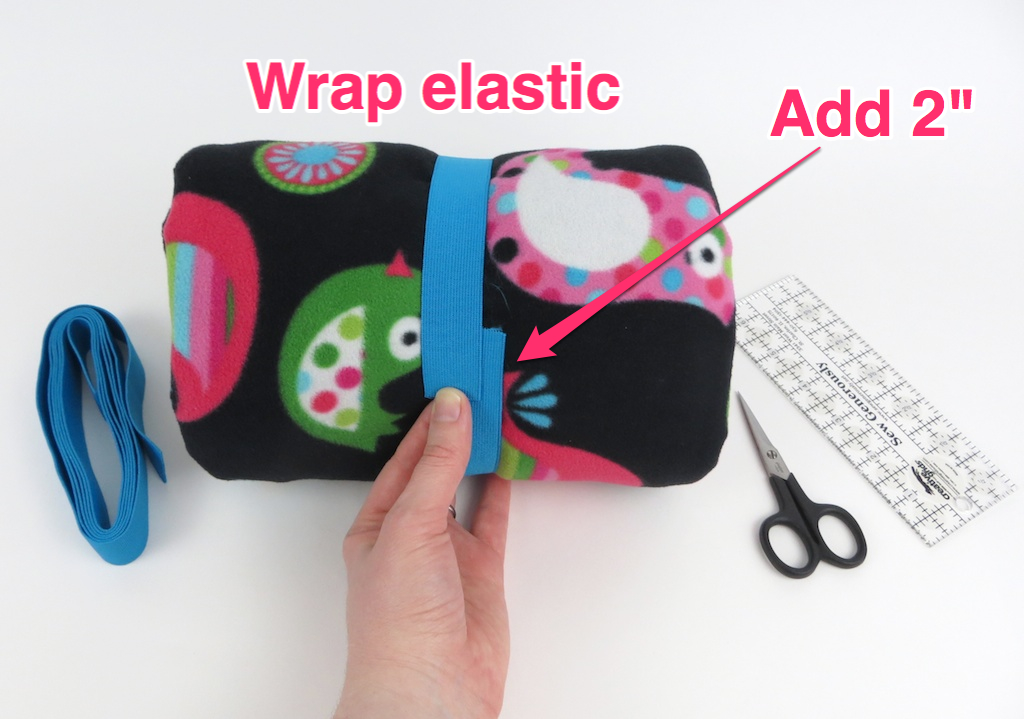
Wrap the elastic around as tight as you want it to be when you’re all done. Add 2″ for seam allowance.
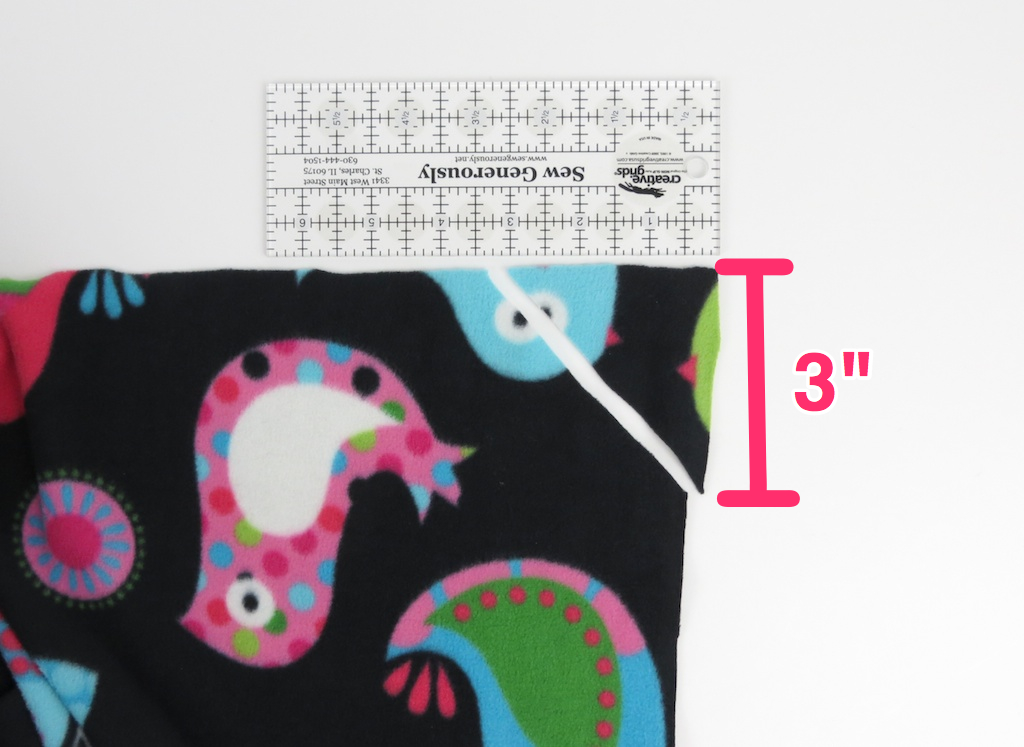
Trim a 3″ triangle off the corners off the corners to make it easier to fold without so much bulk.
Fold all the edges 1″ to the wrong side, then fold 1″ again to enclose the raw edge. Pin or clip this in place.

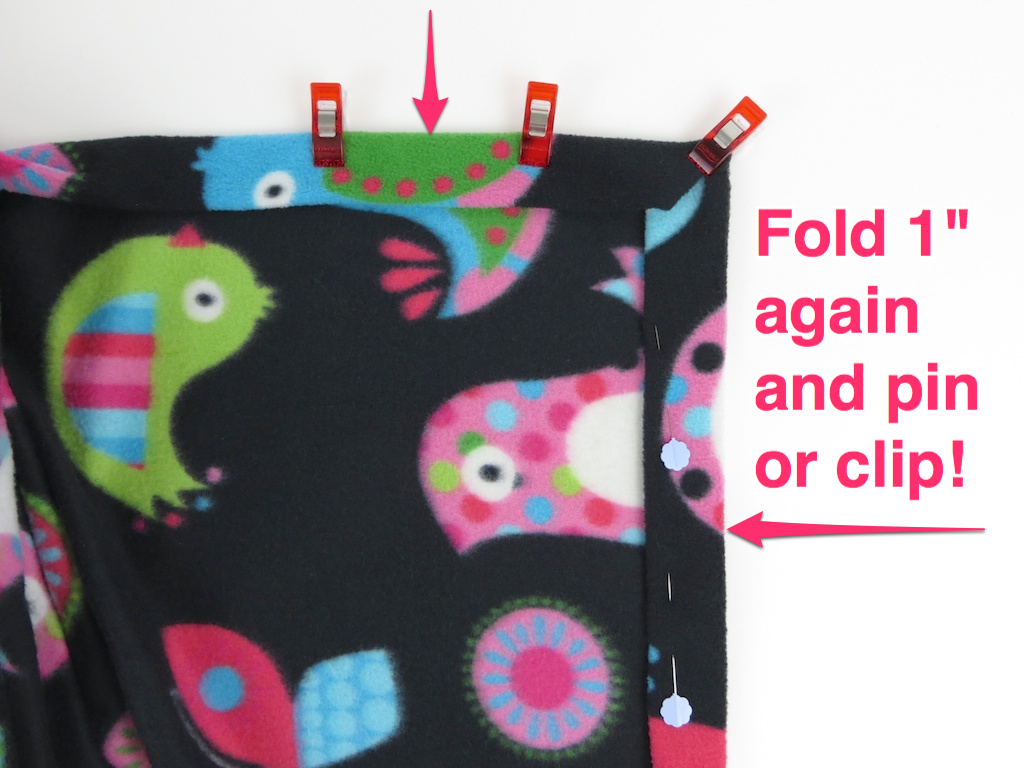
(I don’t actually fold the whole thing at once, I fold a section at a time right before it goes through the machine. Otherwise I get stuck by pins!)
Sew all the way around with a decorative stitch, wide zig zag or long straight stitch. I sew this with the folded side up. (A walking foot helps but you can manage without it, just go slowly.) Start with the mark for the elastic, looping it and sliding both raw edges under the hem.
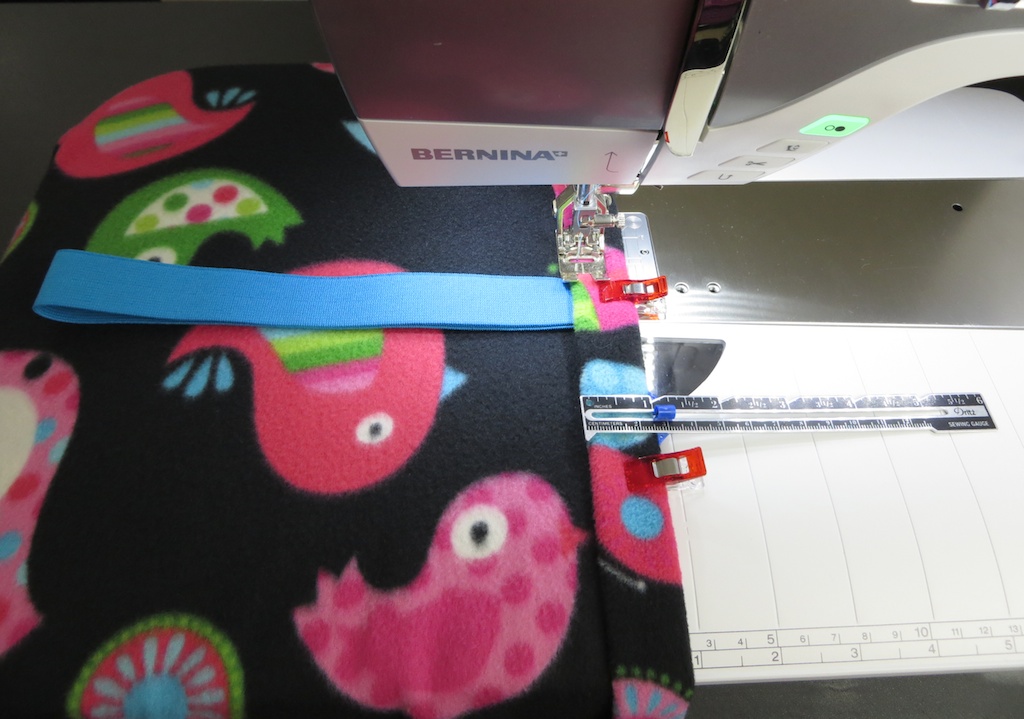
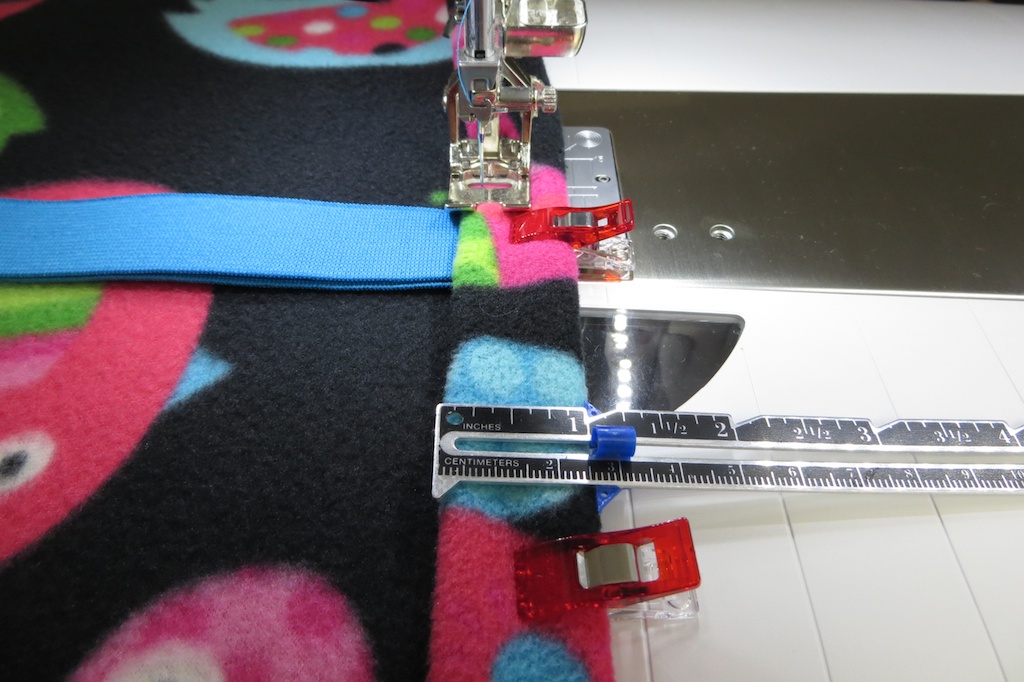 I used a wide, long triple zig zag stitch.
 Now try to remember how you rolled it up the first time! :)
Looks good!! I love it and going to add one to my collection!! Love your tutorials!!
This looks like a great travel blanket!
I am so happy you said that it is difficult to square up fleece, LOL, I have the worst time squaring it up and I thought it was something I was doing wrong! :) Glad to know it’s the nature of the beast!
I like your hemmed edges too.
Great tutorial, thank you!